Today I’ll show you how to draw the “I Love You” hand that is used for sign language. We will guide you through the process of drawing love hands with simple to follow, step by step instructions that even older kids would be able to follow along with. Happy Drawing!
You Might Like Our Other Hand Tutorials
Learn How to Draw Love Hands – Sign Language for Love – Simple Steps Drawing Lesson for Beginners
[ad#draw]
Written-Out Step by Step Drawing Instructions
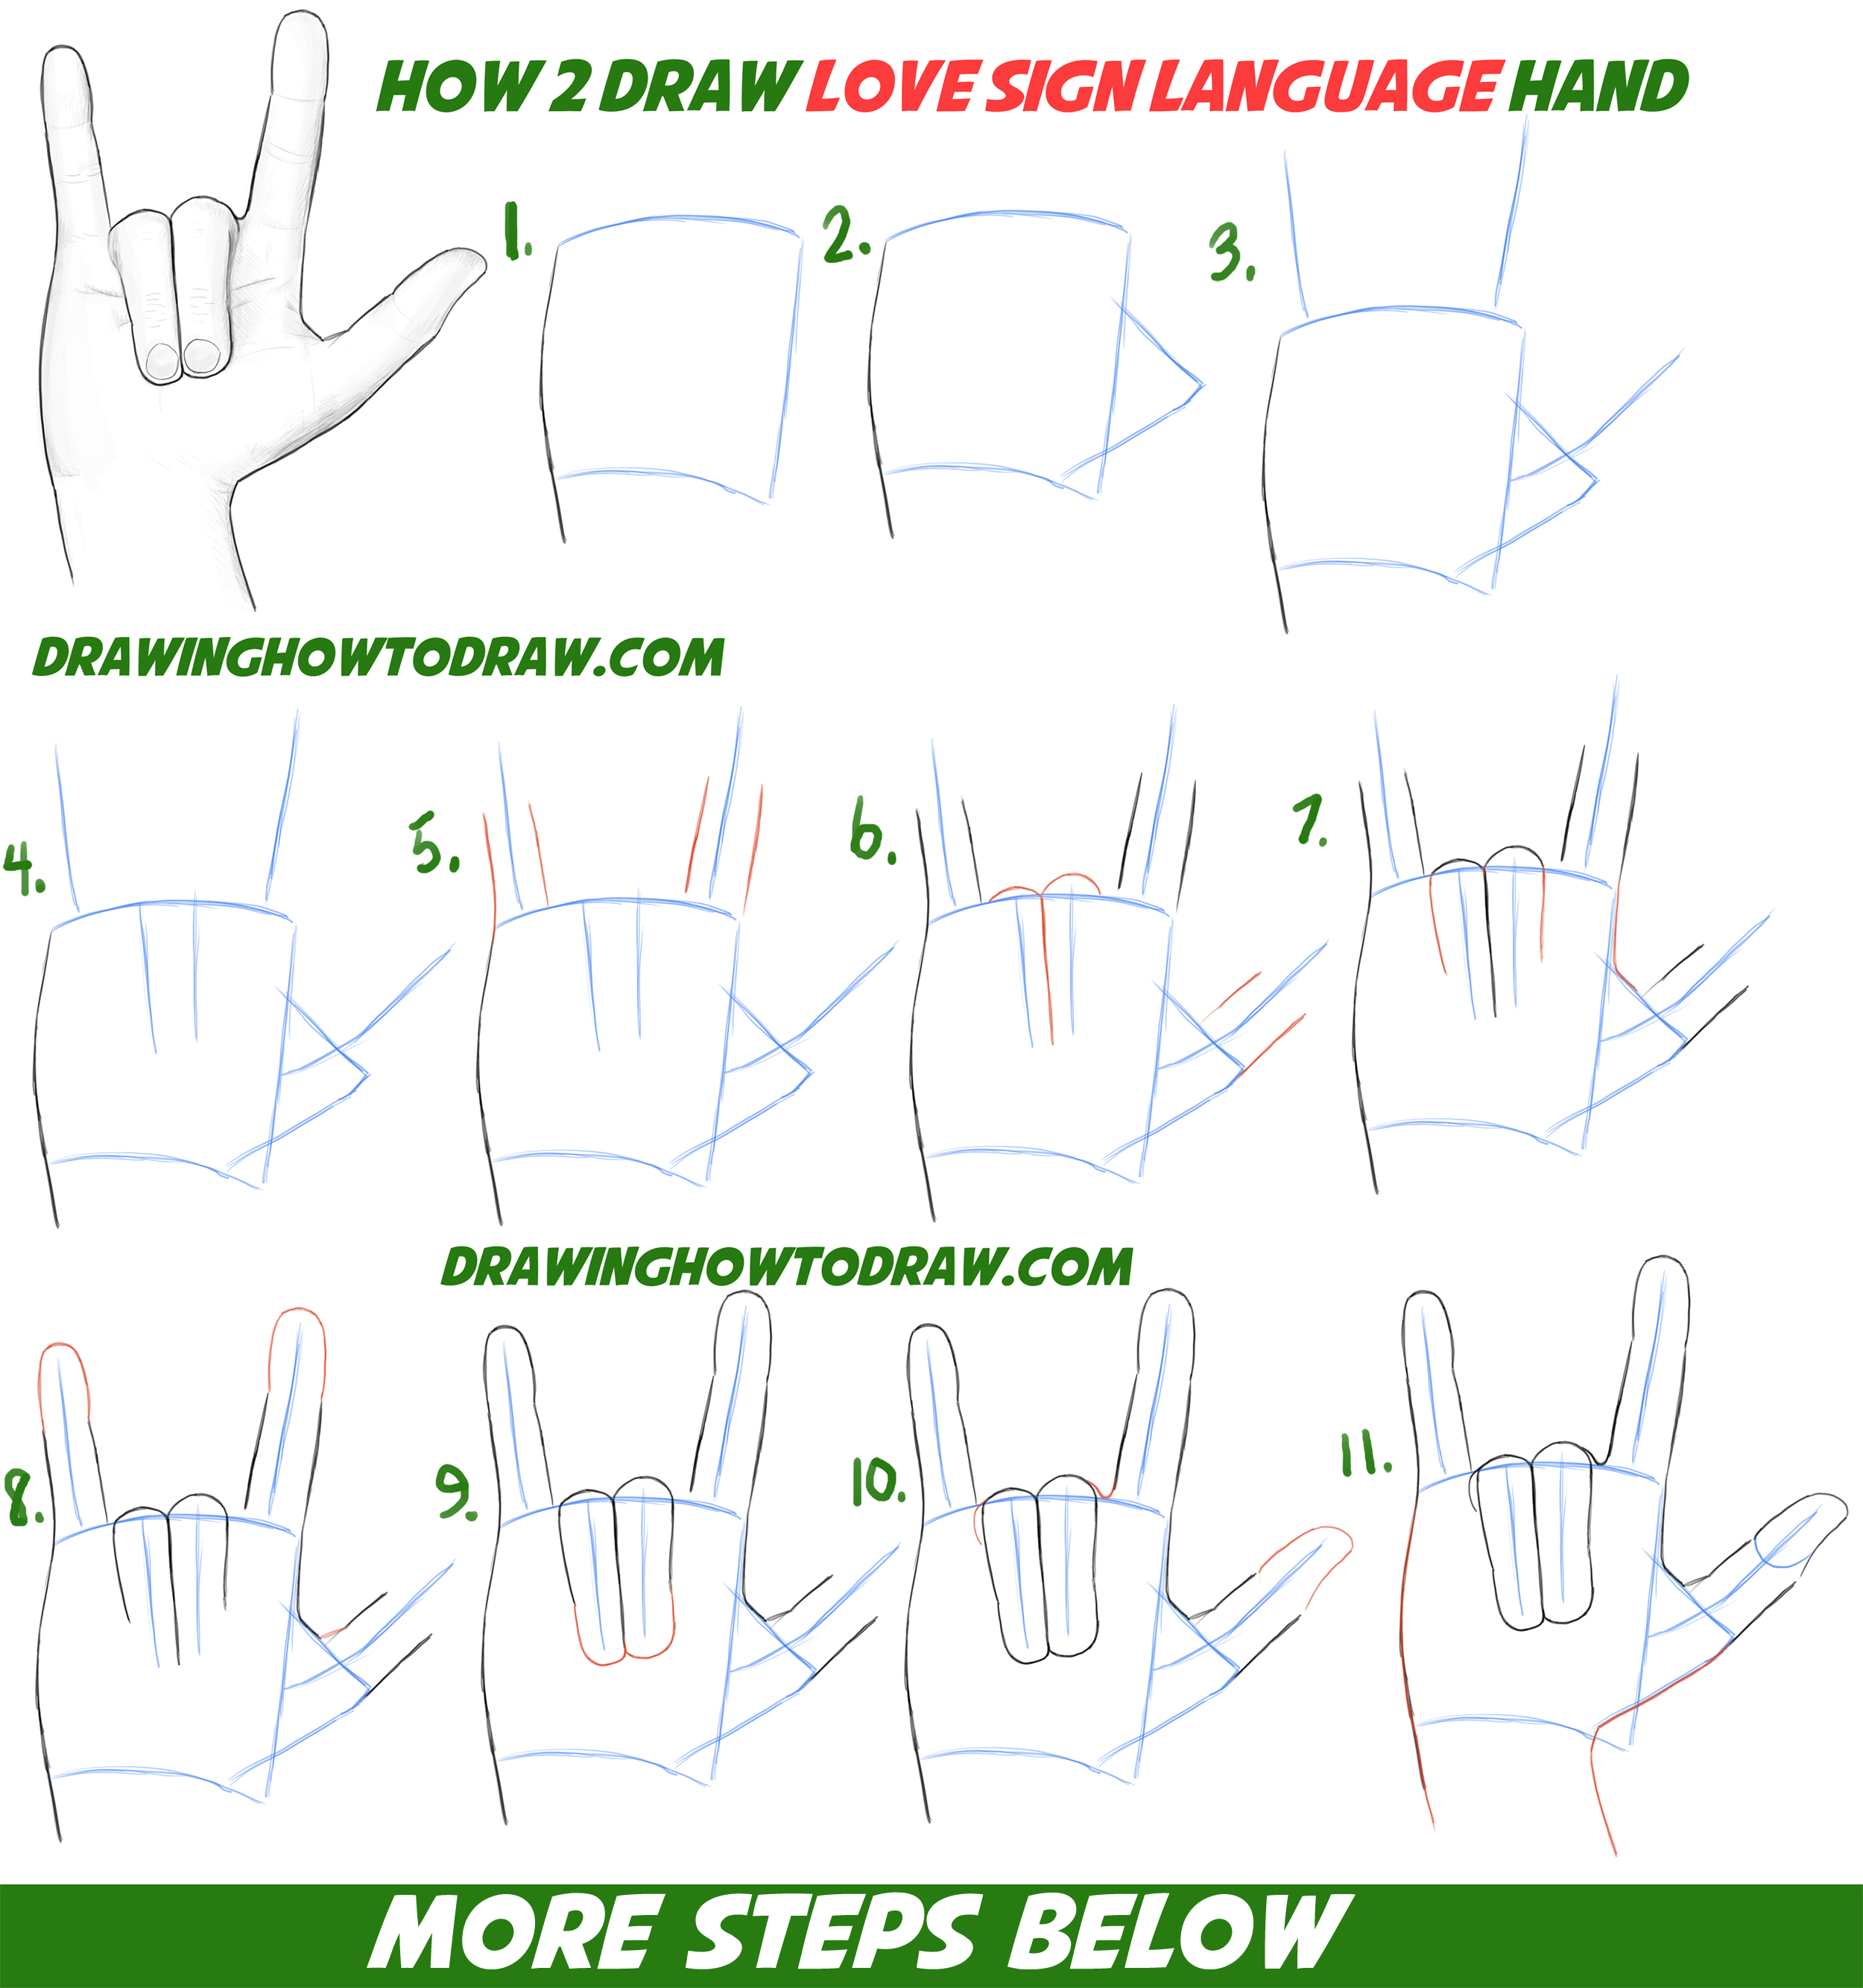
All guide lines in this tutorial are blue. This means that they will be erased later, after they help you.
(Step 1) Draw a square-ish letter ‘P’ shape. The blue lines are guides.
(Step 2) Draw a sideways letter ‘V’ shape.
(Steps 3 + 4) Draw more guide lines.
(Step 5) Draw lines around 2 of the fingers.
(Step 6) Draw a line between the center fingers. Draw a sideways ‘3’ shape for the knuckles of those 2 fingers. Draw lines around the thumb guide line.
(Step 7) Draw Draw 2 lines on the center fingers to form a letter ‘m’ shape. Draw a letter ‘L’ between the thumb and finger on the right side.
(Step 8) Draw upside down letter ‘U’ shape on top of 2 of the fingers. Draw a line in between the thumb and 1st finger.
(Step 9) Draw a sideways #3 shape on the bottom of the center fingers.
(Step 10) Draw a curved line and a sideways #2 around the center fingers. Draw a curved line on thumb. Notice on step #11…that we show you that it is the shape of a letter ‘a’ shape.
(Step 11) Outline the guides on the outer hand. Draw curved lines for nails.
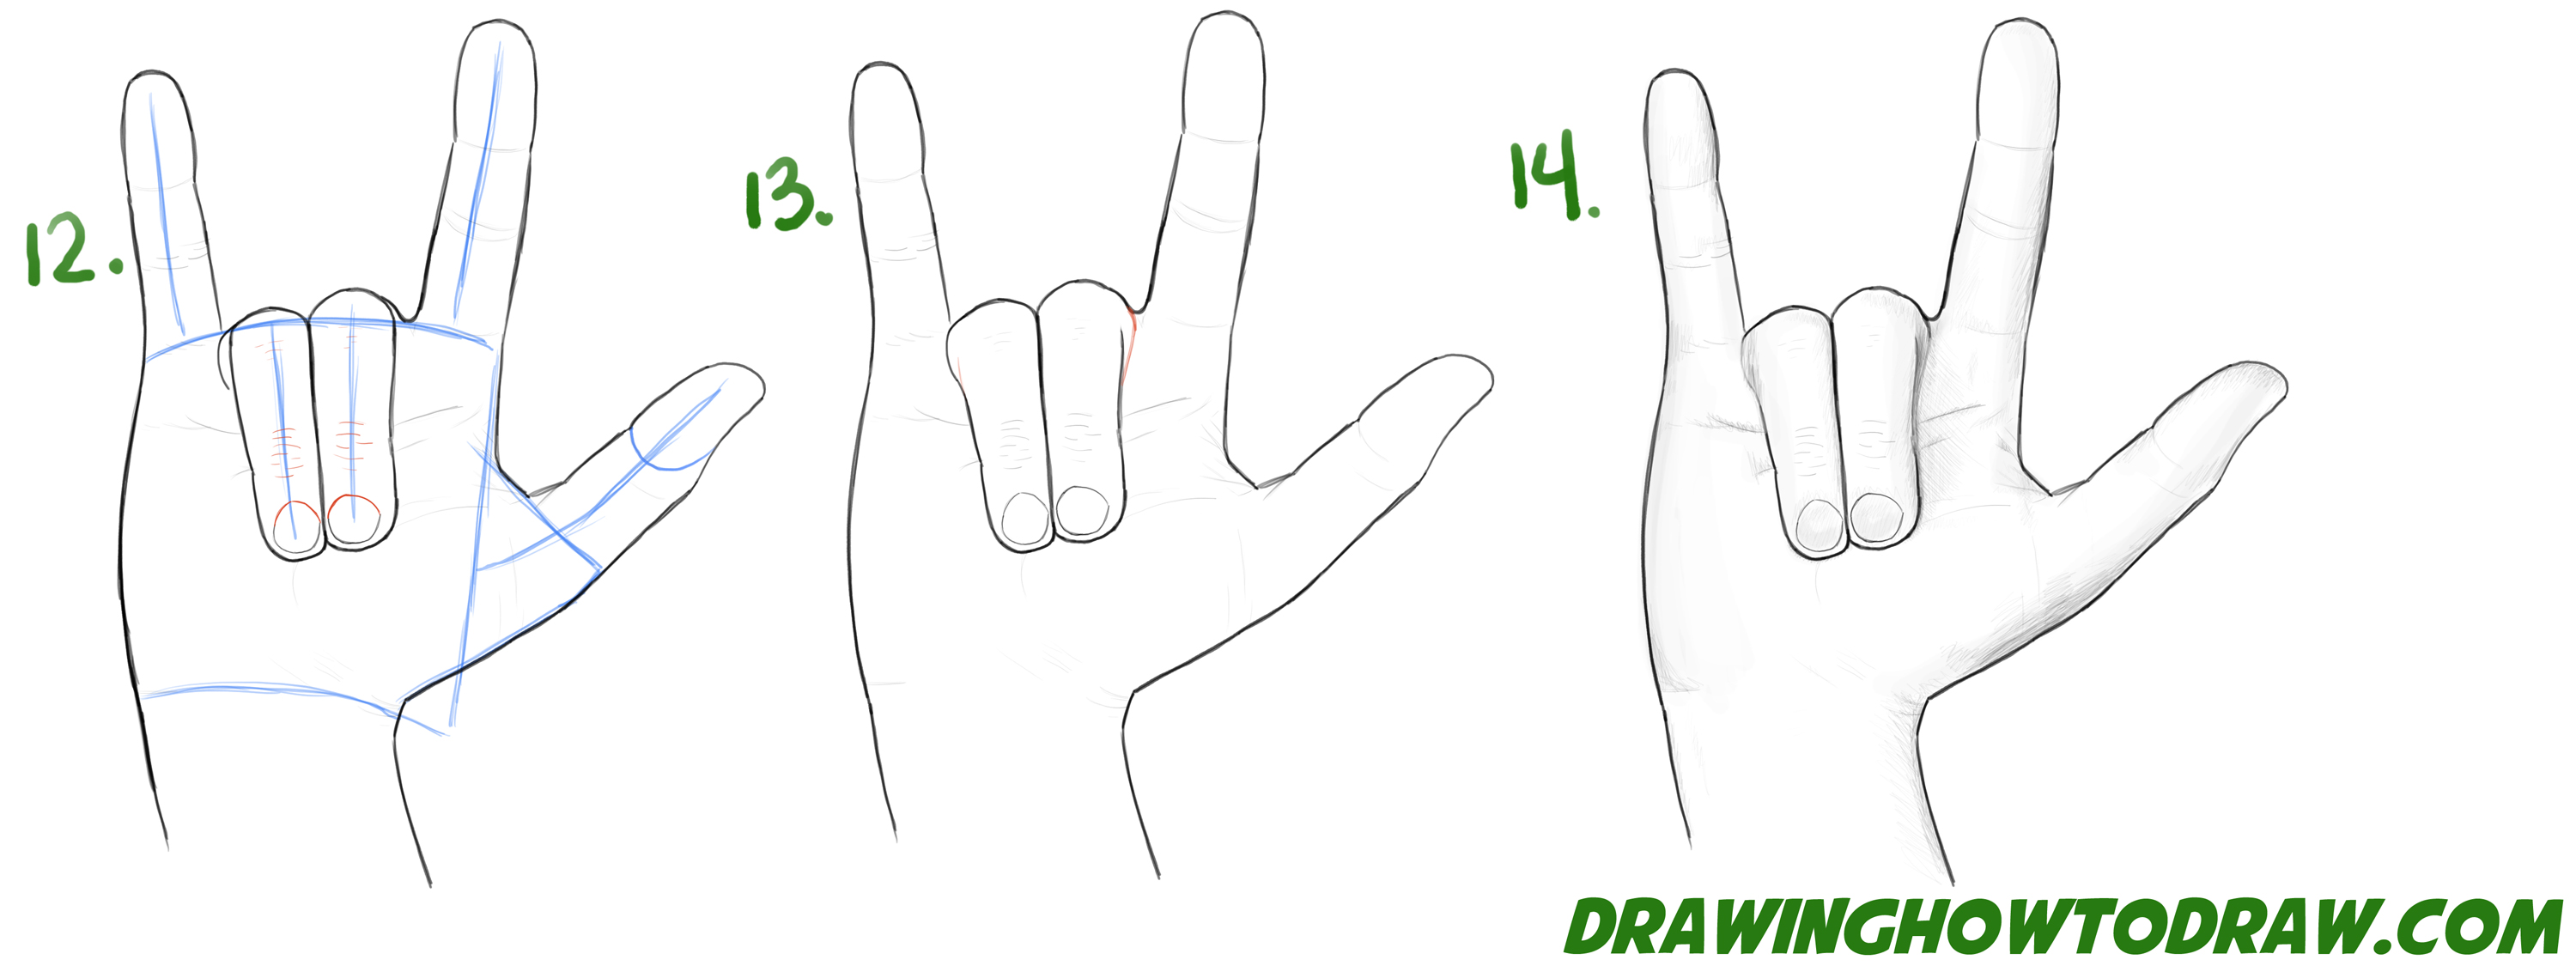
(Step 12) Draw some curved lines.
(Step 13) Fix up the center 2 fingers.
(Step 14) Add some shading.
You Might Like Our Other Hand Tutorials
Technorati Tags: love, hands, love hands, sign language, sign language hand for love, how to draw love hands, how to draw love hand


