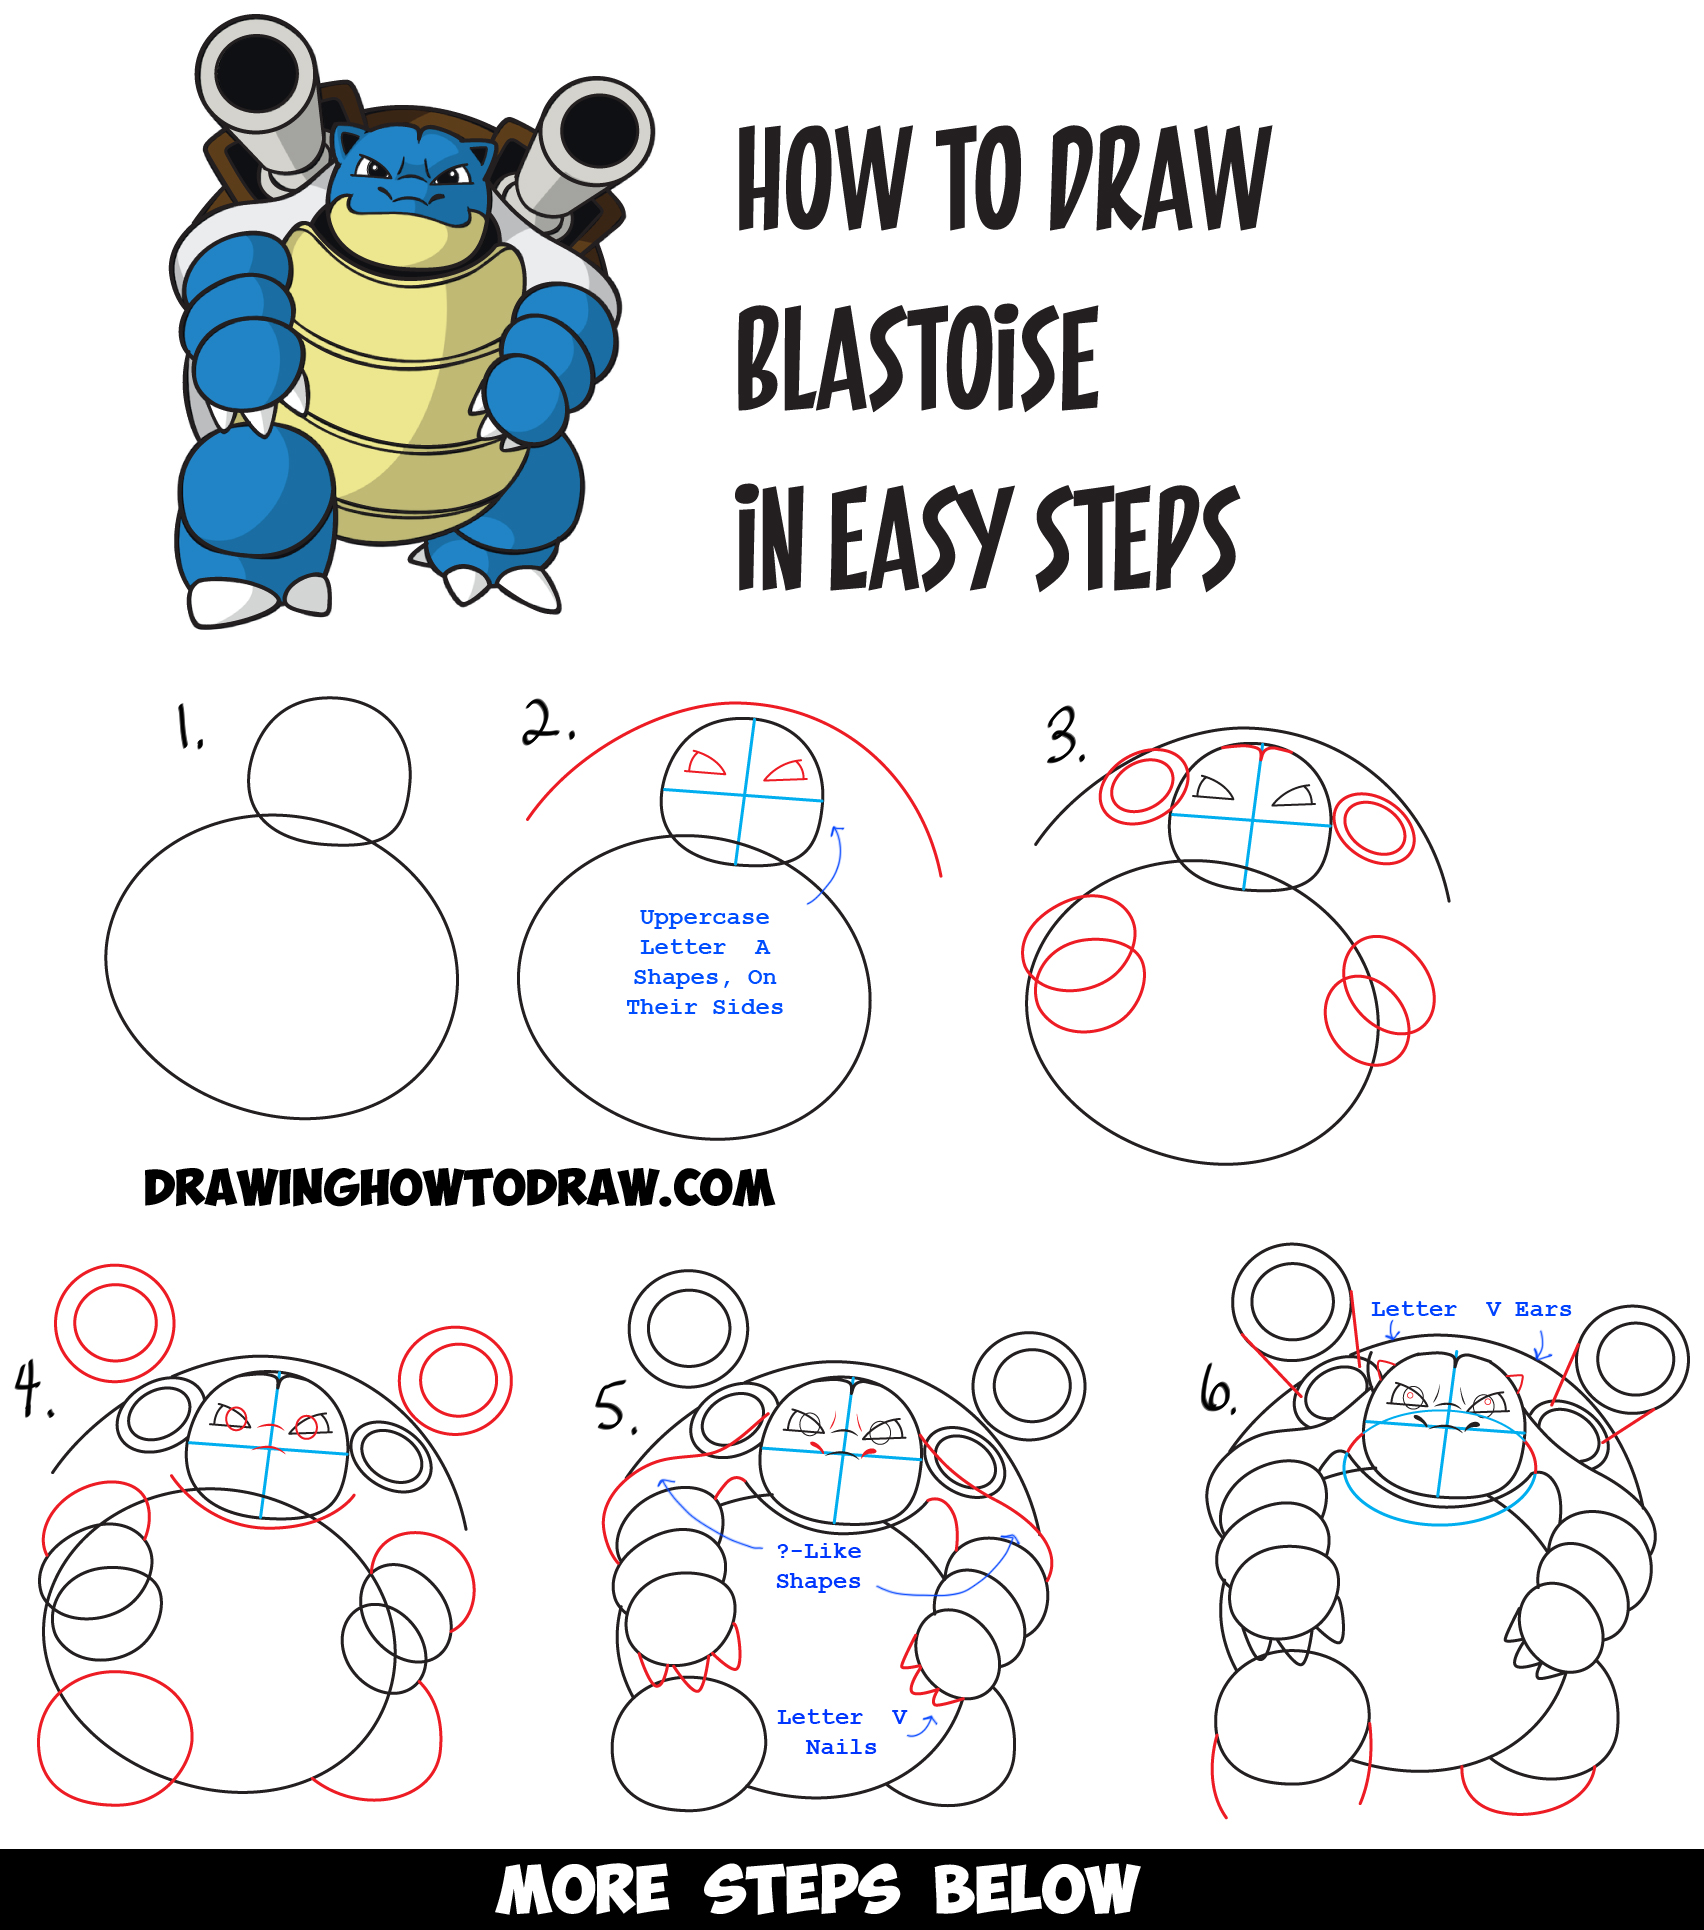
Today I will show you how to draw Blastoise from Pokemon and Pokemon Go. This is one one of the more difficult Pokemon characters to draw, but we have broken it down into easy-to-follow steps using basic geometric shapes, letters, and numbers. Happy Drawing!
Learn How to Draw Blastoise from Pokemon and Pokemon Go Simple Step by Step Drawing Lesson for Kids
Here are More Pokemon Drawing Tutorials
[ad#draw]
Written-Out Step by Step Drawing Instructions
(Step 1) Draw a #8 shape with 2 ovals.
(Step 2) Draw sideways uppercase letter ‘A’-like shapes, as I did. Lightly draw guidelines thru the face (we will erase these lines later). Draw a curved line over the head.
(Step 3) Draw a sideways #3-like shape on top of the head. Draw 2 circles on both sides of the head. Draw 2 ovals forming a #8-like shape for arms on both sides of the body.
(Step 4) Again, draw 2 circles on above the head, as we have..this time larger. Draw a sideways letter ‘c’ shape on top of the arms. Draw a curved line below the head. Draw an oval in each eye. Draw 2 curved lines in center of head. Draw an oval and a backwards letter ‘c’ shape for legs.
(Step 5) Draw a sideways ?-like shape on both sides of the head. Draw a curved line under on both sides under head. Draw tear-drop shapes for nostrils. Draw 2 lines in between eyes. Draw letter ‘v’ shapes for nails on hands.
(Step 6) Connect the circles with lines for cannons. Draw an oval, lightly, for neck…only parts of it will stay, the parts I drew in blue will be erased. Draw an oval in each eye again. Draw letter ‘v’ shaped ears. Draw 2 curved lines on left leg and a sideways letter ‘c’ shape on right leg.
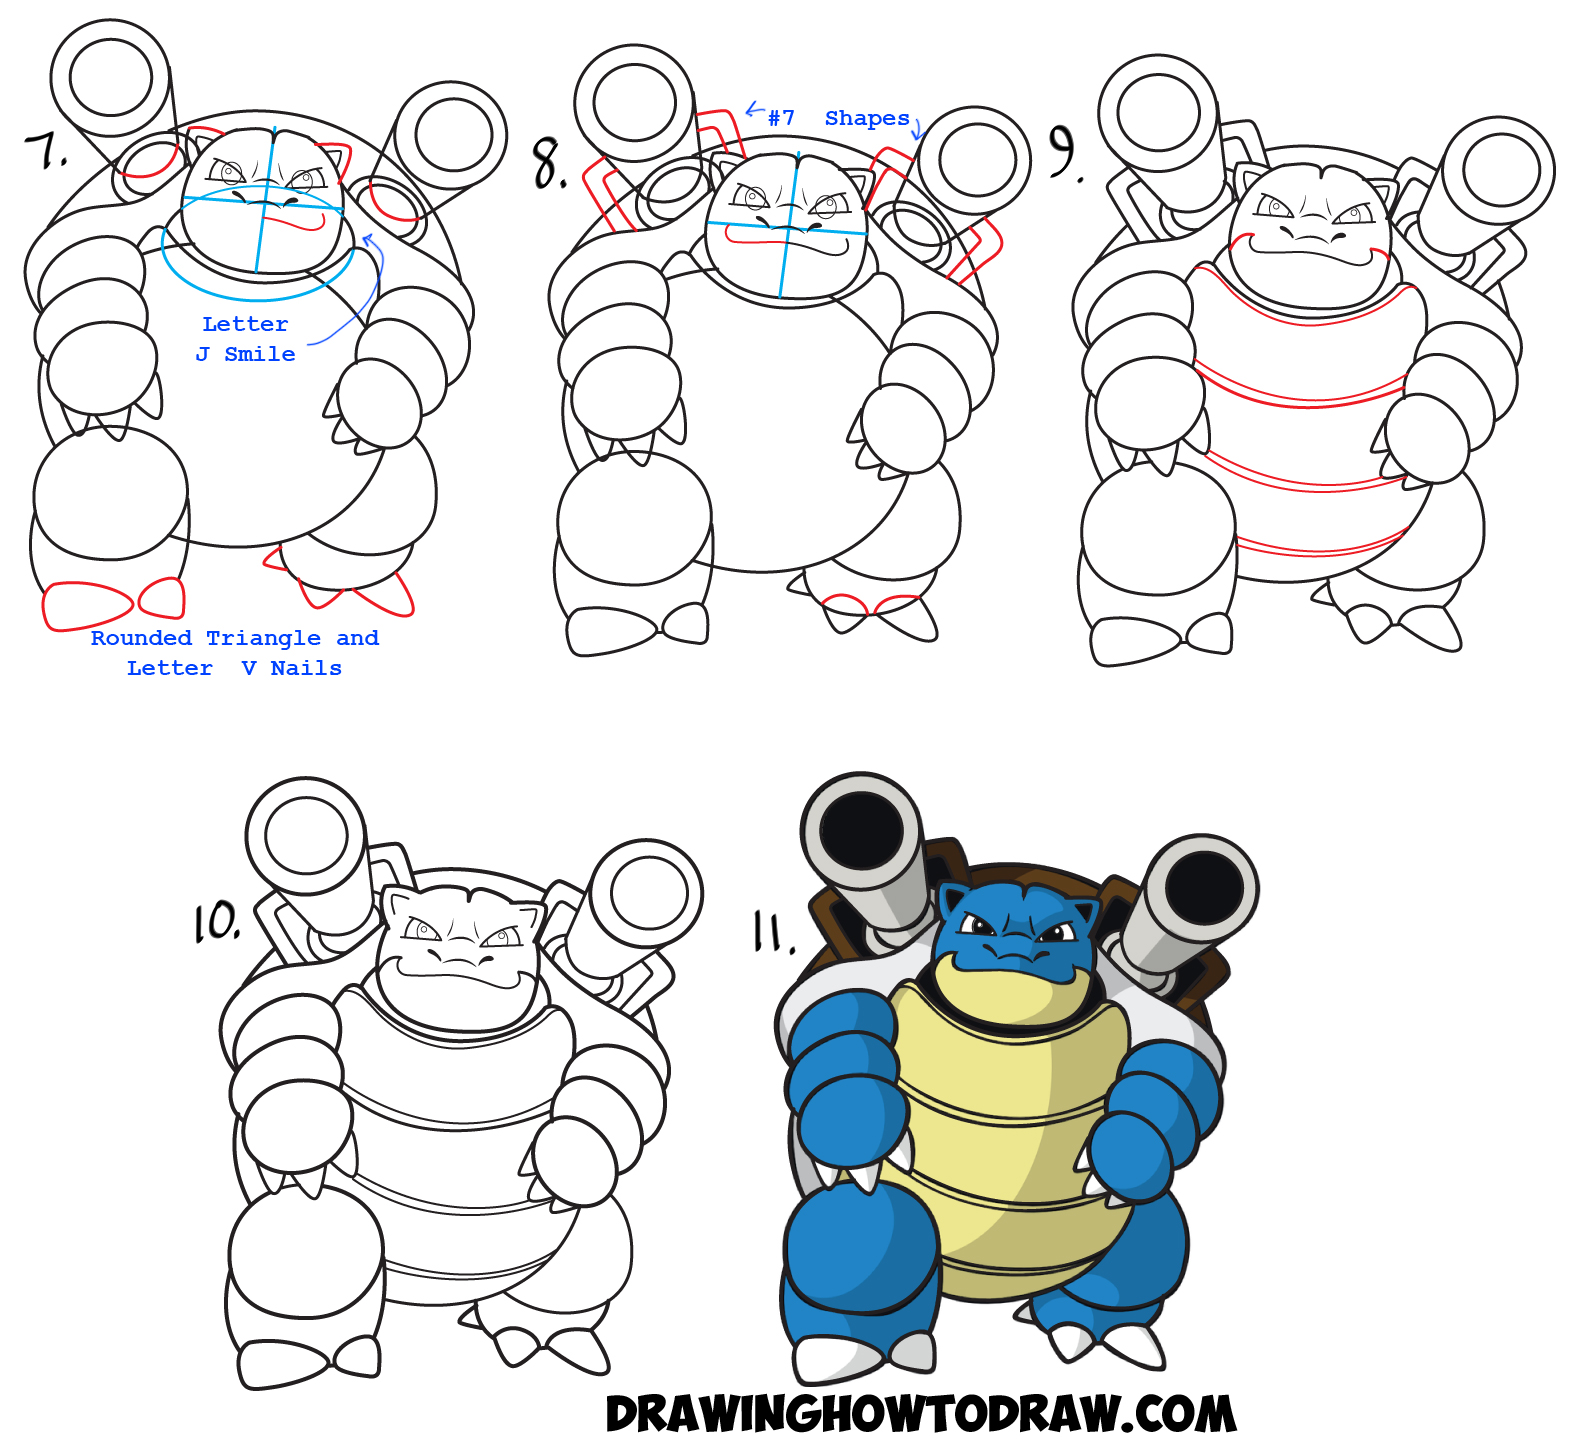
(Step 7) Draw a curved line on each cannon. Draw a letter ‘v’ shape for each ear. Draw a sideways letter ‘j’ shape for part of the smile. Draw curved triangles for nails on left foot and letter ‘v’-like shapes for the nails on right foot.
(Step 8) Draw #7-like shapes on cannons. Draw another sideways letter ‘j’-like shape on smile. Draw curved lines on the nails of the right foot.
(Step 9) Draw curved lines on Blastoise’s shell. Draw curved lines on his smile.
(Step 10) Blastoise is finished…erase any lines that aren’t needed any more on the line drawing.
(Step 11) Color in Blastoise if you have the time.
I hope you enjoyed this tutorial…come back for more soon.
Here are More Pokemon Drawing Tutorials
Technorati Tags: blastoise, how to draw blastoise, draw blastoise drawing blastoise, pokemon, pokemon go


THIS IS AN AMAZING TUTORIAL FOR NOOBS IN DRAWING
For every one of your drawings I just copy it i don’t use the steps
it is good but you will be colour this blastois it is better
You give. Pokemon blastoys.