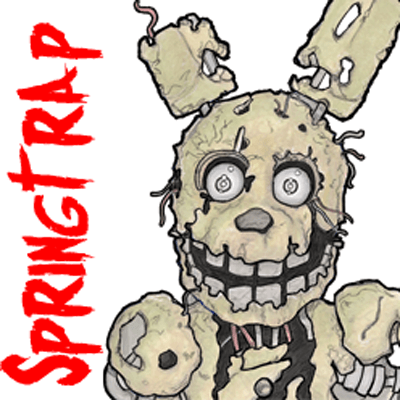
Learn how to draw Springtrap from Five Nights at Freddy’s 3 with the following step by step guide. This is an advanced drawing tutorial and it might be a bit tough for some of you. I have tried to make it as easy as I could. Try it out below.
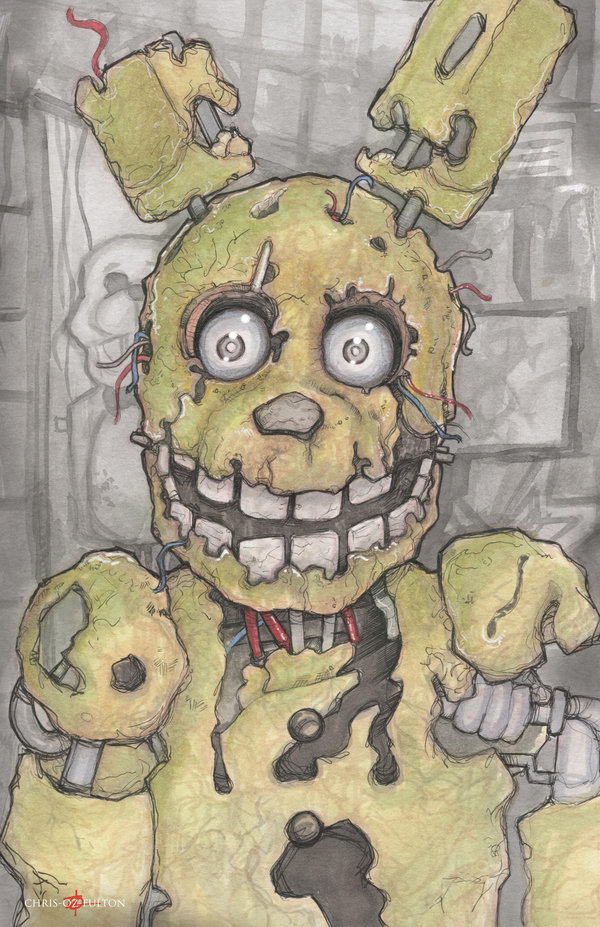
The original artwork that I used as a source came from ChrisOzFulton. Check out Chris’ artwork here.
How to Draw Springtrap from Five Nights at Freddy’s 3 Step by Step Drawing Tutorial
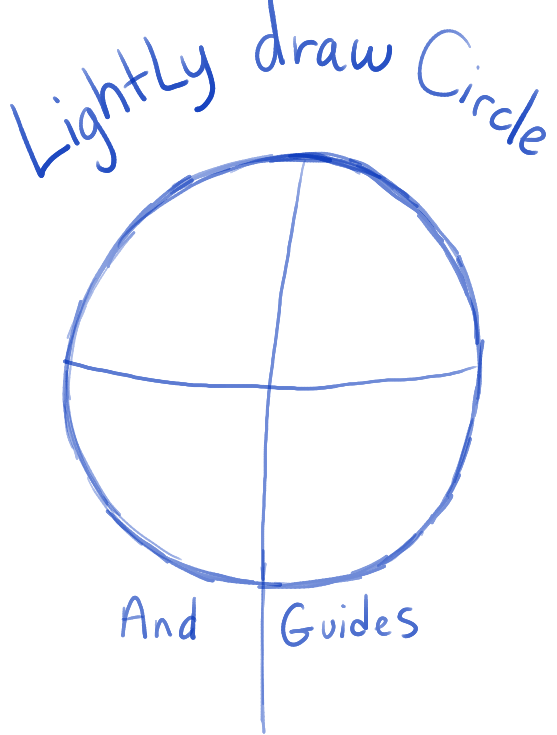
Step 1
– Draw a circle.
– Then draw guidelines thru the face.
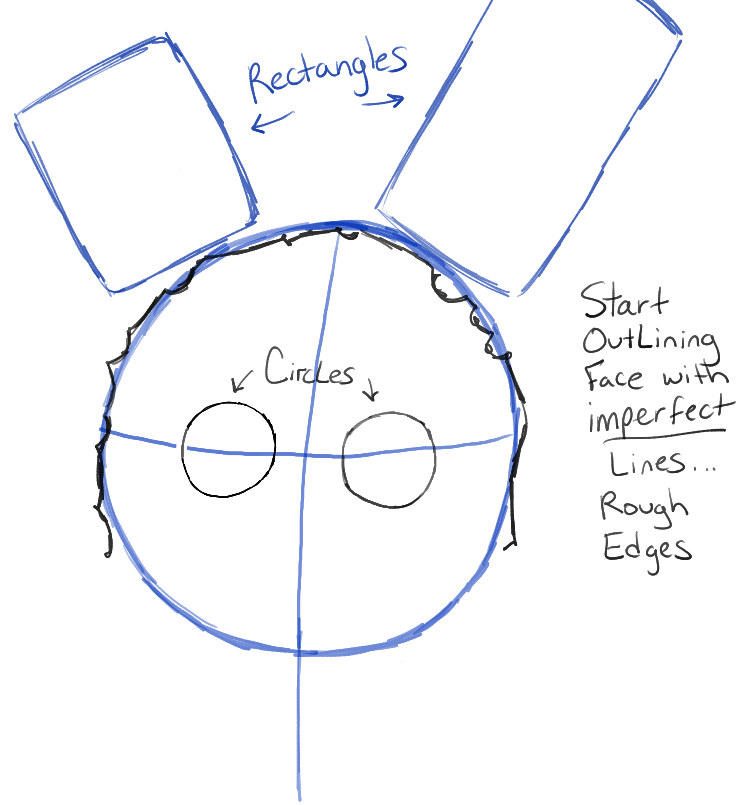
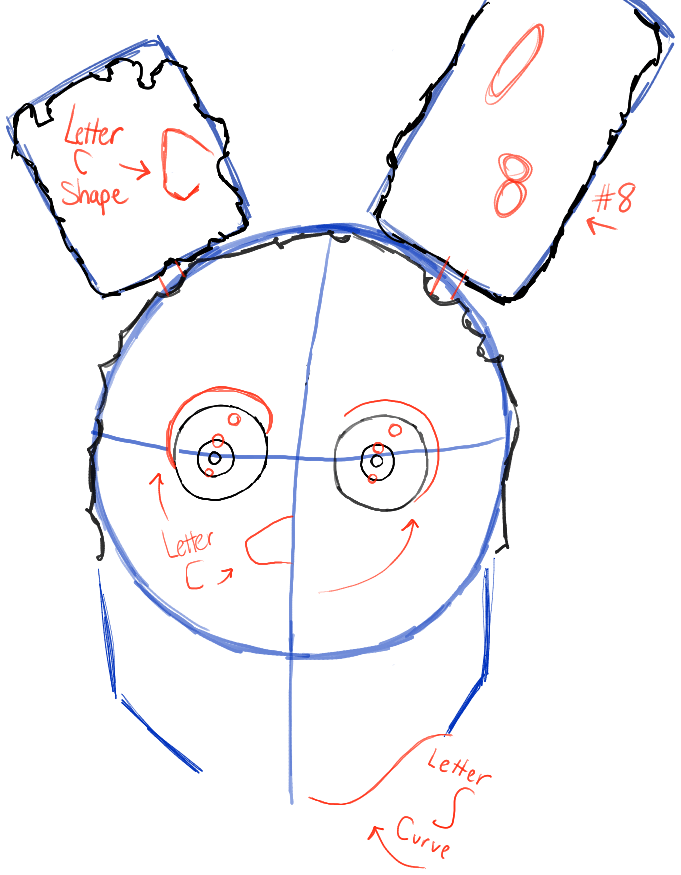
Step 2
– Lightly draw rounded rectangles as guides for the ears.
– Draw rough edges around the guide circle that you drew in the last step.
– Draw circles for eyes.
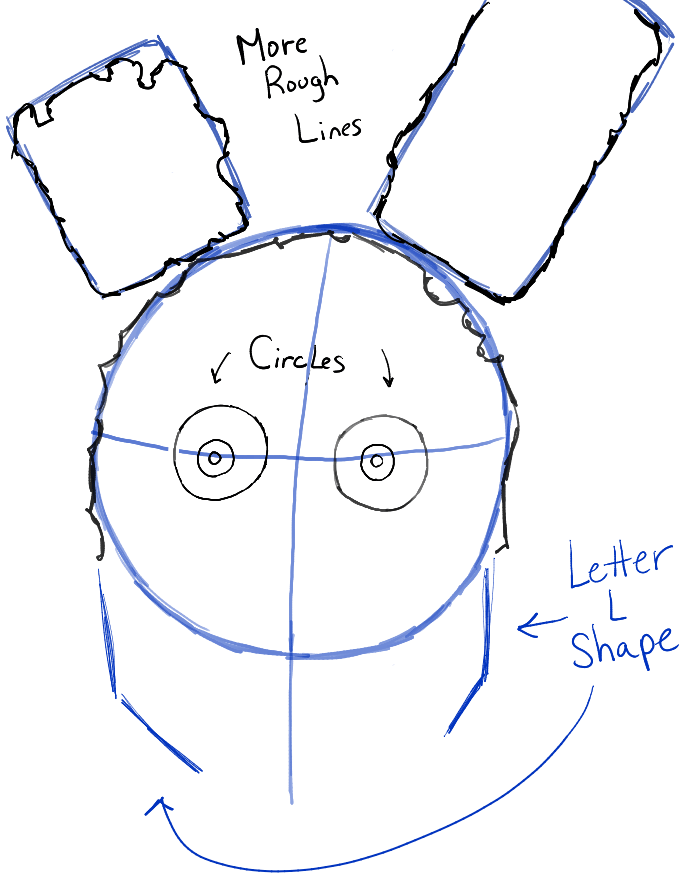
Step 3
– Lightly draw letter ‘L’-shaped guidelines for the jaw-guidelines.
– Draw circles inside the eyes.
– Draw rough edges around the ear, rectangle guidelines.
[ad#draw]
Step 4
– Draw letter ‘C’-like shape on the left ear.
– Draw an oval and a #8-like shape on the right ear.
– Draw details in and around the eyes.
– Draw letter ‘S’-like shape on the right side of the jaw.
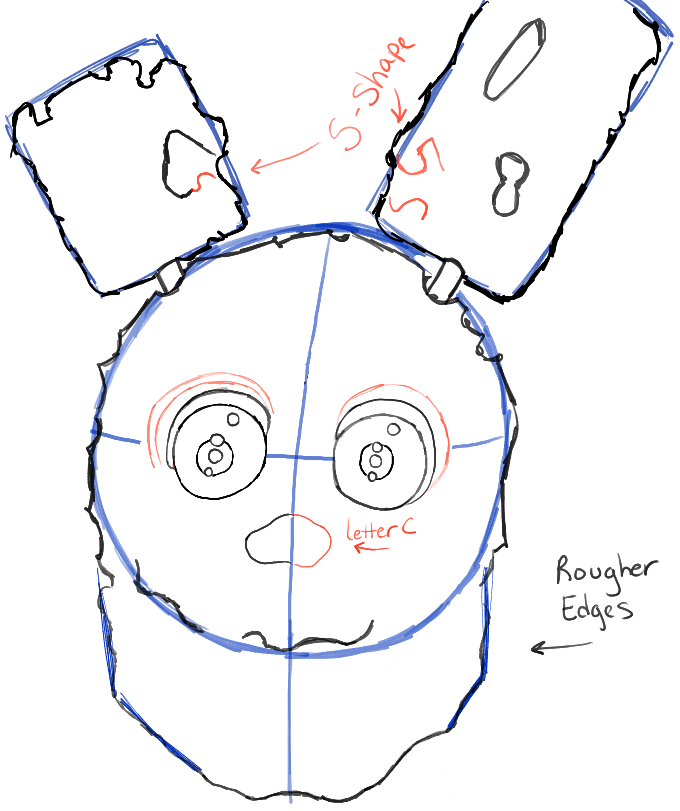
Step 5
– Draw #5 and letter ‘S’-like shapes on the ear.
– Draw curved lines around eyes.
– Draw letter ‘C’ like shape for the right side of the nose.
– Draw rougher edges around the chin.
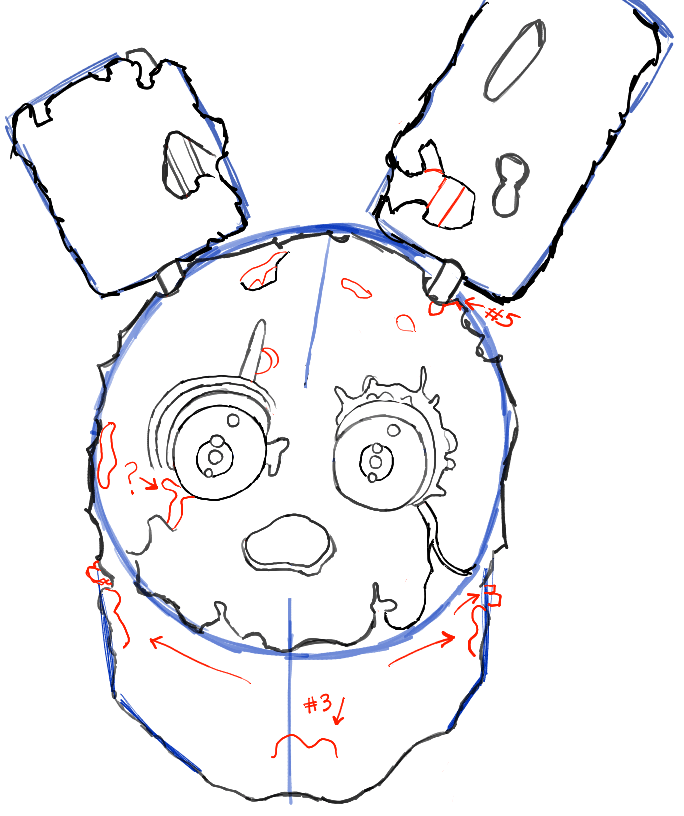
Step 6
– Draw a few basic shapes all around the face.
Step 7
– Draw #3-like shapes all around the jaw.
– Draw oval-ish shapes around the face.
– Draw a ?-like shape under the left eye.
– Draw a few details on the right ear.
– Draw a #5-like shape under the right ear.
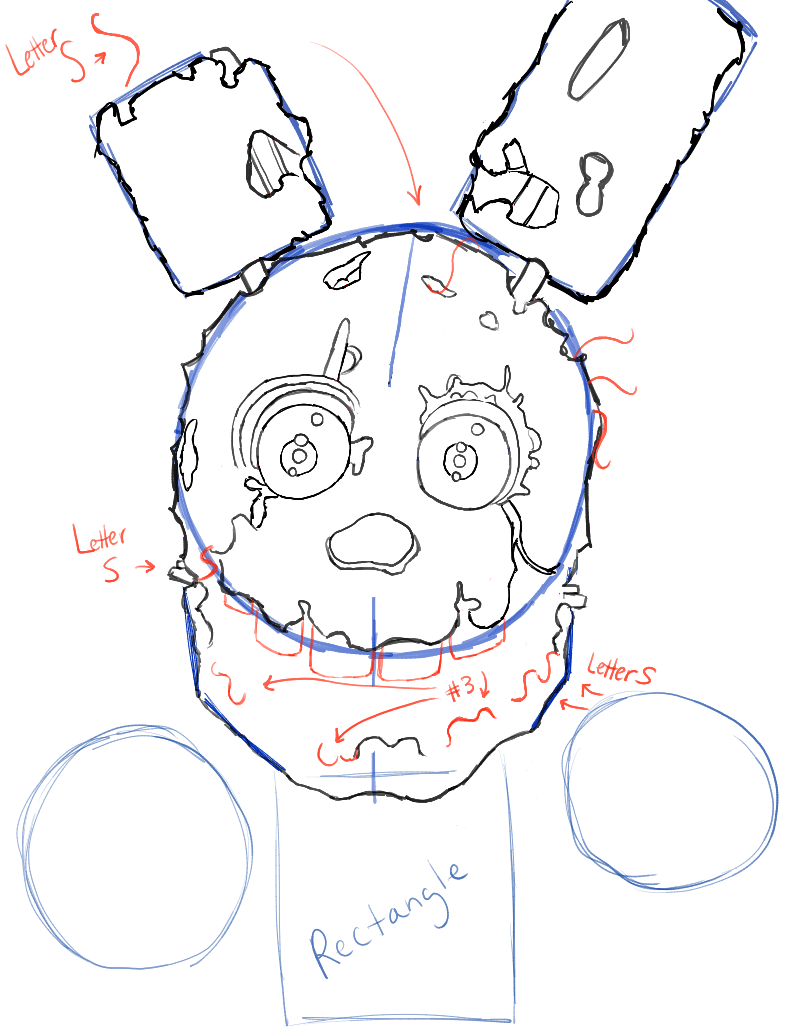
Step 8
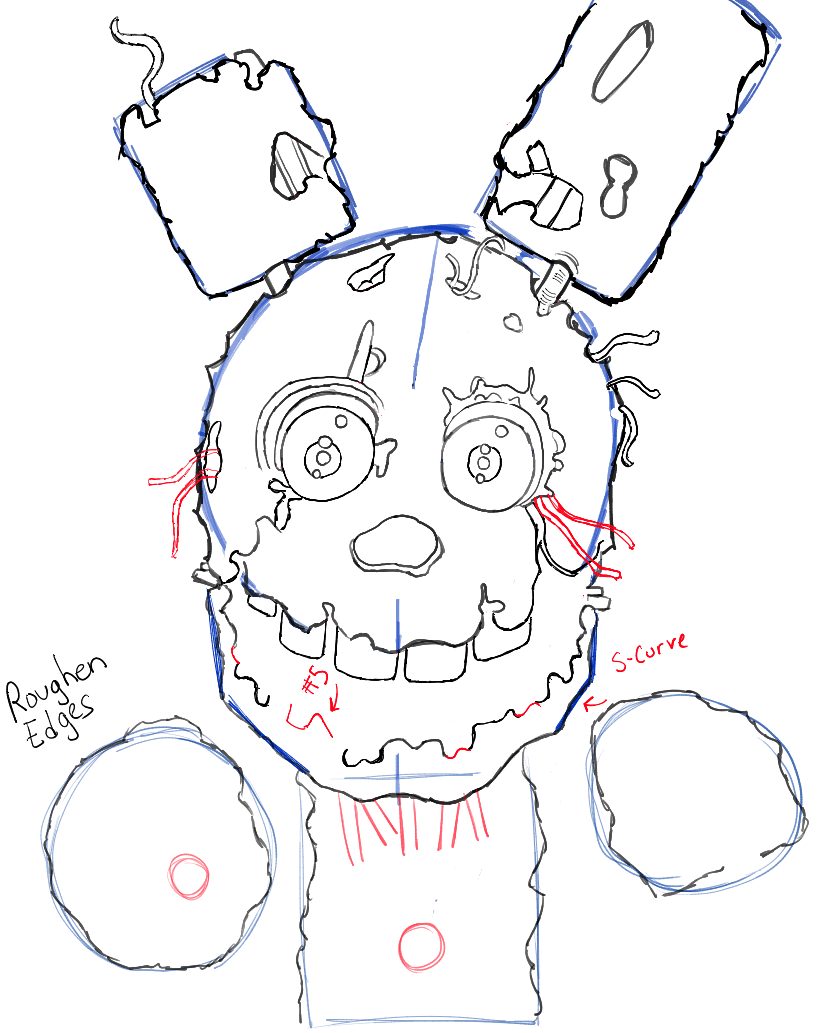
– Draw a few letter ‘S’ shapes around the face.
– Draw rectangle-ish shapes for teeth.
– Draw #3-like and ‘S’-like shapes around the jaw.
– Draw circle and rectangle guidelines below the face.
Step 9
– Draw curvy lines coming out of the holes in the face.
– Draw more details on the lower jaw area.
– Draw circles in the chest and left arm.
– Draw some lines on top of the chest.
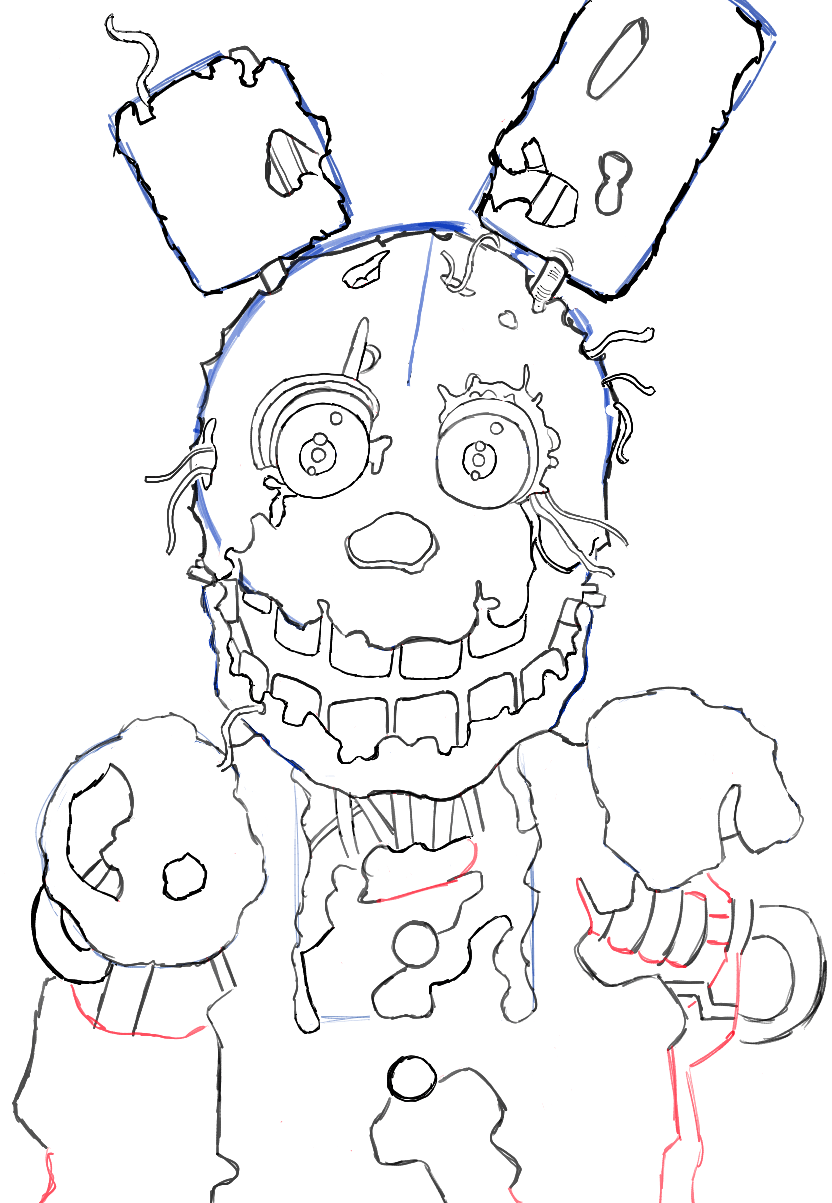
– Draw rough edges around the blue guidelines.
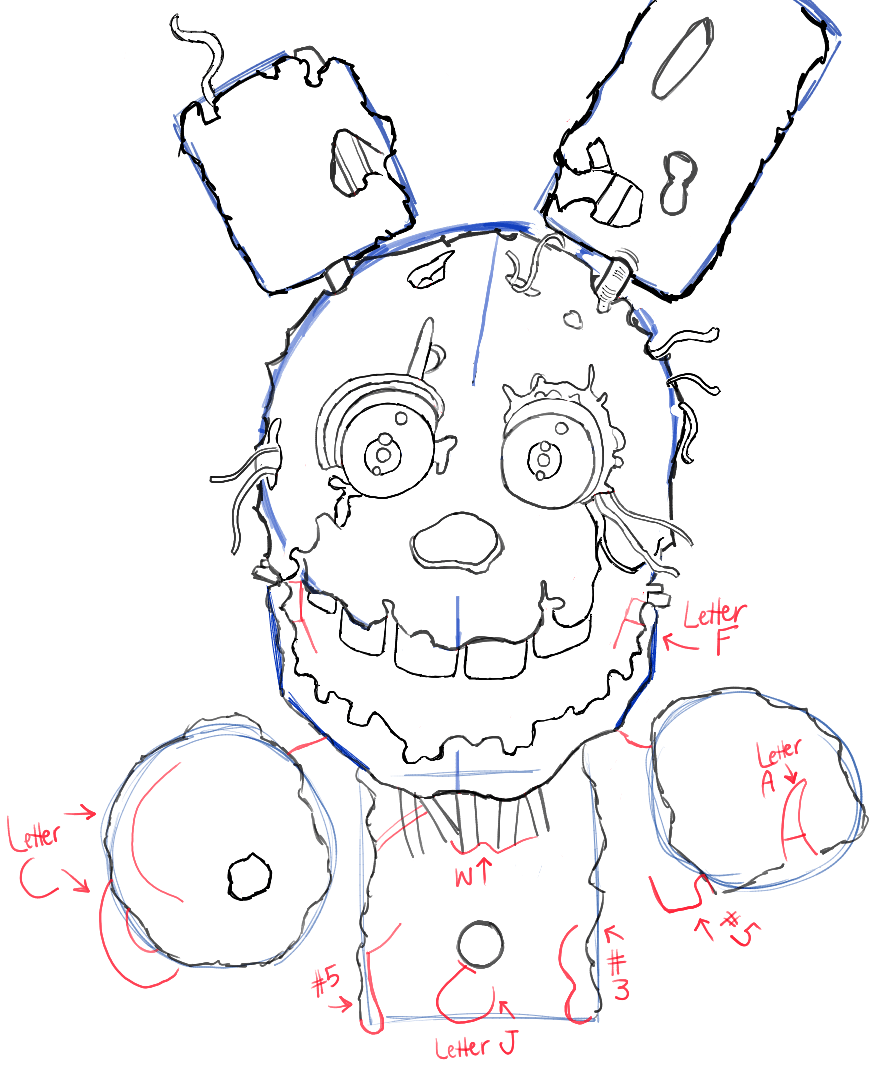
Step 10
– Draw letter ‘F’-like shapes in the mouth.
– Add details to the chest and arms.
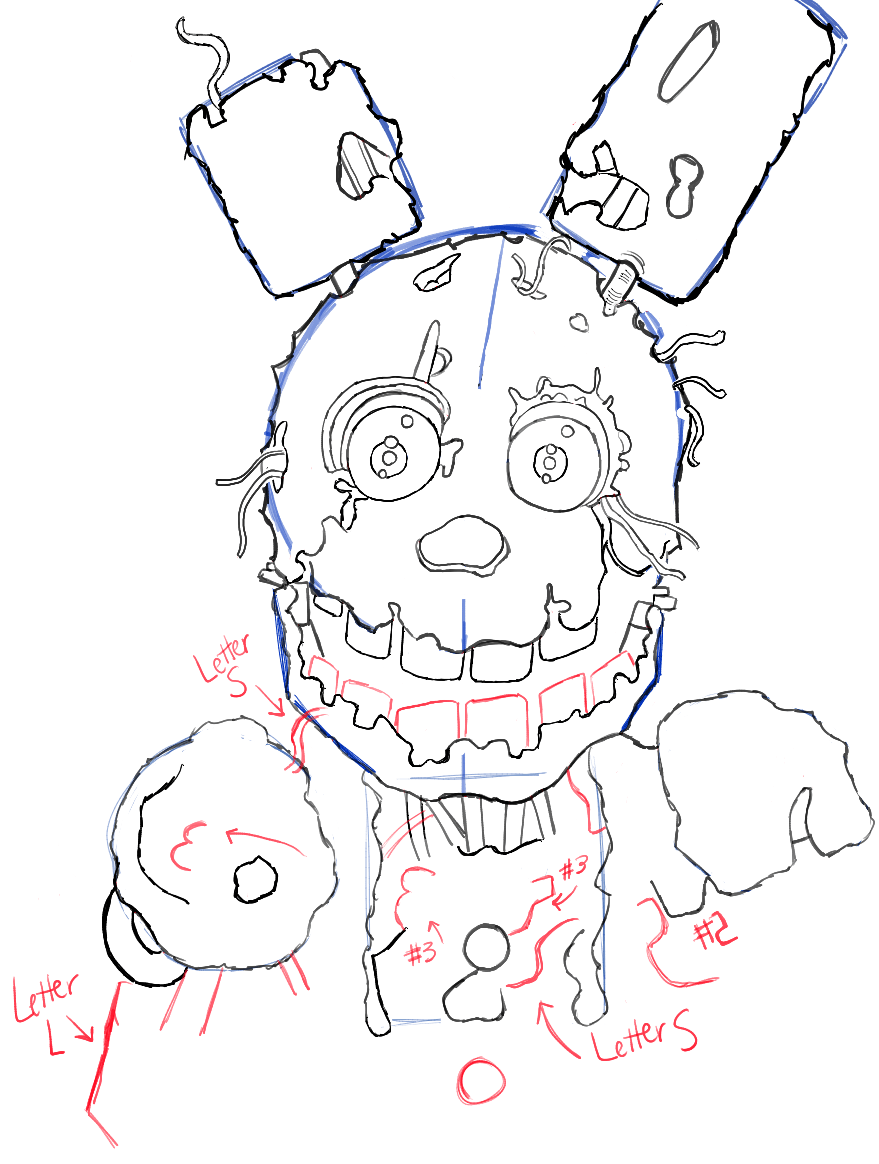
Step 11
– Draw in teeth.
– Add more details to chest and arms.
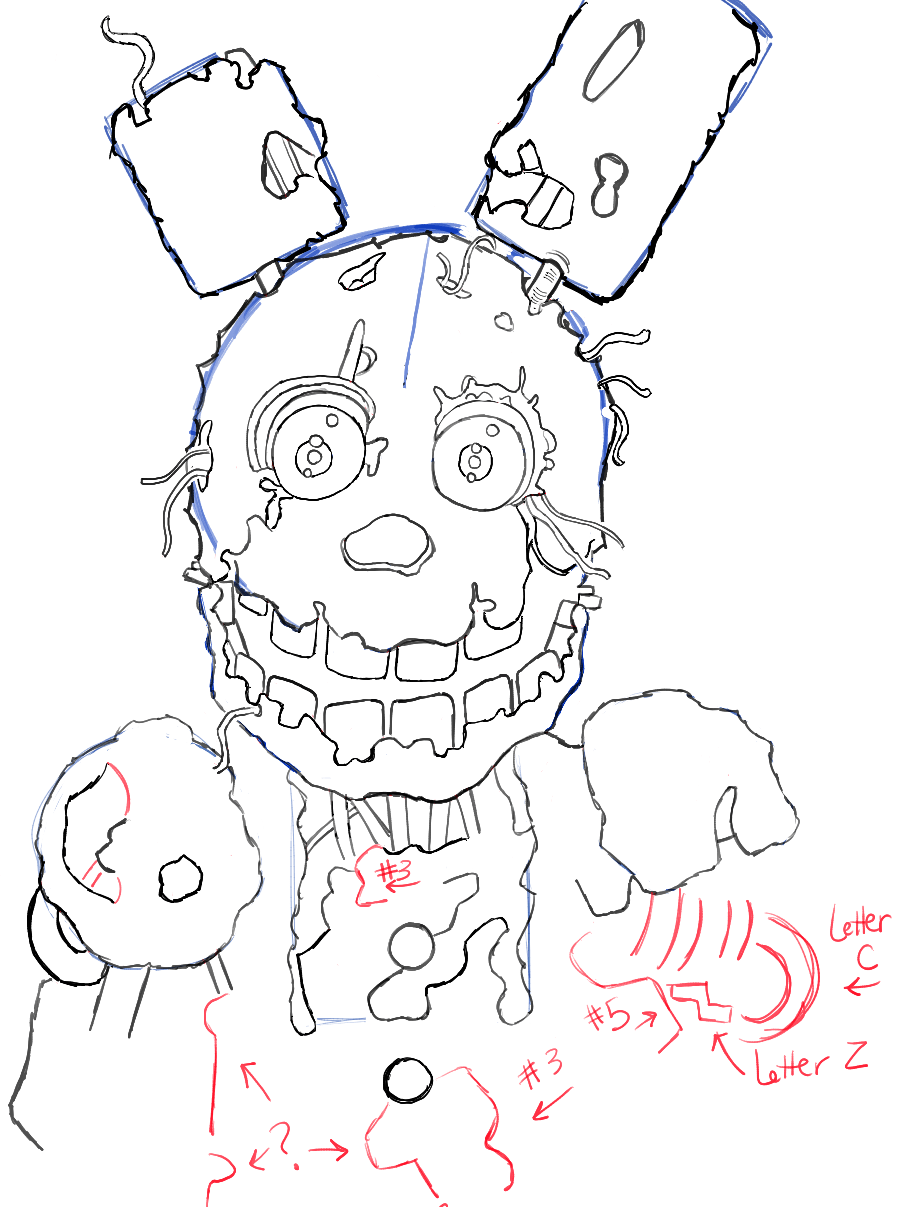
Step 12
– Continue to add in the details.
– All of these lines can be drawn with basic shapes that you draw every day, such as the ?, #3, #5, etc.
Step 13
– Now we just add a few remaining lines.
Step 14
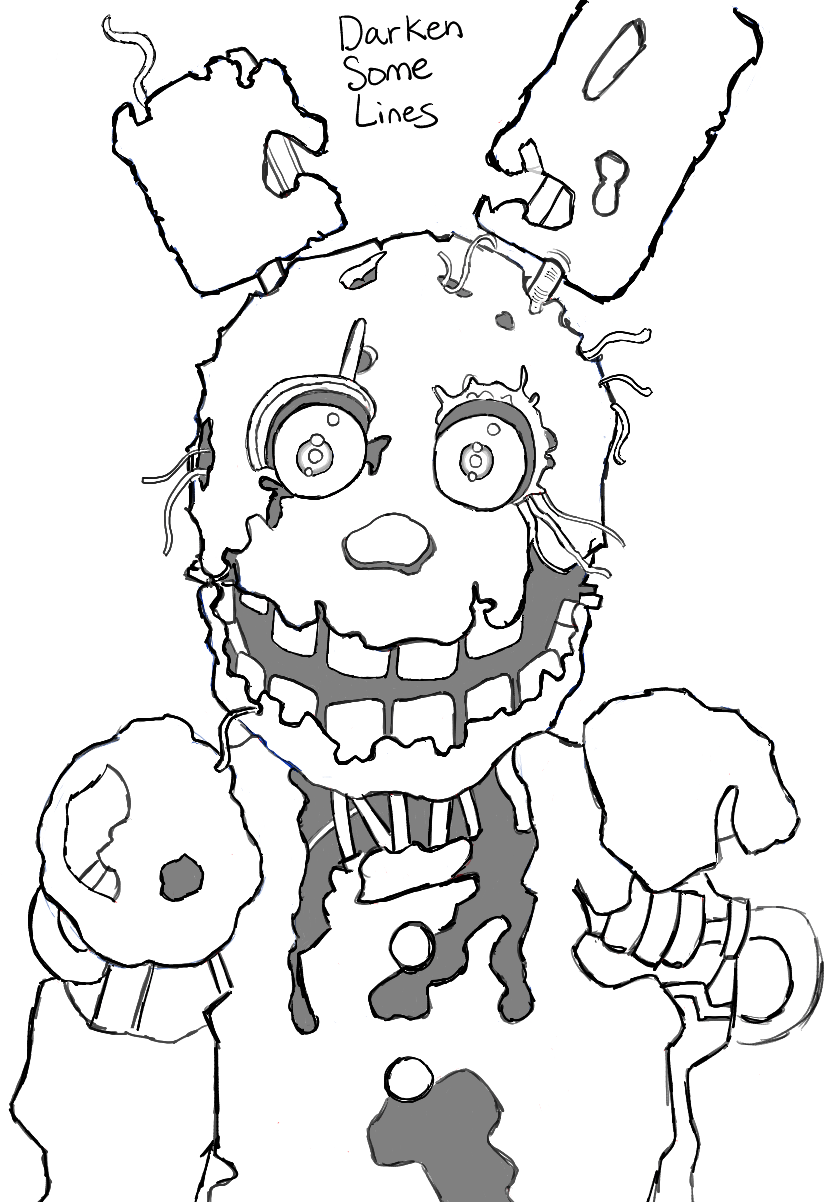
– Now erase guide lines. Darken lines. Fill in some blackened areas.
Step 15
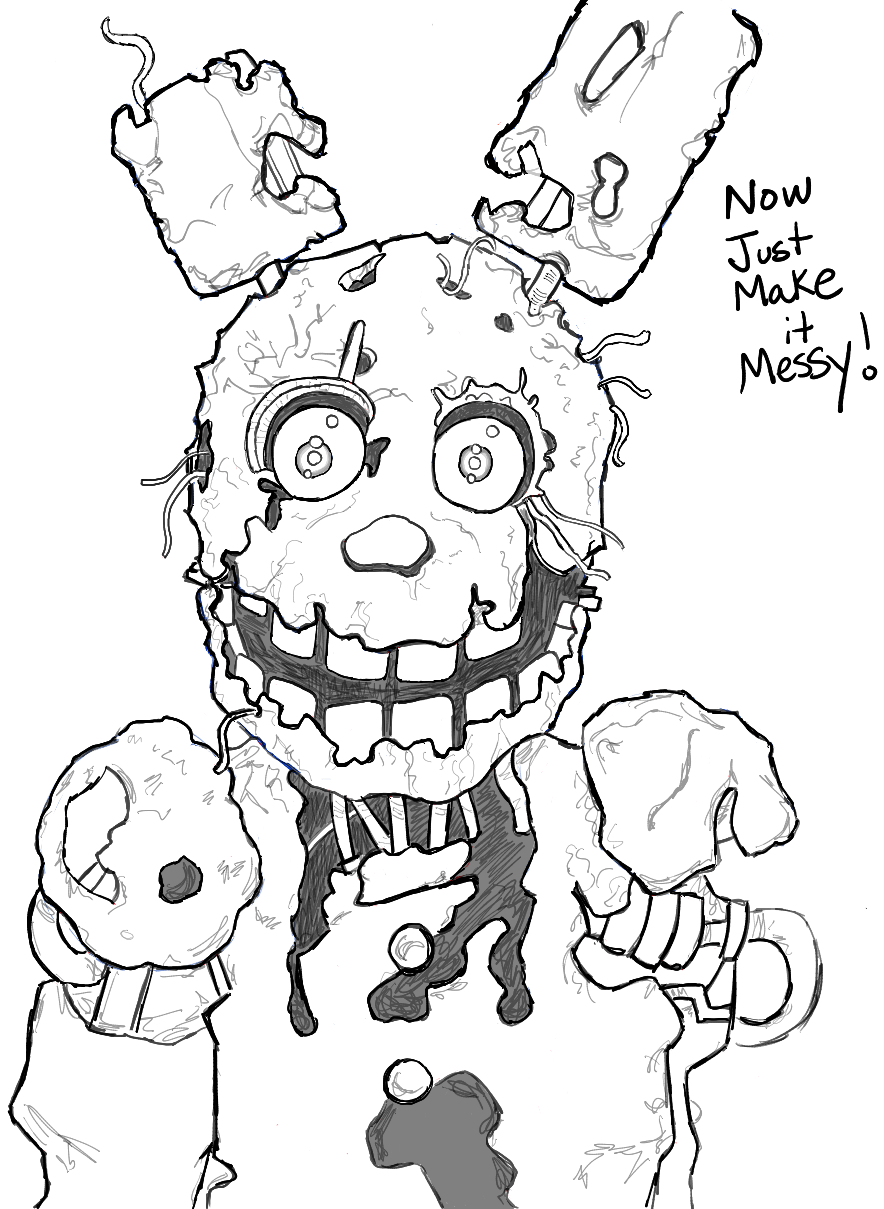
– Now just add squiggly, messy lines, as seen above.
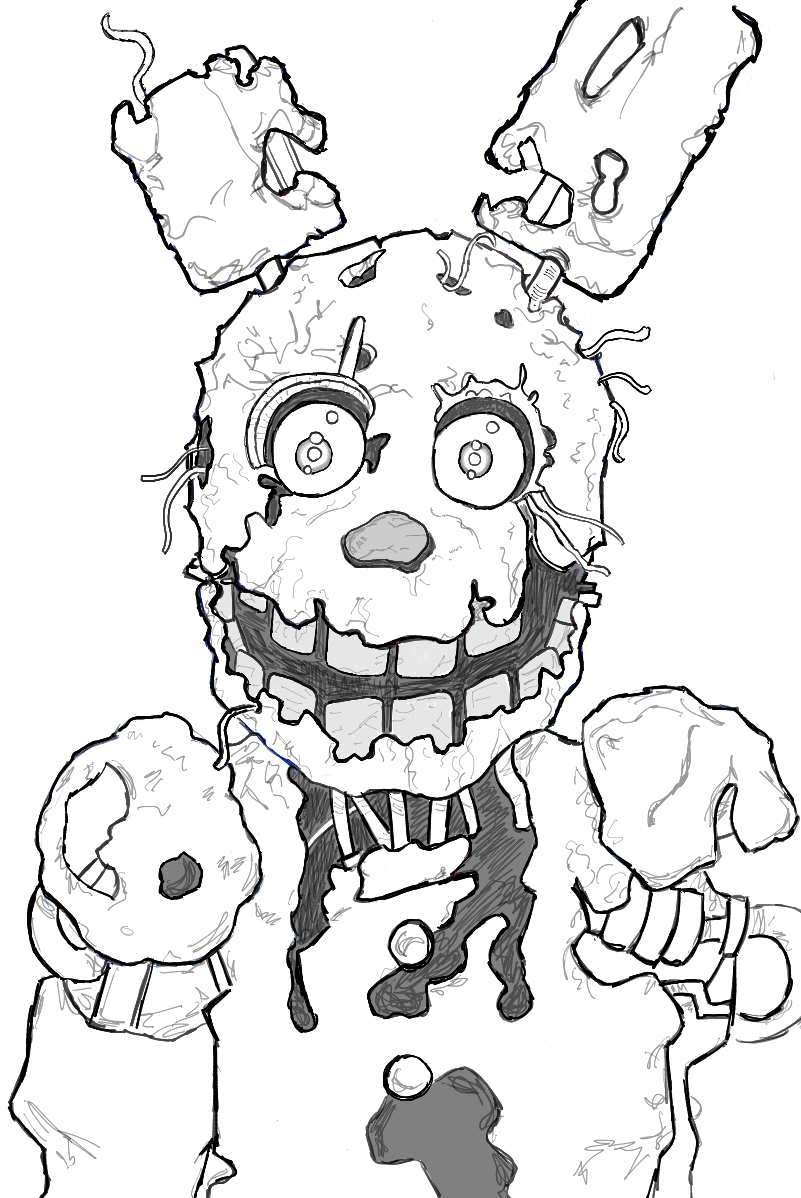
Finished Black and White Drawing of SpringTrap from Five Nights at Freddy’s 3
– Finish up your drawing. You can add color if you want to.
Springtrap Colored Drawing by Chris “Oz” Fulton
The original artwork that I used as a source came from ChrisOzFulton over at DeviantArt.com. Check out his artwork here.
Technorati Tags: how to draw Springtrap, drawing Springtrap, Springtrap, Springtrap from Five Nights at Freddys

Comments are closed, but trackbacks and pingbacks are open.