Today I’ll show you how to draw a realistic hand holding a paper coffee cup, like the kind you get from Starbucks. This tutorial is broken down into many steps to help you draw it more easily. Happy Drawing!
How to Draw a Realistic Hand Holding a Disposable Coffee Cup – Step by Step Drawing Tutorial
Written-Out Step by Step Drawing Instructions
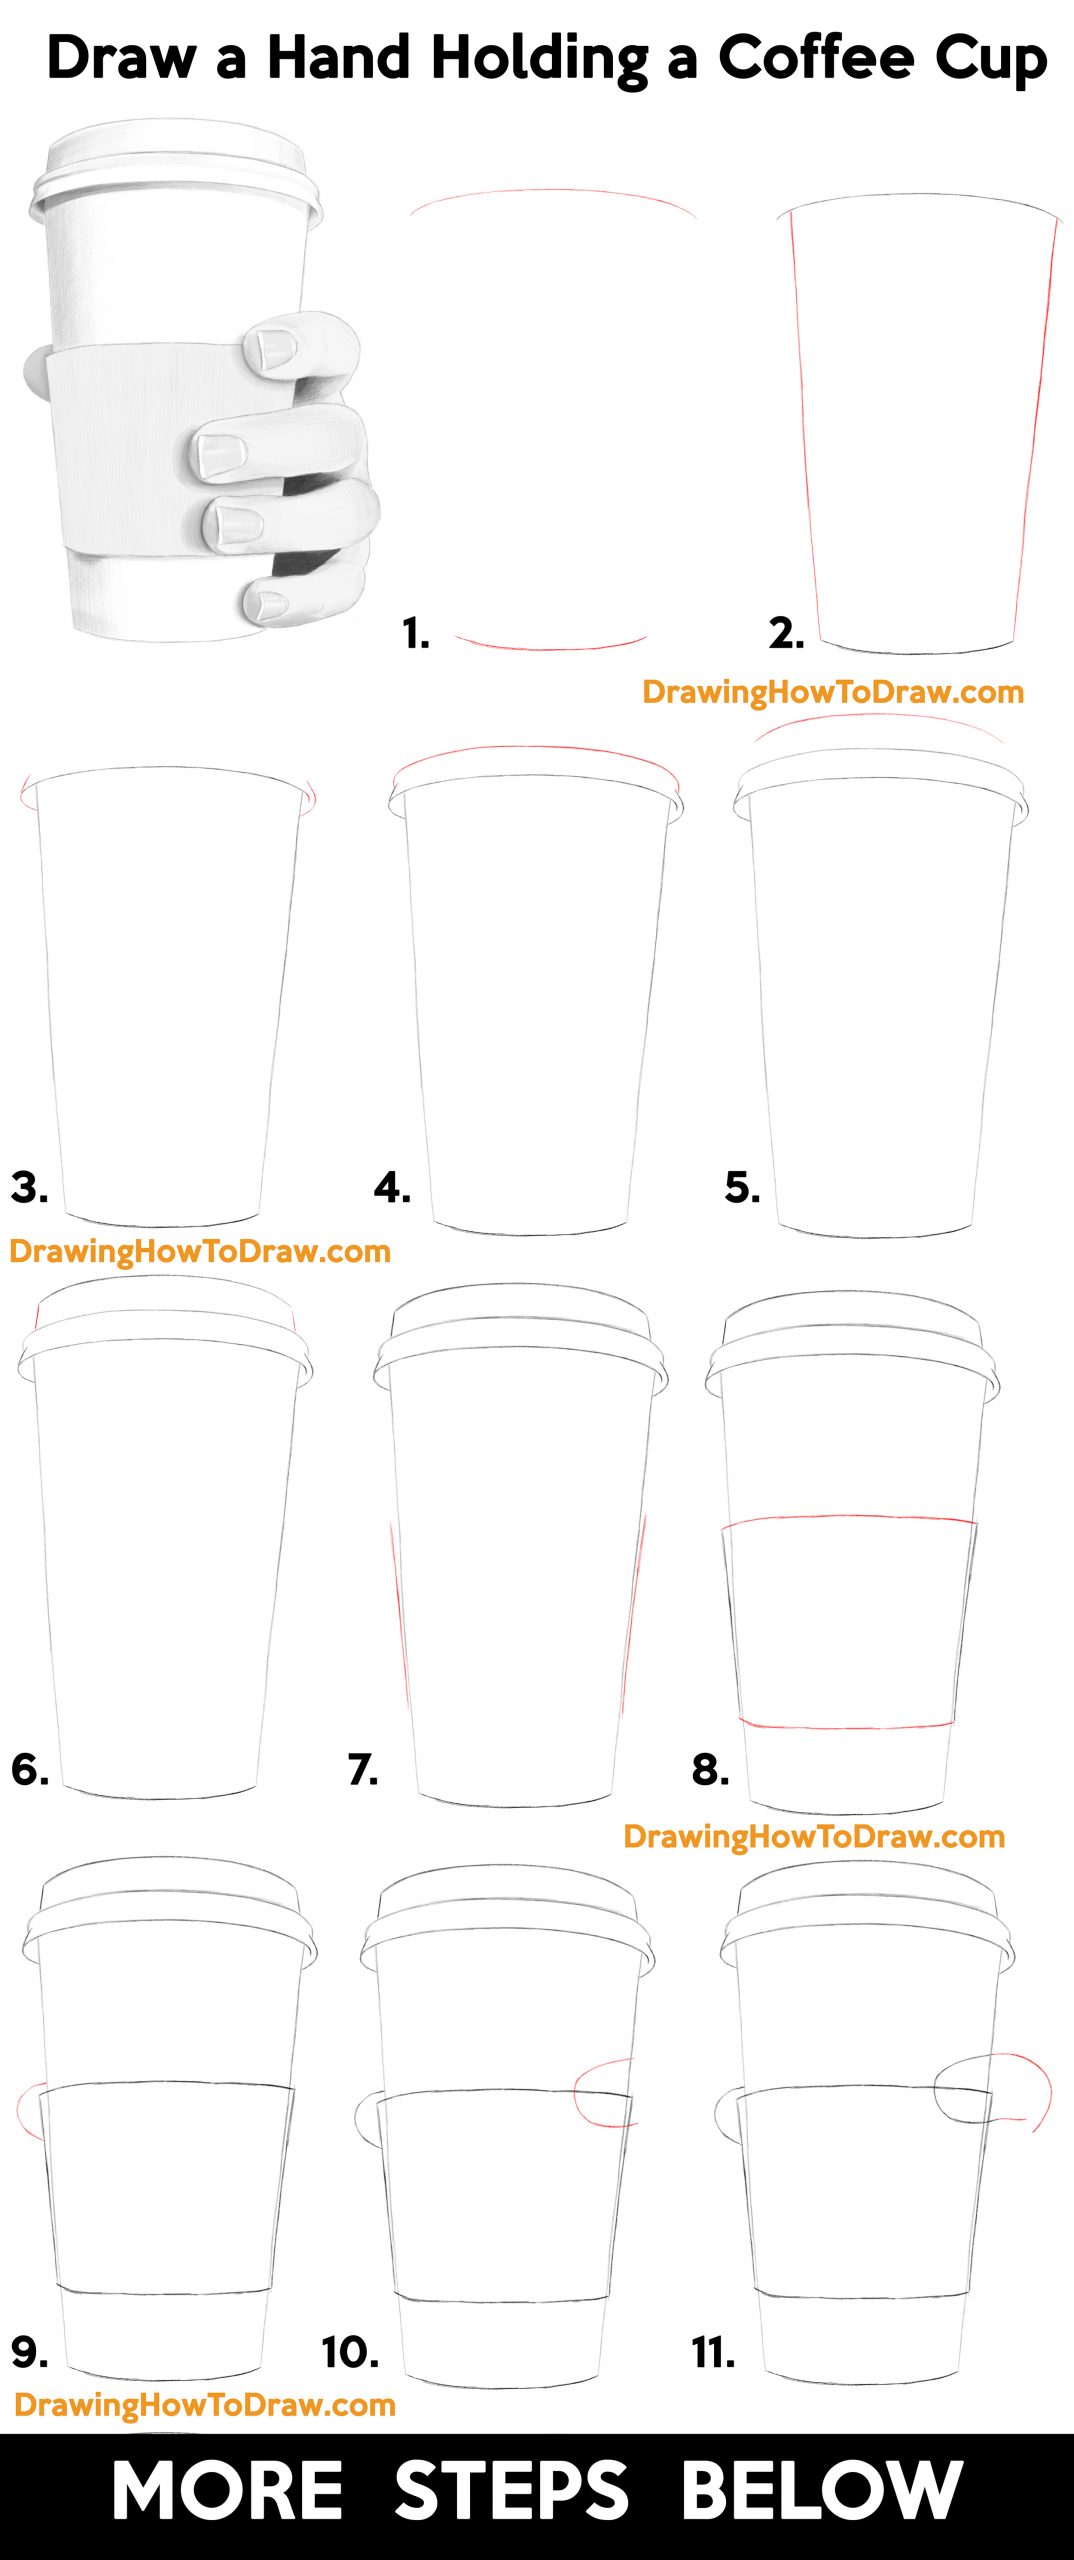
(STEP 01) Draw 2 curved lines for the top and bottom of the cup.
(STEP 02) Draw lines between the top and the bottom.
(STEP 03) Draw a curved line on each side of the cup.
(STEP 04) Draw another curved line above the curved line from Step #1.
(STEP 05) Draw a shorter curved line above the previous one.
(STEP 06) Draw lines on the side of the cup’s lid.
(STEP 07) Draw lines outside of the cup. We are drawing the cardboard protective sleeve.
(STEP 08) Draw the bottom and top of the cardboard sleeve.
(STEP 09) Draw a “C” shape for the hand’s thumb.
(STEP 10) Draw a sideways “U” shape for one of the fingers.
(STEP 11) Draw 2 curved lines on this finger.
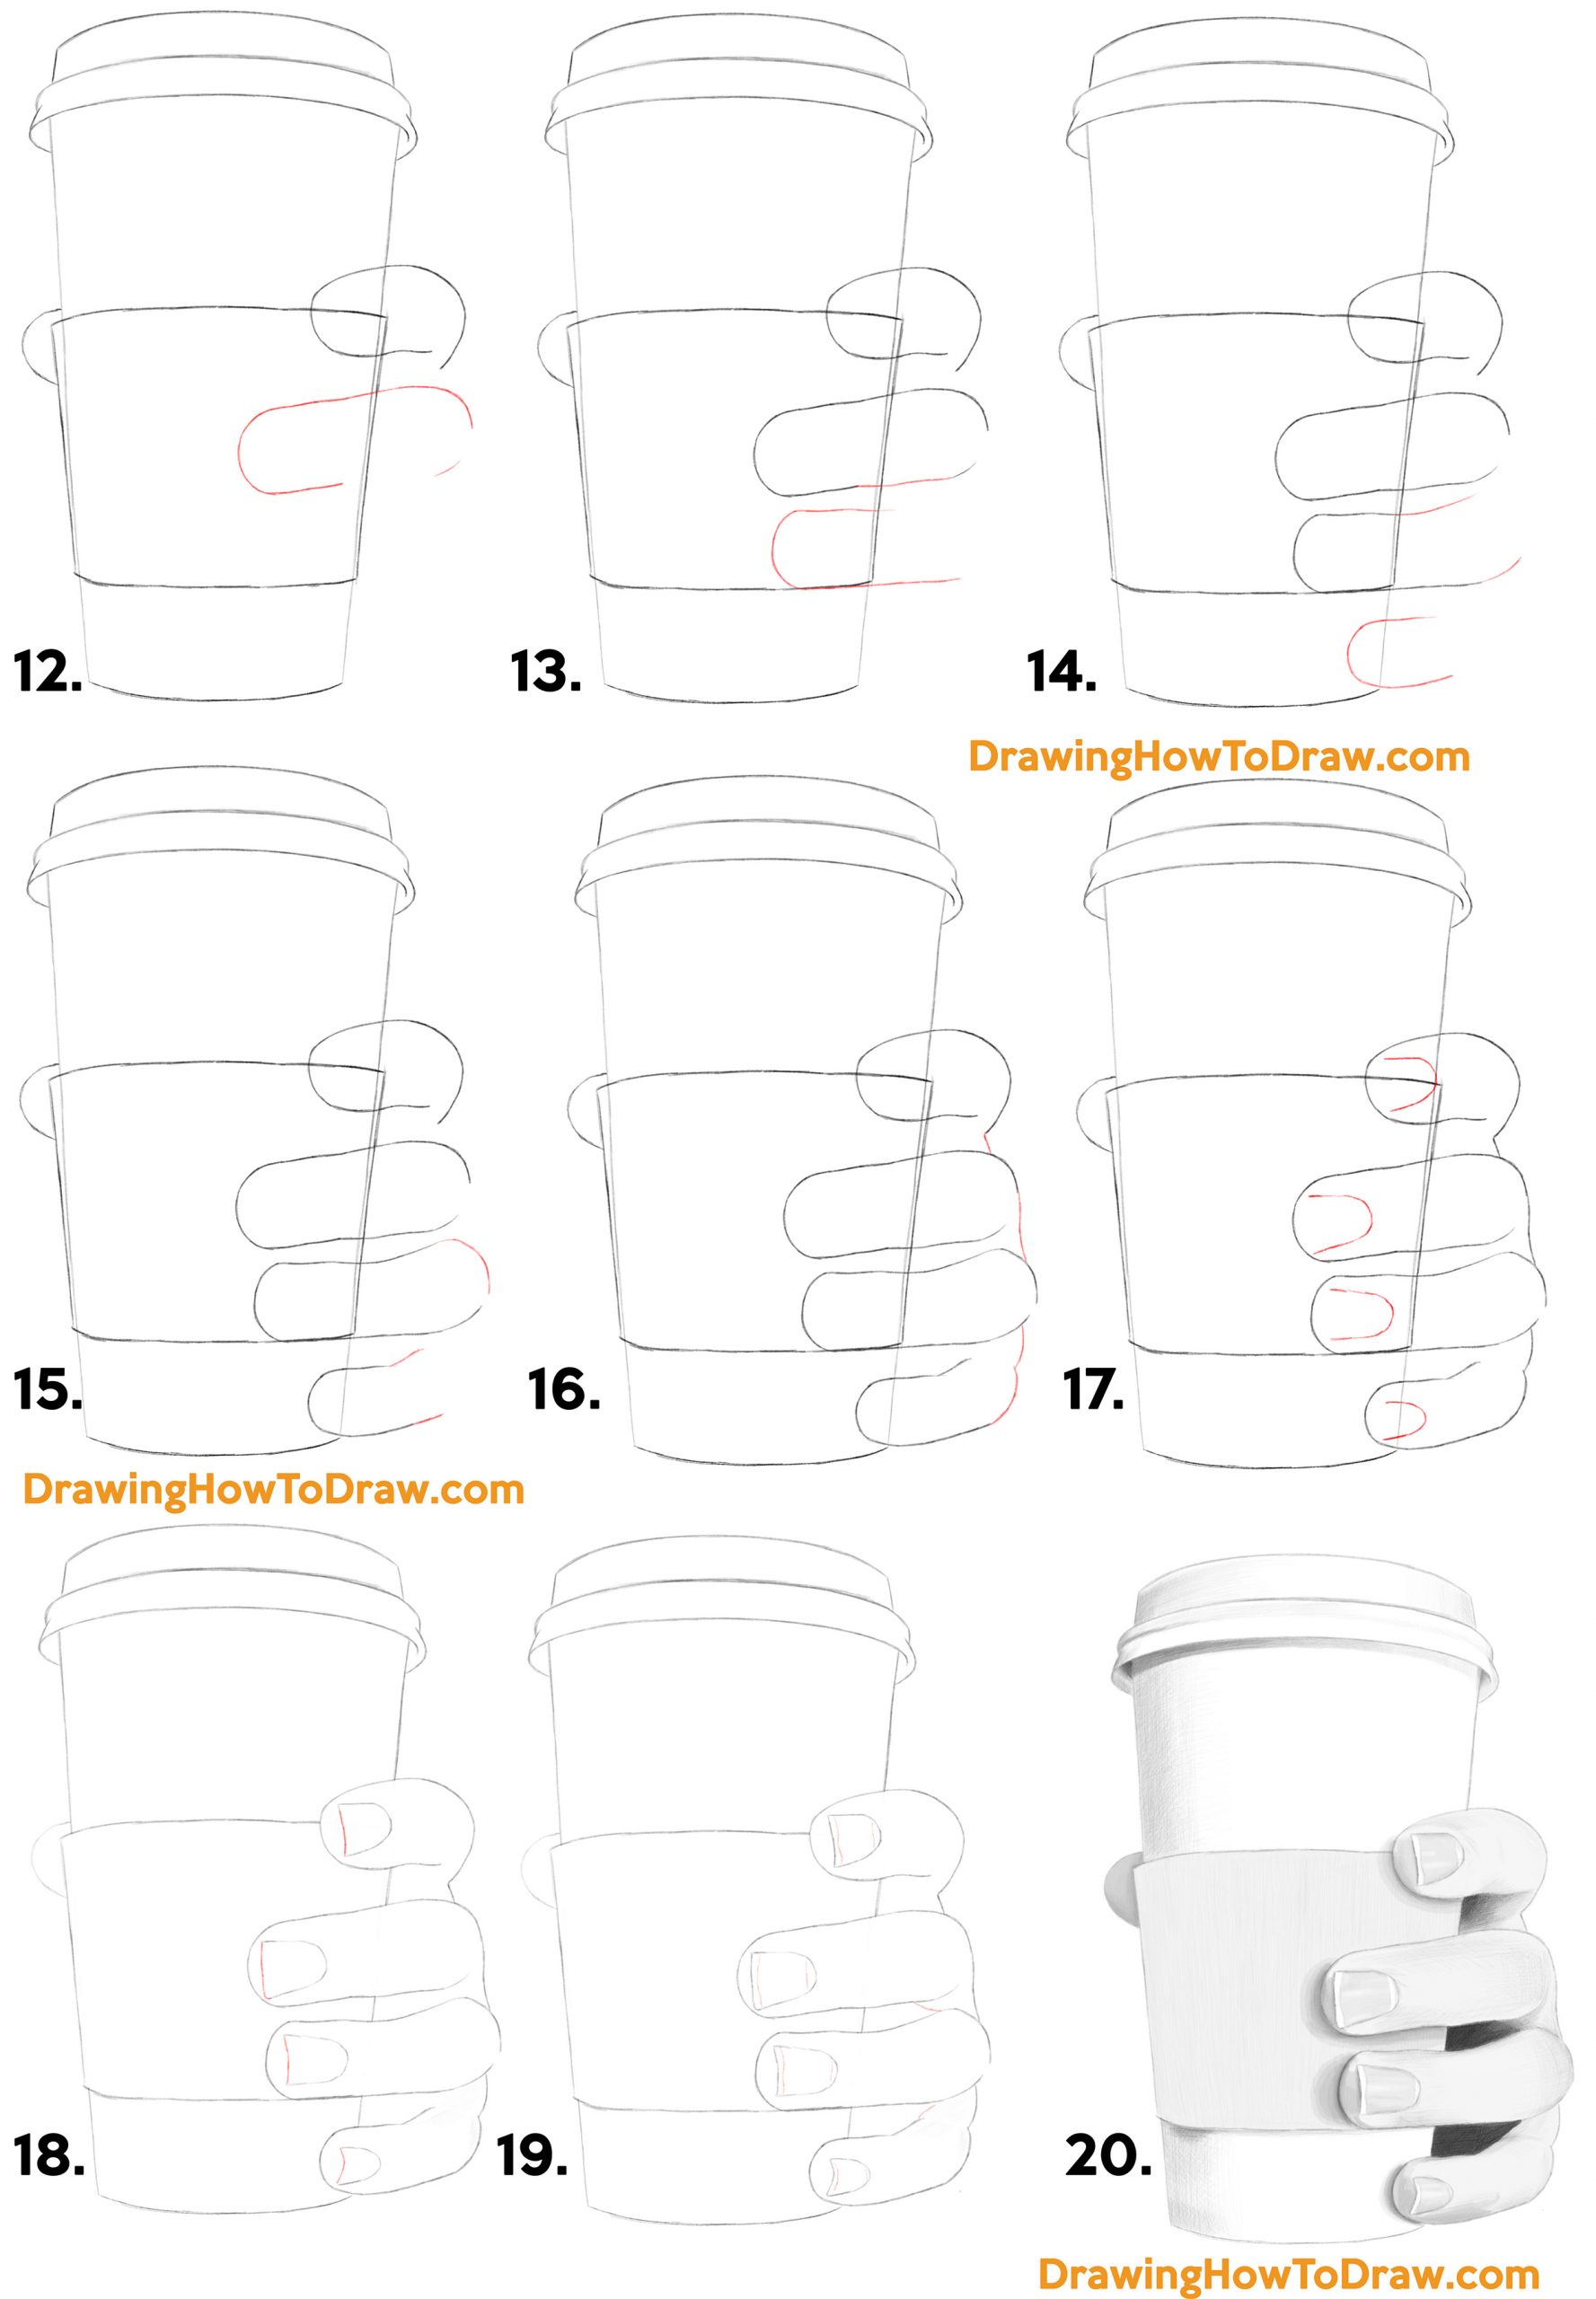
(STEP 12) Draw a partial oval for the next finger.
(STEP 13) Draw a line to finish off the 2nd finger. Draw a sideways “J”-like shape to draw the 3rd finger.
(STEP 14) Add curved lines to the 3rd finger. Draw a sideways “U” shape for the 4th finger.
(STEP 15) Add a curved line to the end of the 3rd finger. Draw lines to the 4th finger.
(STEP 16) Draw curved lines at the backs of the fingers.
(STEP 17) Draw “U” shaped nails.
(STEP 18) Erase unnecessary lines and draw curved lines at the ends of the nails.
(STEP 19) Add some finishing details to the fingers.
(STEP 20) Shade in the picture.


