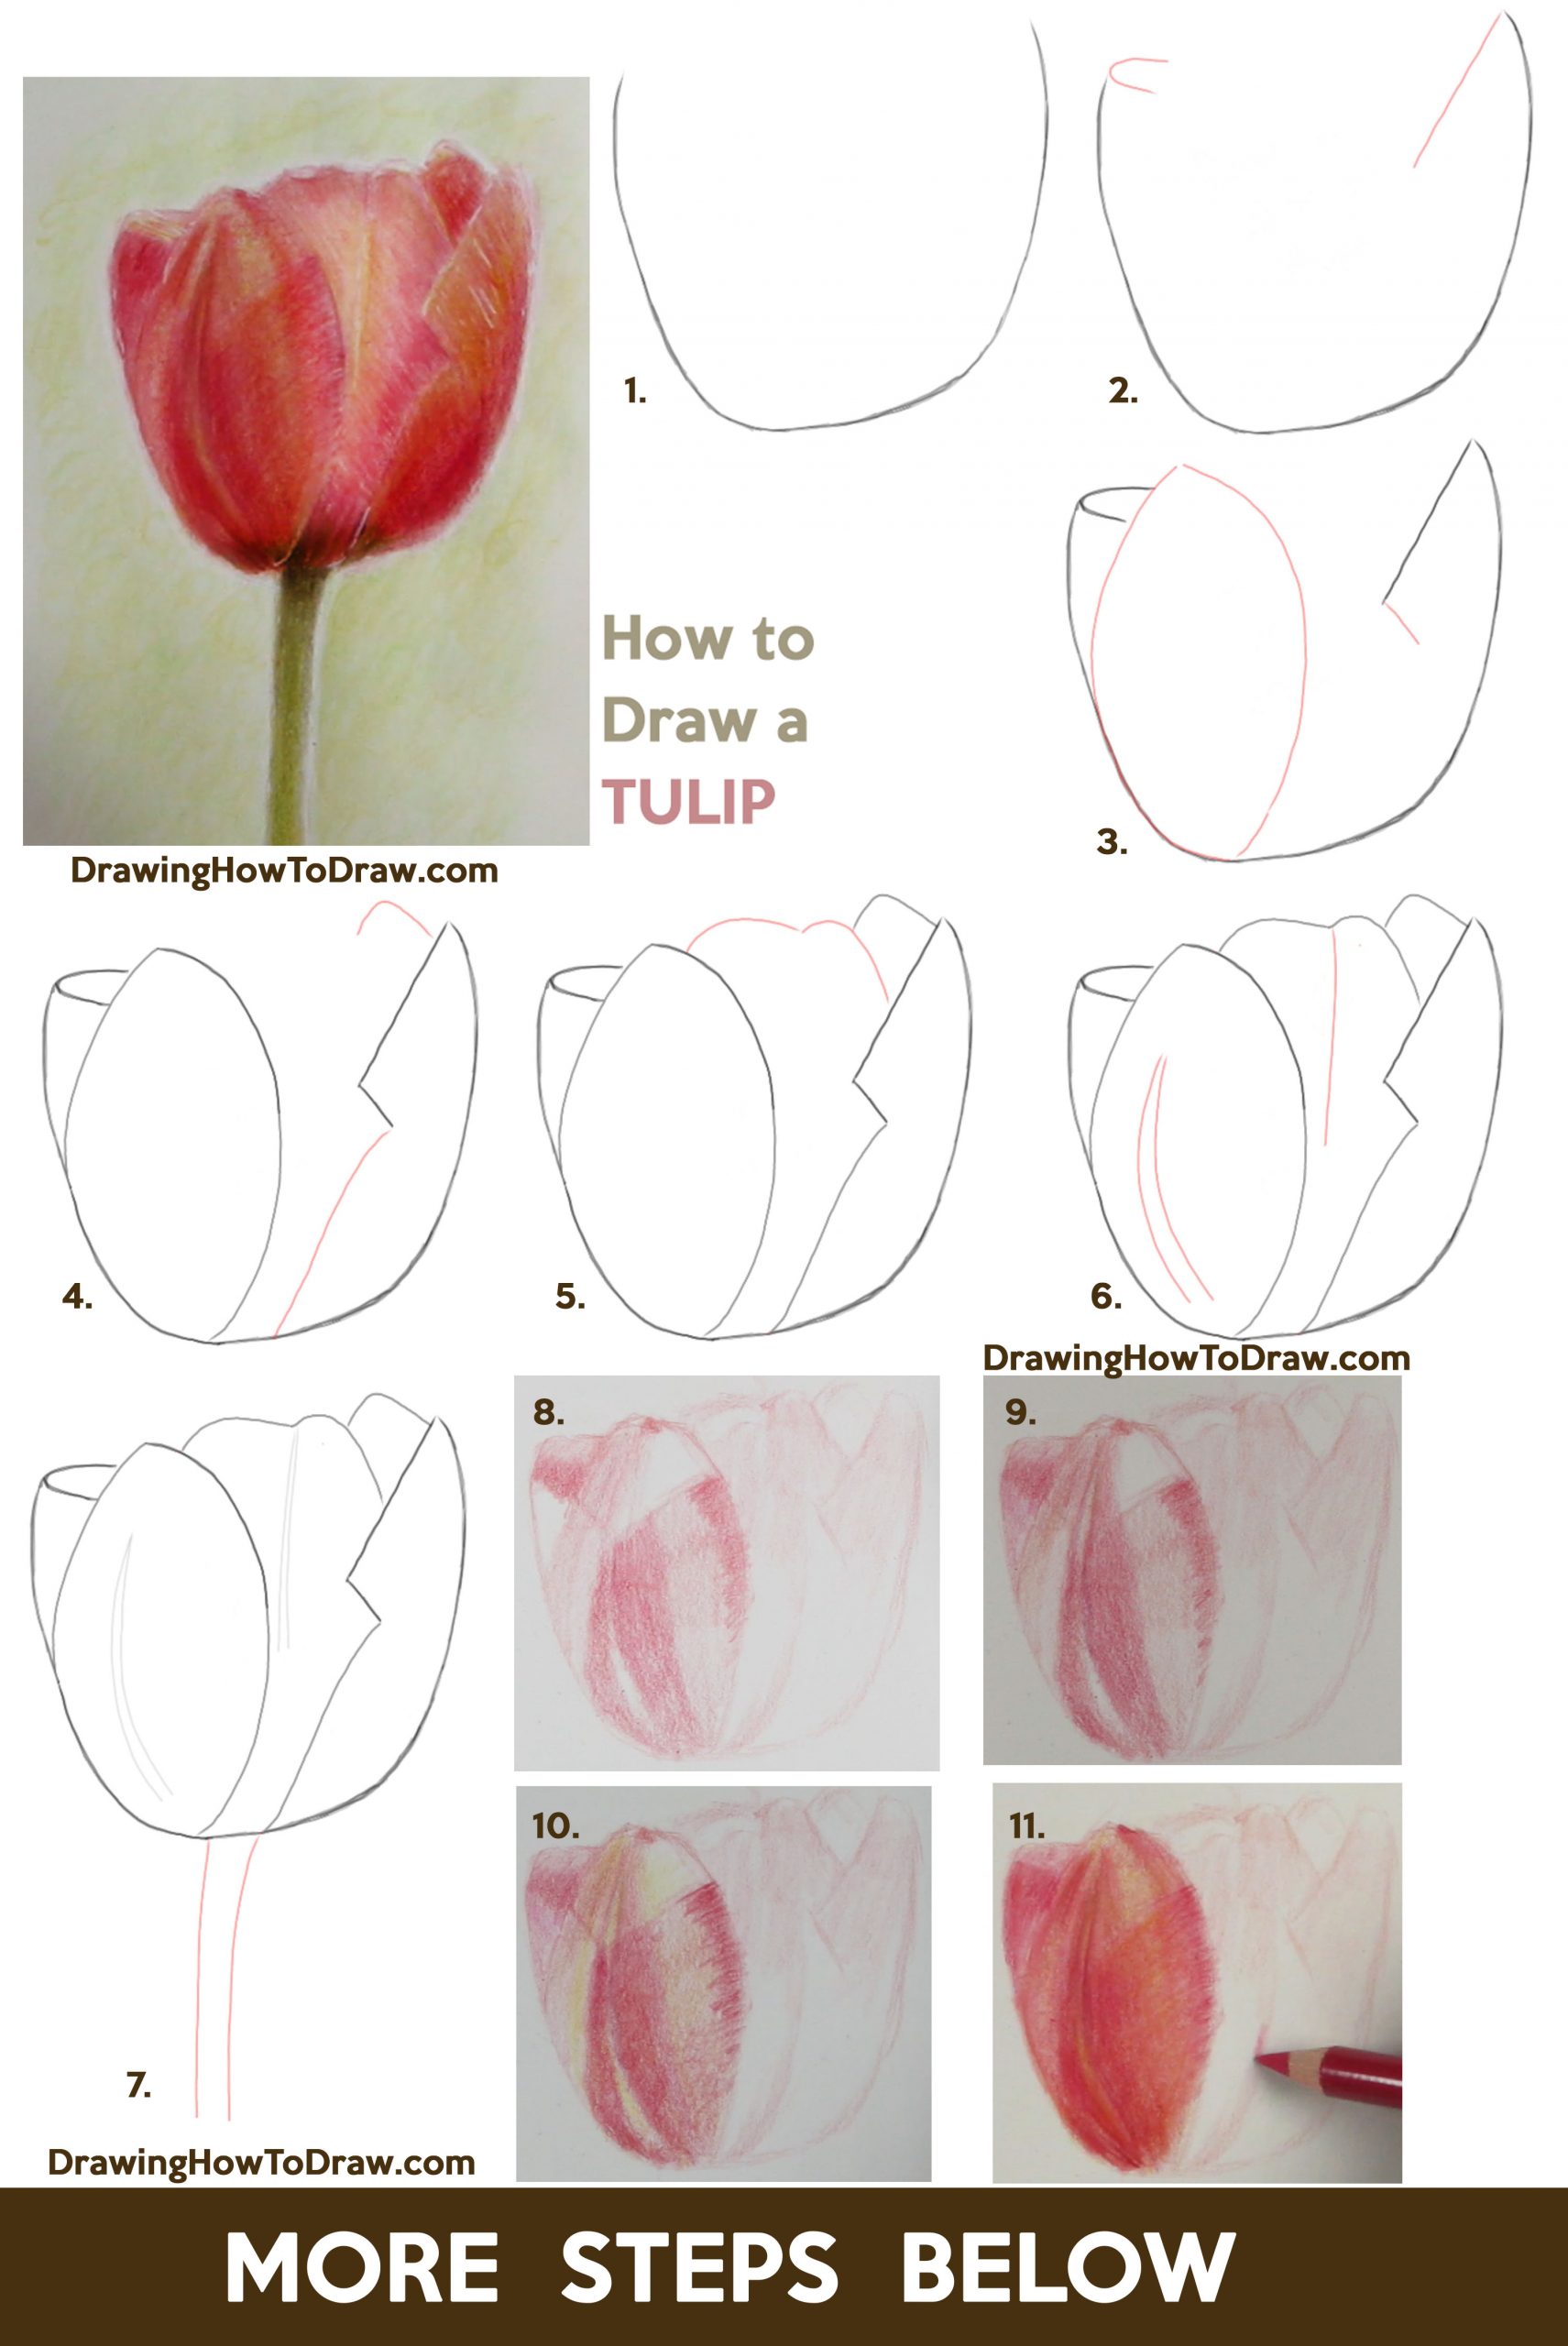
Today I will show you how to draw a beautiful red tulip using colored pencils. I guide you through the process in the following step by step tutorial. I hope you enjoy the tutorial.
Products that I Used in this Tutorial
Faber-Castell Polychromos Colored Pencils (this is a professional level set)
Tombow Dual Brush Pen Colorless Blender (Optional)
Learn How to Draw Tulips with Colored Pencils Easy Step by Step Drawing Tutorial
Written-Out Step by Step Drawing Instructions
(STEP 01) Draw a “U”-like shape.
(STEP 02) Draw a line and a sideways “U” shape.
(STEP 03) Draw a line and a leaf shape.
(STEP 04) Draw a wavy line and a sideways #7 shape.
(STEP 05) Draw a sideways #3-like shape on the top of the tulip.
(STEPS 06 + 07) Draw some curved lines.
(STEP 08) You will want to gather colored pencils in various shades of pink, red, orange, yellow, green, and tan. Start shading the flower with lighter pinks.
(STEP 09) Now add some darker pinks.
(STEP 10) Add some darker pinks and reds. Start adding some yellow.
(STEP 11) Add darker pinks, reds, and oranges to make a beautiful mixed shade of pink/red.
(STEP 12) Add some darker pinks to the right side of the flower.
(STEP 13) Add some yellows.
(STEP 14) Add some darker reds to the bottom of the flower.
(STEP 15) Add a mix of yellow, orange, tan, and red. I like using a Tombow Dual Brush Pen Colorless Blender to mix the colored pencils together a bit (it works a bit like watercolors). This is an optional step. Add various shades of green to the stem and flower.
(STEP 16) Use a white gel pen to add some highlights. Also, do this around the flower.
(STEP 17) Use yellows and light green to make a nice background.


ree this ree helped ree a lot ree
Excellent tutorial! Thank you so much!