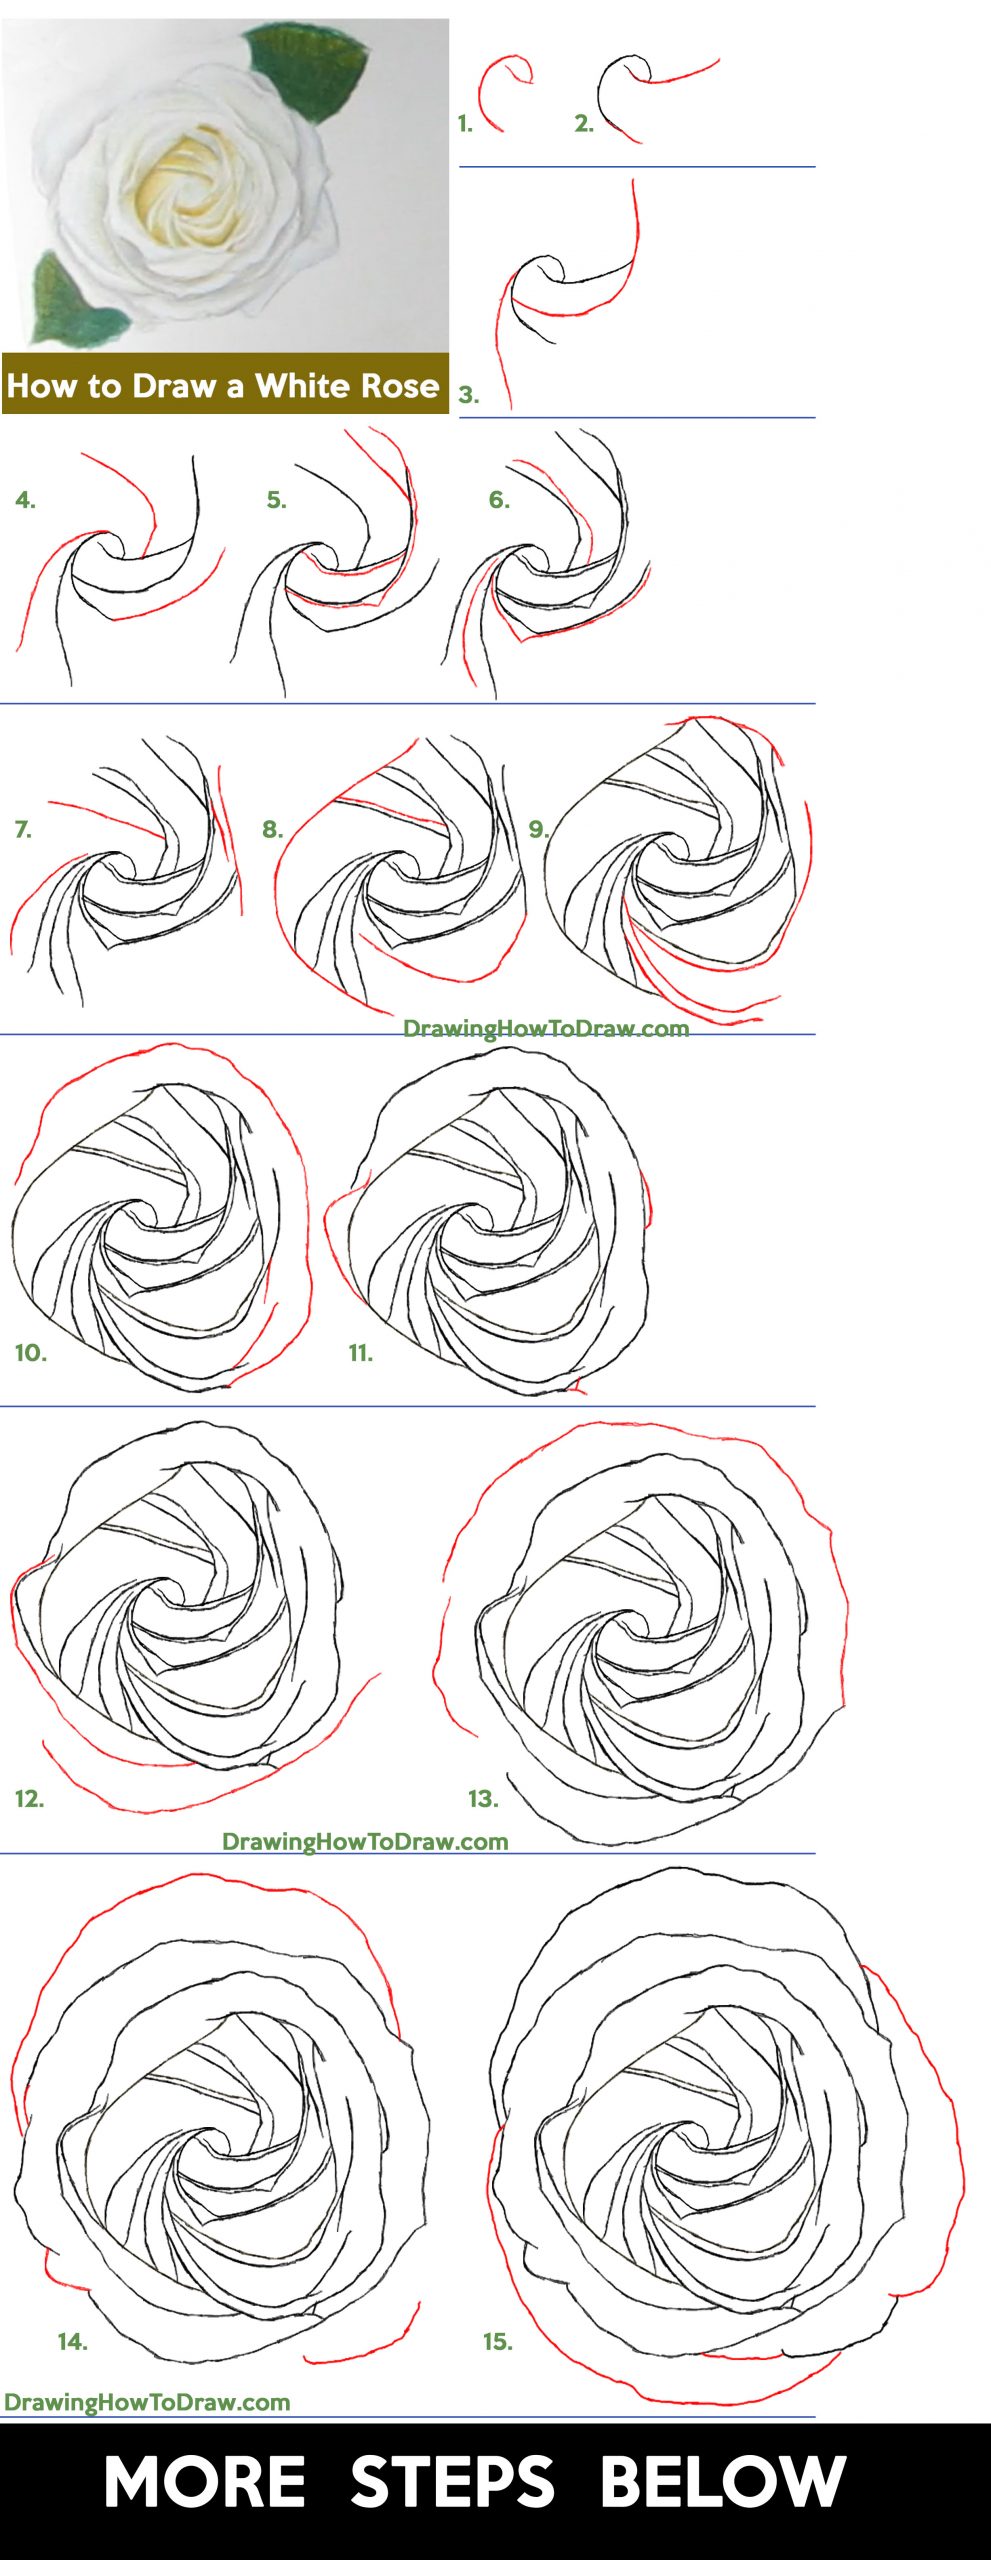
Today I’ll show you how to draw a white rose, as viewed from above. This rose is very tricky to draw, so intermediate drawers and above should give it a try. I used colored pencils at the end of the drawing to shade and color the white rose in. Have fun and Happy Drawing!
Learn How to Draw a White Rose from Above for Valentine’s Day – Using Pencils and Colored Pencils – Step by Step Drawing Tutorial
Written-Out Step by Step Drawing Instructions
(STEP 01) Draw a lowercase “e” shape to start off with.
(STEP 02) Draw a curved line at the top and bottom of that shape.
(STEP 03) The inner part of the rose sort of turns into a spiral. Draw curved lines spiraling from the center.
(STEP 04) Continue adding the curved lines.
(STEPS 05 – 06) Now draw some of the inner lines.
(STEP 07) Continue adding some lines.
(STEP 08) Draw a backward “j” shape on the left side and on the right. Also, draw an inner line.
(STEP 09) Spiral more curved lines around and outwards.
(STEP 10) Now we will start drawing the outer petals. Notice that there is some waviness to the lines.
(STEP 11) Draw a “Y”-like shape at the bottom. Draw some more petals.
(STEP 12) Draw some more curved lines for the outer petals.
(STEP 13) Draw wavy lines around the flower.
(STEP 14) Draw more wavy lines for outer petals. Connect the petals from the last step together.
(STEPS 15 … 19) There are a lot of outer petals, so keep going.
(STEPS 19 + 20) The petals get much more angled as you get closer toward the outside.
(STEP 21) Continue drawing petals. One of the petals looks like a sideways #3 shape. We have started drawing the 2 leaves that are on the top right and bottom left.
(STEP 22) Finish off the petals and the leaves.
(STEPS 23 – 26) Use colored pencils to shade in the rose. (There is a video above, you will get more visuals by watching the video).


