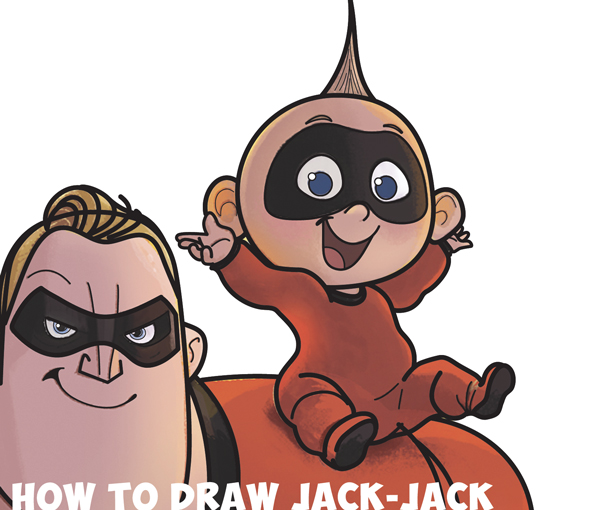

Today I’ll show you how to draw Jack Jack…the baby from The Incredibles 1 and The Incredibles 2. This is part 2 of a 5 part series on how to draw the entire Incredibles family.
I found the source picture for this tutorial using the Incredibles 2 Book for Kids
Part 1 of this Tutorial is here ( Draw Mr. Incredible)
We will guide you through the steps with simple to follow steps using alphabet letters, numbers, and simple geometric shapes. Have fun & Happy Drawing!
[ad#draw]
All blue lines in this tutorial are guide lines. Guide lines are there to guide you, but will be erased later. So draw guide lines very lightly.
(Step 1) As you will notice, the drawing here starts with a picture of Mr. Incredible. We drew him in part 1 of this tutorial series. If you want to just draw Jack-Jack, then just ignore Mr. Incredible. Part 1 of this Tutorial is here ( Draw Mr. Incredible)
Draw a letter “J” shaped guide lines on Mr.Incredible’s shoulder. Draw a circle-ish shape for Jack-Jack’s head.
(Step 2) Draw oval guide lines (lightly).
(Step 3) Draw another oval for the left arm. Draw an oval for the left leg. Draw odd-shapes for the right leg guide lines.
(Step 4) Draw curved lines within Jack-Jack’s head.
(Step 5) Now for the “real” lines. Draw a sideways “C” shape for his nose. Draw a curved line for his smile.
(Step 6) Draw a circle for each eye. Use the guide lines to help you place the facial features in the right spots. Draw a curved line for the bottom of the smile.
(Step 7) Draw a small circle in each eye for the highlights. Draw a curved line for his tongue.
(Step 8) Draw a curved line above each eye. Draw a curved line at the side of his mouth.
(Step 9) Draw a curved line at the bottom of each eye. Draw a sideways #3-like shape for the bottom of his mask.
(Step 10) Draw a lowercase letter “m”-like shape (in that it has the humps of an “m”). Draw a curved line for each eye brow.
(Step 11) Draw an upside down letter “V” shape for the hair. Draw a curved line on each brow.
(Step 12) Draw curved lines in the hair. Draw letter “C” shapes for the ears.
(Step 13) Draw a #5-like shape in each ear.
(Step 14) Now for the body. Use the guide lines to help you draw the “real” lines. Draw #3-like curves on top of the guide lines.
(Step 15) Again, continue to use the guide lines to help you place the “real” lines. Draw a sideways #3 shape on the right arm. Outline the guidelines for the leg.
(Step 16) Draw a curved line for Jack Jack’s collar. Draw a #5-like shape on the right side of his body.
(Step 17) Draw another curved line around the collar. Draw a backwards #3-like shape on his butt-region. Draw a letter “C” like-shape on his right leg/foot.
(Step 18) Draw a curved line on his left sleeve. Draw a few curved lines on the left leg. Draw a letter “S”-like curve for the right foot.
(Step 19) Draw a curved line on the left foot. Draw a curvy line on his right leg/thigh.
(Step 20) Draw 2 #3-like shapes.
(Step 21) Continue to add details.
(Step 22) Draw curved lines on his little feet. Draw a #3-like shape on his left hand.
(Step 23) Draw a sideways #2 shape on his left hand. Draw a #3 shape on his right hand. Draw a curved line between his legs.
(Step 24) Draw a “U”-like shape on his left hand. Draw a curved line on his right hand.
(Step 25) Draw a sideways #2-like shape on his left hand. Draw a few curved lines on his right hand.
(Step 26) Finish up the drawing.
Erase any lines that you don’t need any more.
Technorati Tags: the incredibles, the incredibles 2, disney, pixar, jack jack, baby, how to draw jack jack, how to draw the incredibles 2
Today, I'll show you how to draw a cartoon girl pointing at herself with step-by-step…
Today, I'll show you how to draw a crying cute little cartoon guy who is…
Today, I'll show you how to draw an adorably super-cute cartoon owl on a witch's…
Today I will show you how to draw a super cute baby-version of Winnie The…
Today I'll show you how to draw the famous Pusheen cat from social media, such…
Today I'll show you how to draw this super cute chibi version of Deadpool from…
View Comments