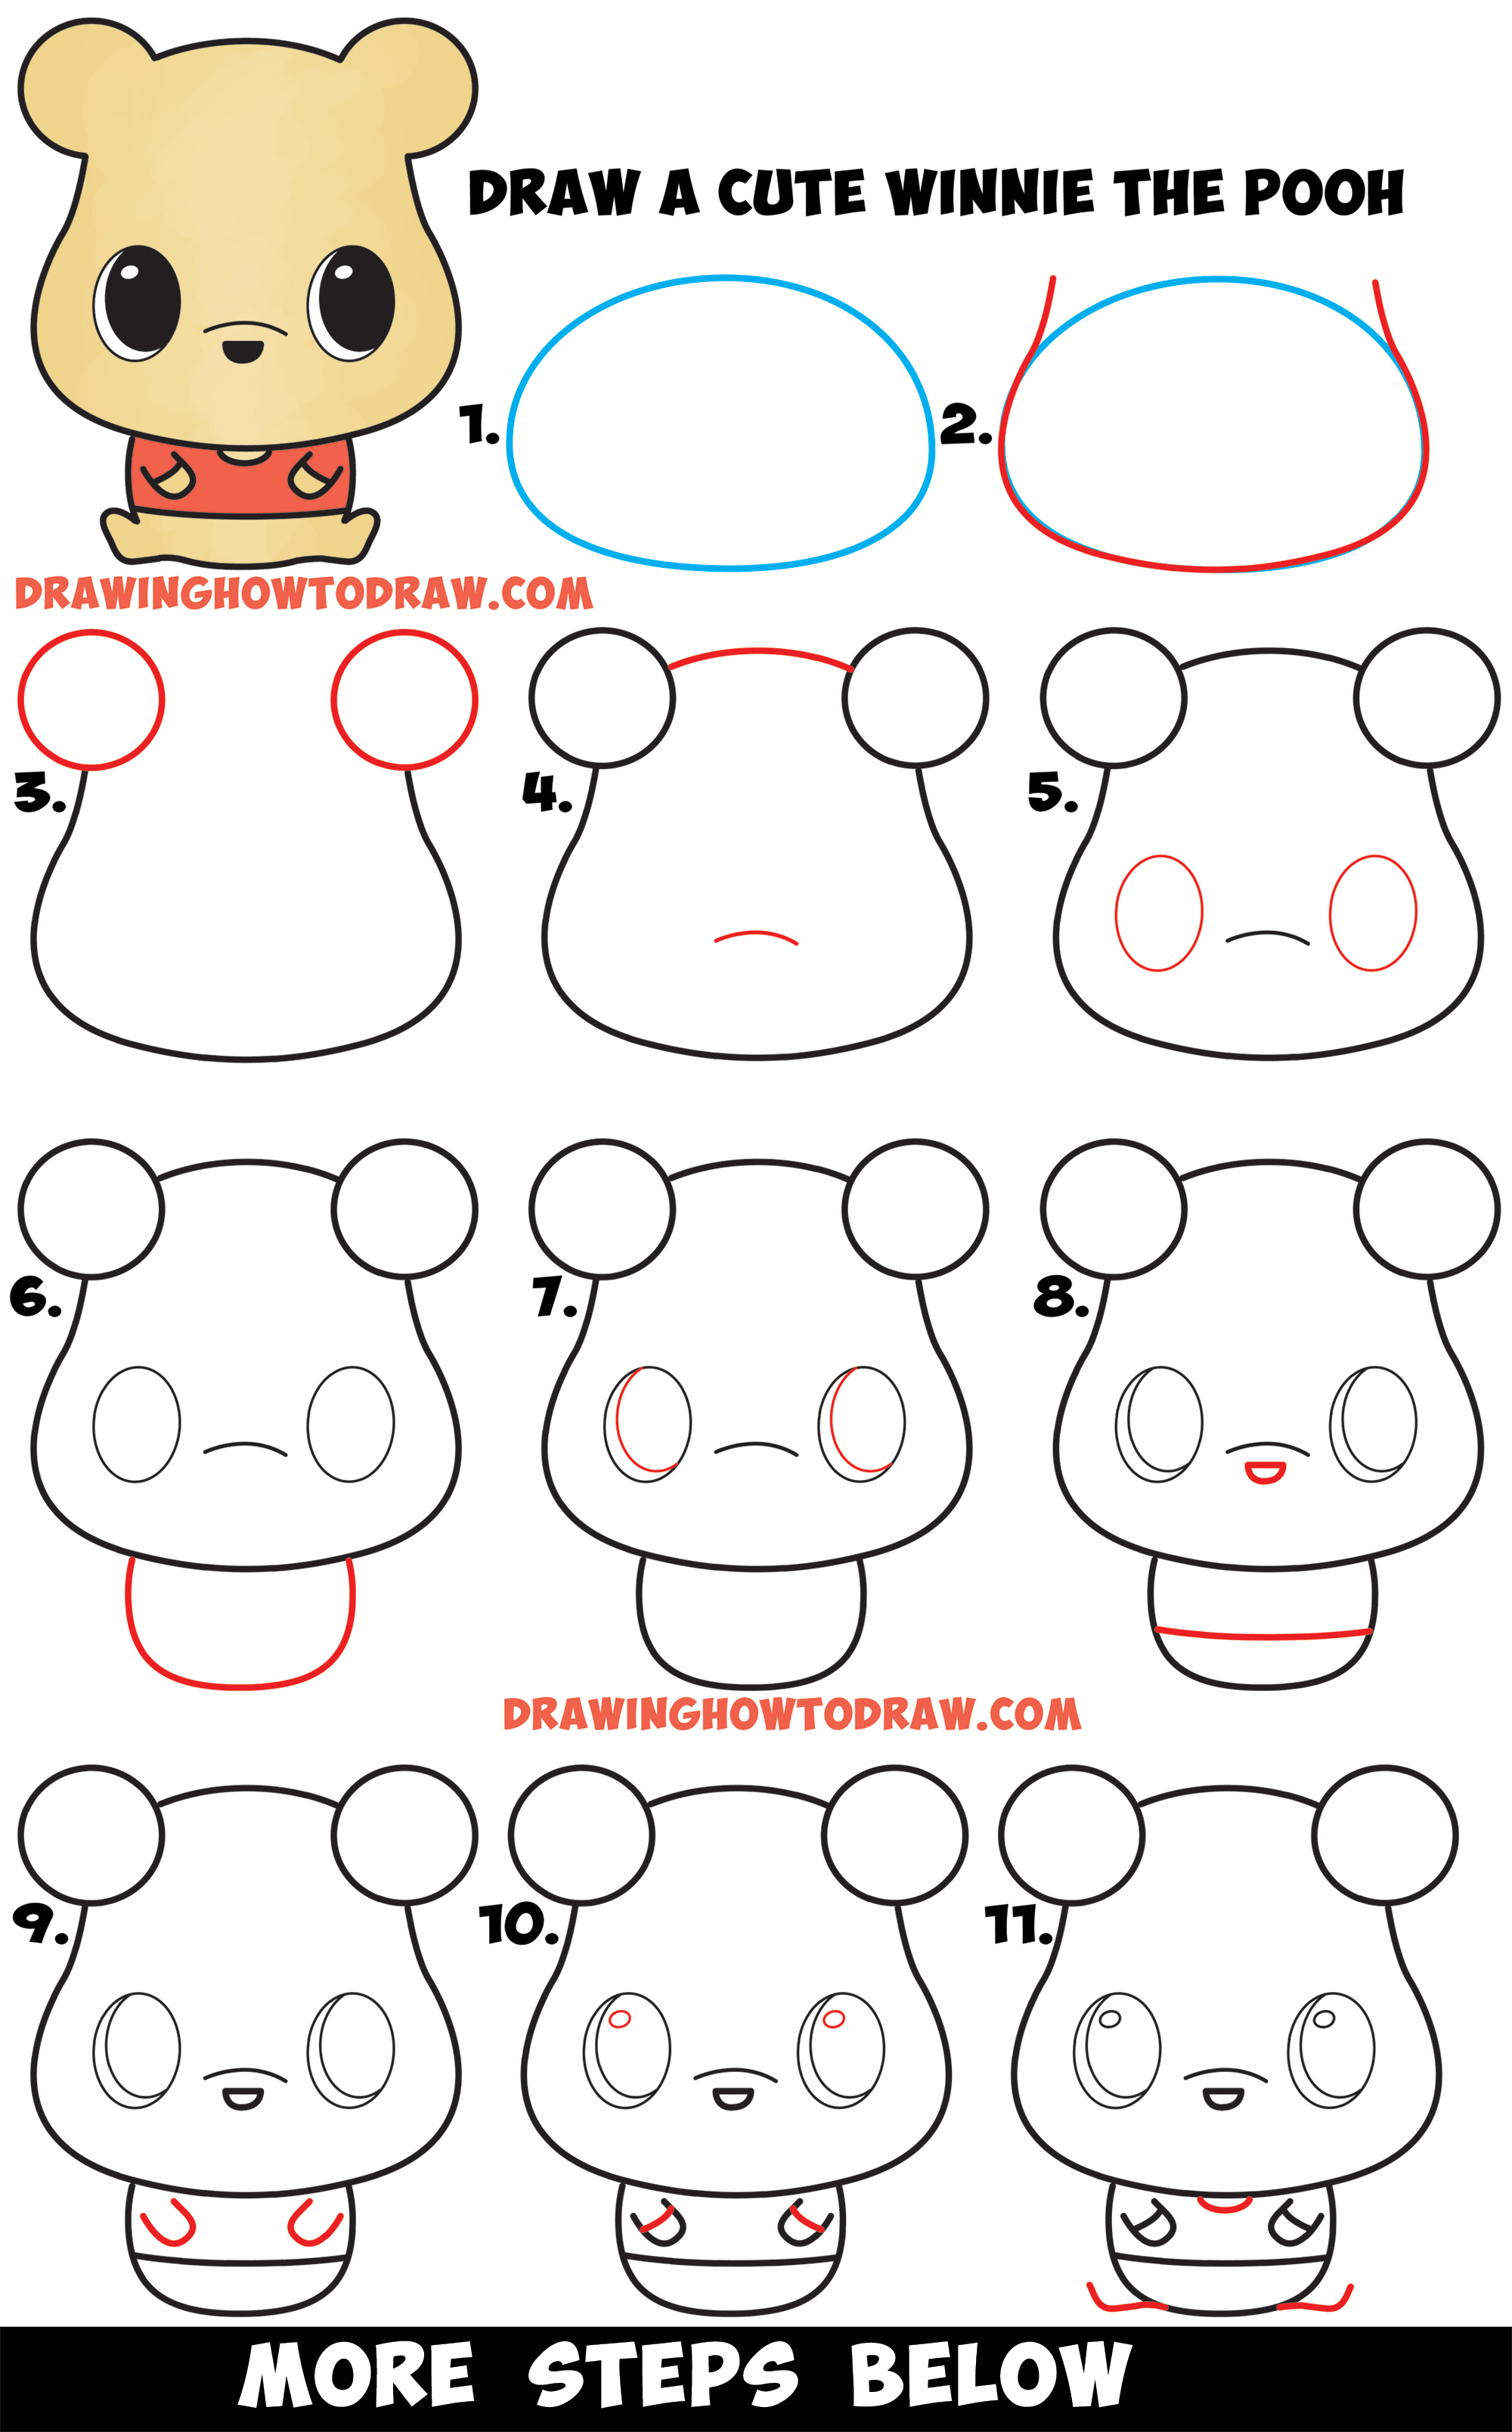
Today I’ll show you how to draw a super-cute version of Disney’s Winnie The Pooh (kawaii / chibi). I got the idea for this drawing when I saw these cute Winnie the Pooh plush toys on Amazon. I had to draw them. I will try to make this drawing as easy as possible by breaking Pooh down into simple geometric shapes, alphabet letters, and numbers. Have fun! Happy Drawing!
How to Draw a Cute Chibi / Kawaii Winnie The Pooh Simple Steps Drawing Lesson for Beginners & Kids
[ad#draw]
Written-Out Step by Step Drawing Instructions
(Step 1) Lightly draw an oval…this is a guide line and will be erased in a minute.
(Step 2) Draw the shape around the guide line and then erase the parts of the guide line that are left.
(Step 3) Draw a circle for each ear.
(Step 4) Draw curved lines.
(Step 5) Draw an oval for each eye.
(Step 6) Draw a letter “U” body.
(Step 7) Draw a letter “C” shape in each eye.
(Step 8) Draw a slightly curved line for the bottom of Pooh’s shirt. Draw a sideways letter “D” shape for his nose.
(Step 9) Draw “U” shaped arms.
(Step 10) Draw a curved line on each arm for the sleeves. Draw an oval in each eye for the highlights.
(Step 11) Draw a curved line (sideways “C”) for the shirt’s collar. Draw a sideways “?”-like shape for each leg.
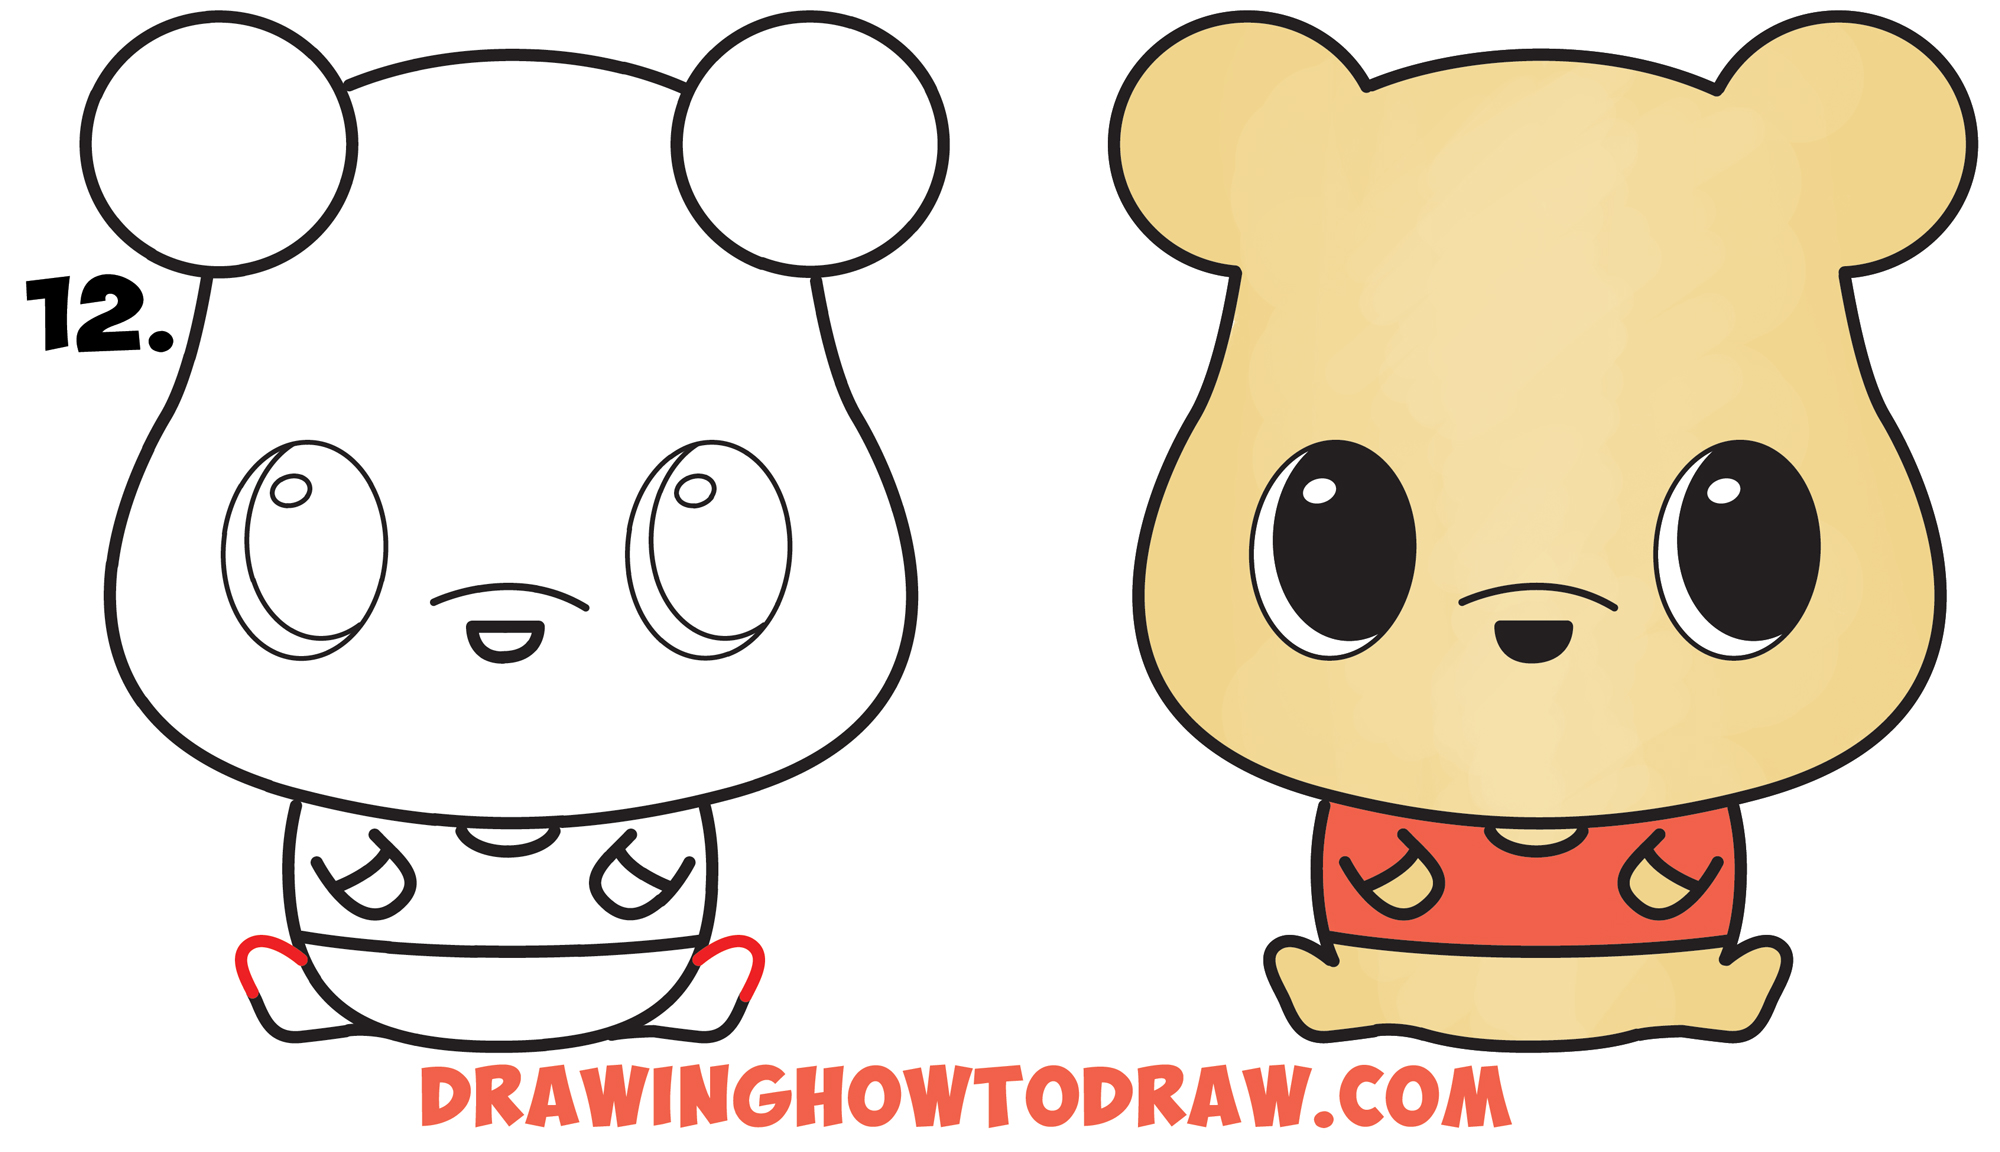
(Step 12) Draw a “U” like shape on the end of each foot.
Color him in as well as you can. I hope that you had fun!
Technorati Tags: winnie the pooh, pooh, how to draw winnie the pooh, chibi, kawaii, cute, chibi winnie the pooh, cute winnie the pooh


Nice drawing, I love it.