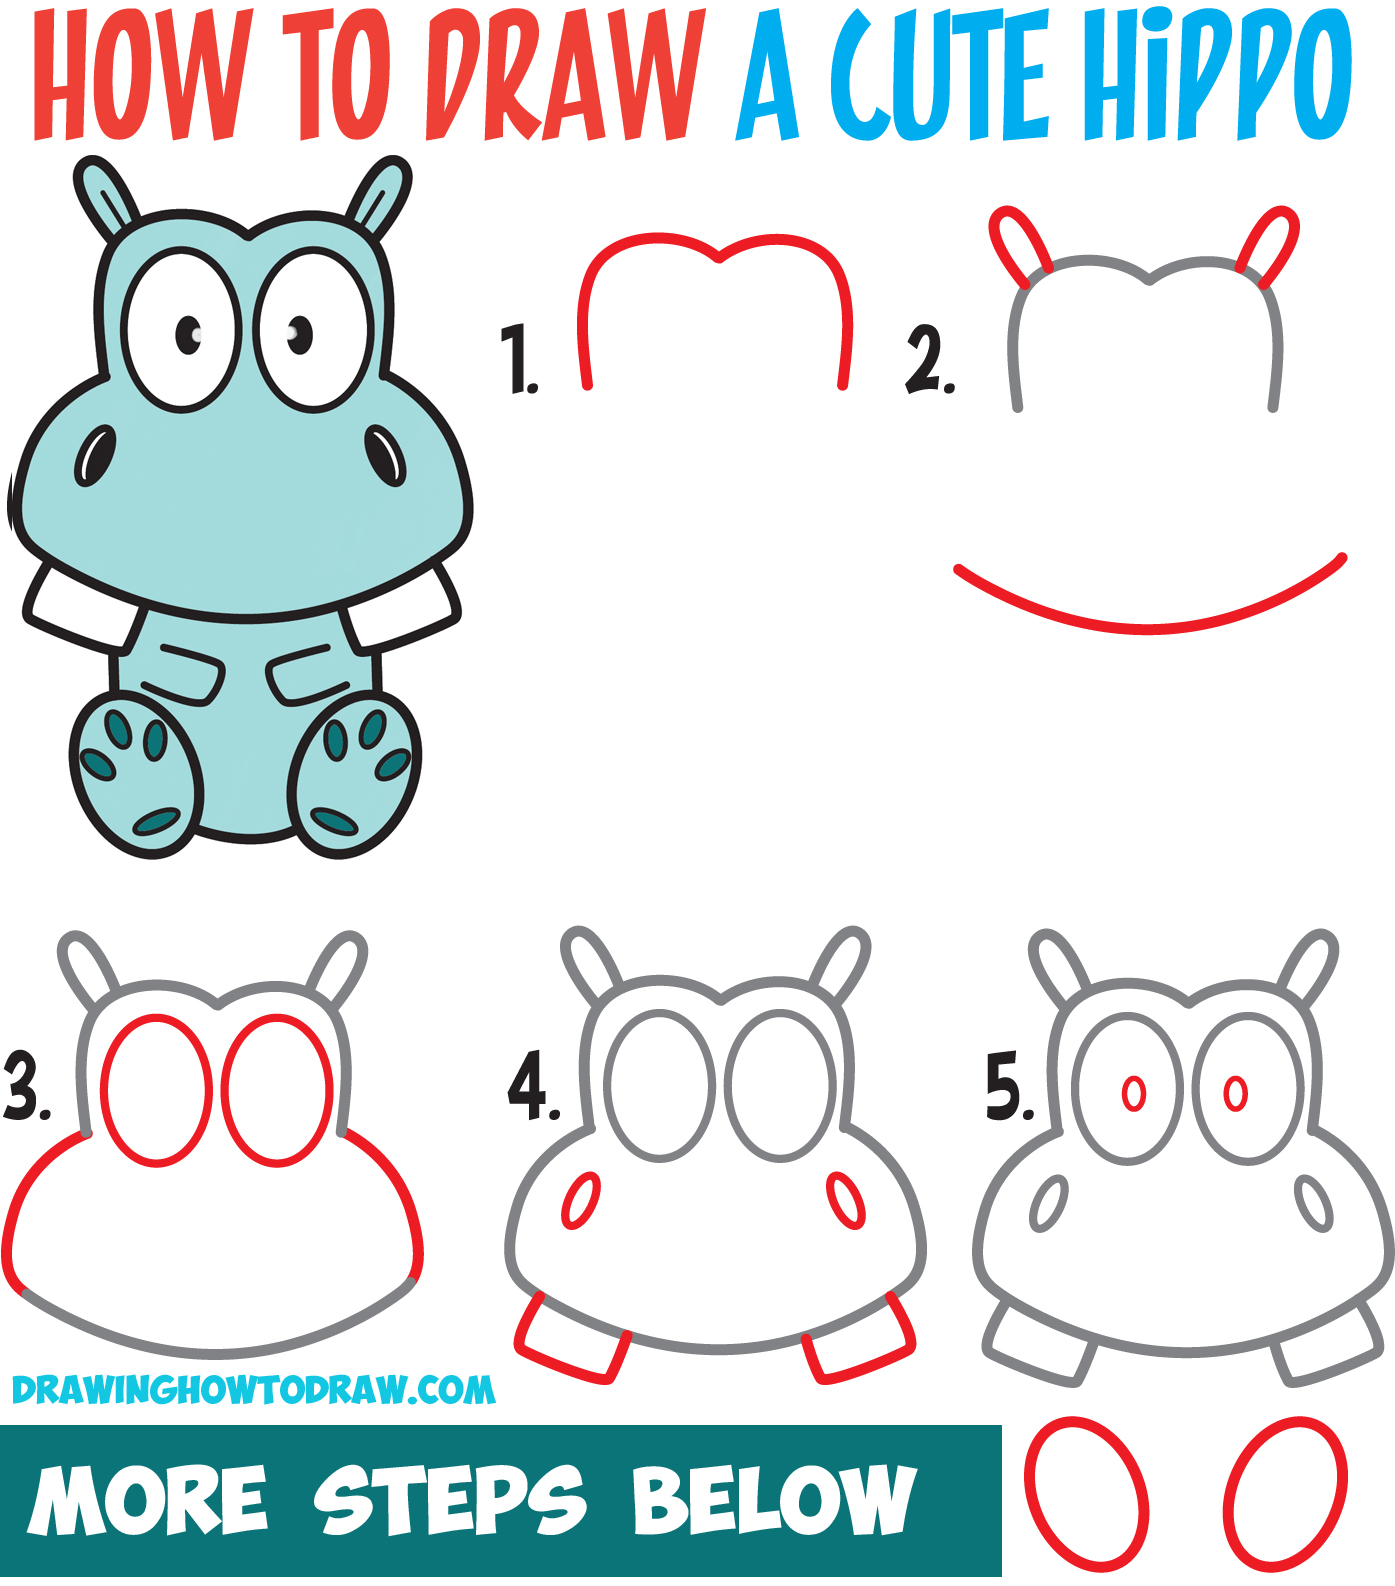
Today I’ll show you how to draw an adorable baby hippo with easy-to-follow instructions. I will guide you through the steps using simple geometric shapes & alphabet letters. Enjoy & Happy Drawing!
You Might Also Like Our Other Kawaii / Chibi Lessons
Learn How to Draw a Cute / Kawaii Cartoon Hippo Easy Step by Step Drawing Tutorial for Beginners & Kids
[ad#draw]
Written-Out Step by Step Drawing Instructions
(Step 1) Draw a letter “m”-like shape.
(Step 2) Draw letter “U”-shaped ears. Draw a curved line for the bottom of the head.
(Step 3) Draw an oval for each eye. Draw curved lines for the sides of the face.
(Step 4) Draw an oval for each nostril. Draw partial rectangles for the teeth.
(Step 5) Draw ovals for eyes and feet.
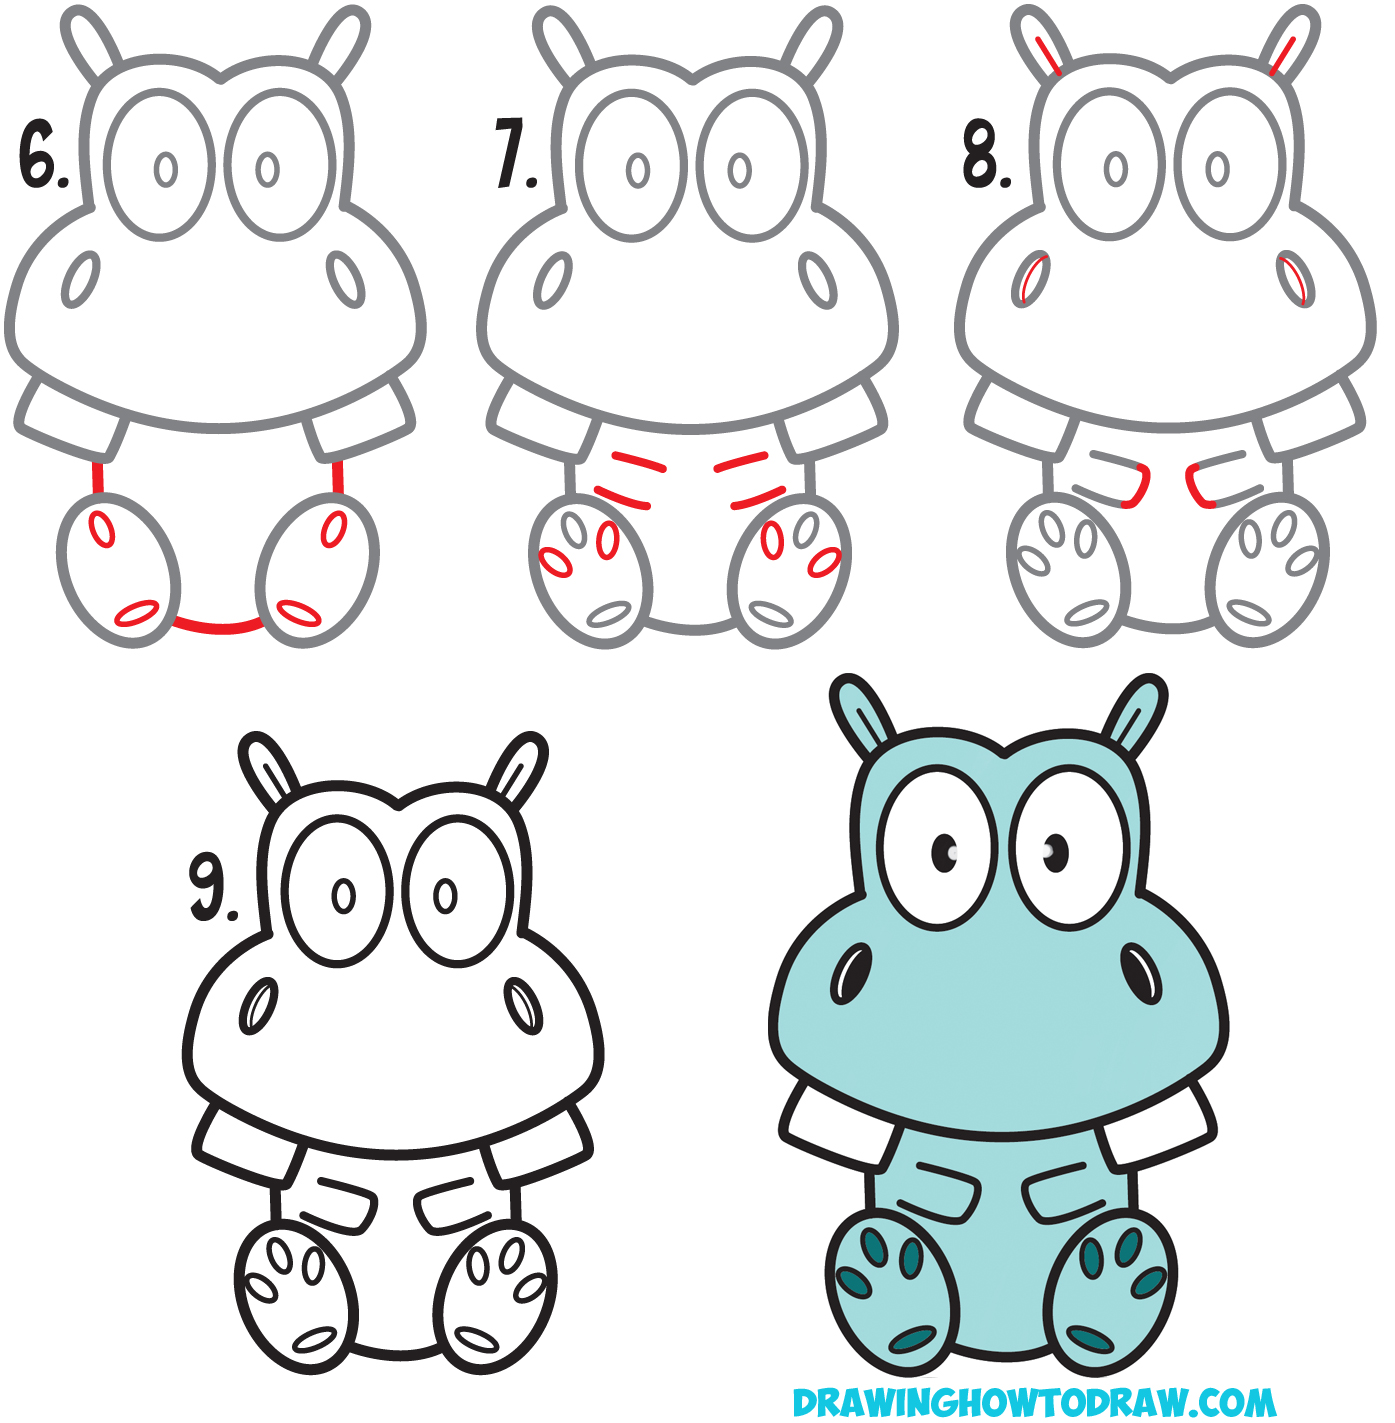
(Step 6) Draw a line on both sides of the body. Draw a curved line between the legs. Draw ovals in the feet.
(Step 7) Draw more ovals on the feet. Draw 2 lines for each arm.
(Step 8) Draw a curved line on each arm. Draw a line in each ear. Draw a curved line in each nostril.
(Step 9) Here is what the hippo should look like when done.
(Step 10) Here is what the hippo looks like colored in.
You Might Also Like Our Other Kawaii / Chibi Lessons
Technorati Tags: how to draw a hippo, cartoon hippo, cute hippo, kawaii hippo, chibi hippo


