Today I’ll share with you a landscape drawing tutorial for kids – a great first landscape art lesson for children to learn in an easy way. We will show you how to draw the basic outlines and shapes of the trees, hills and mountains and then show you how to add patterns to add a visually beautiful texture to your landscape drawing. Have fun and happy drawing! This is a Spring, Fall, or Summer Landscape.
Learn How to Draw Landscapes (Sunset, Mountains, Hills, Trees) for Kids Simple Steps Drawing Lesson Using Patterns to Add Texture (Great Art Lesson for Children)
[ad#draw]
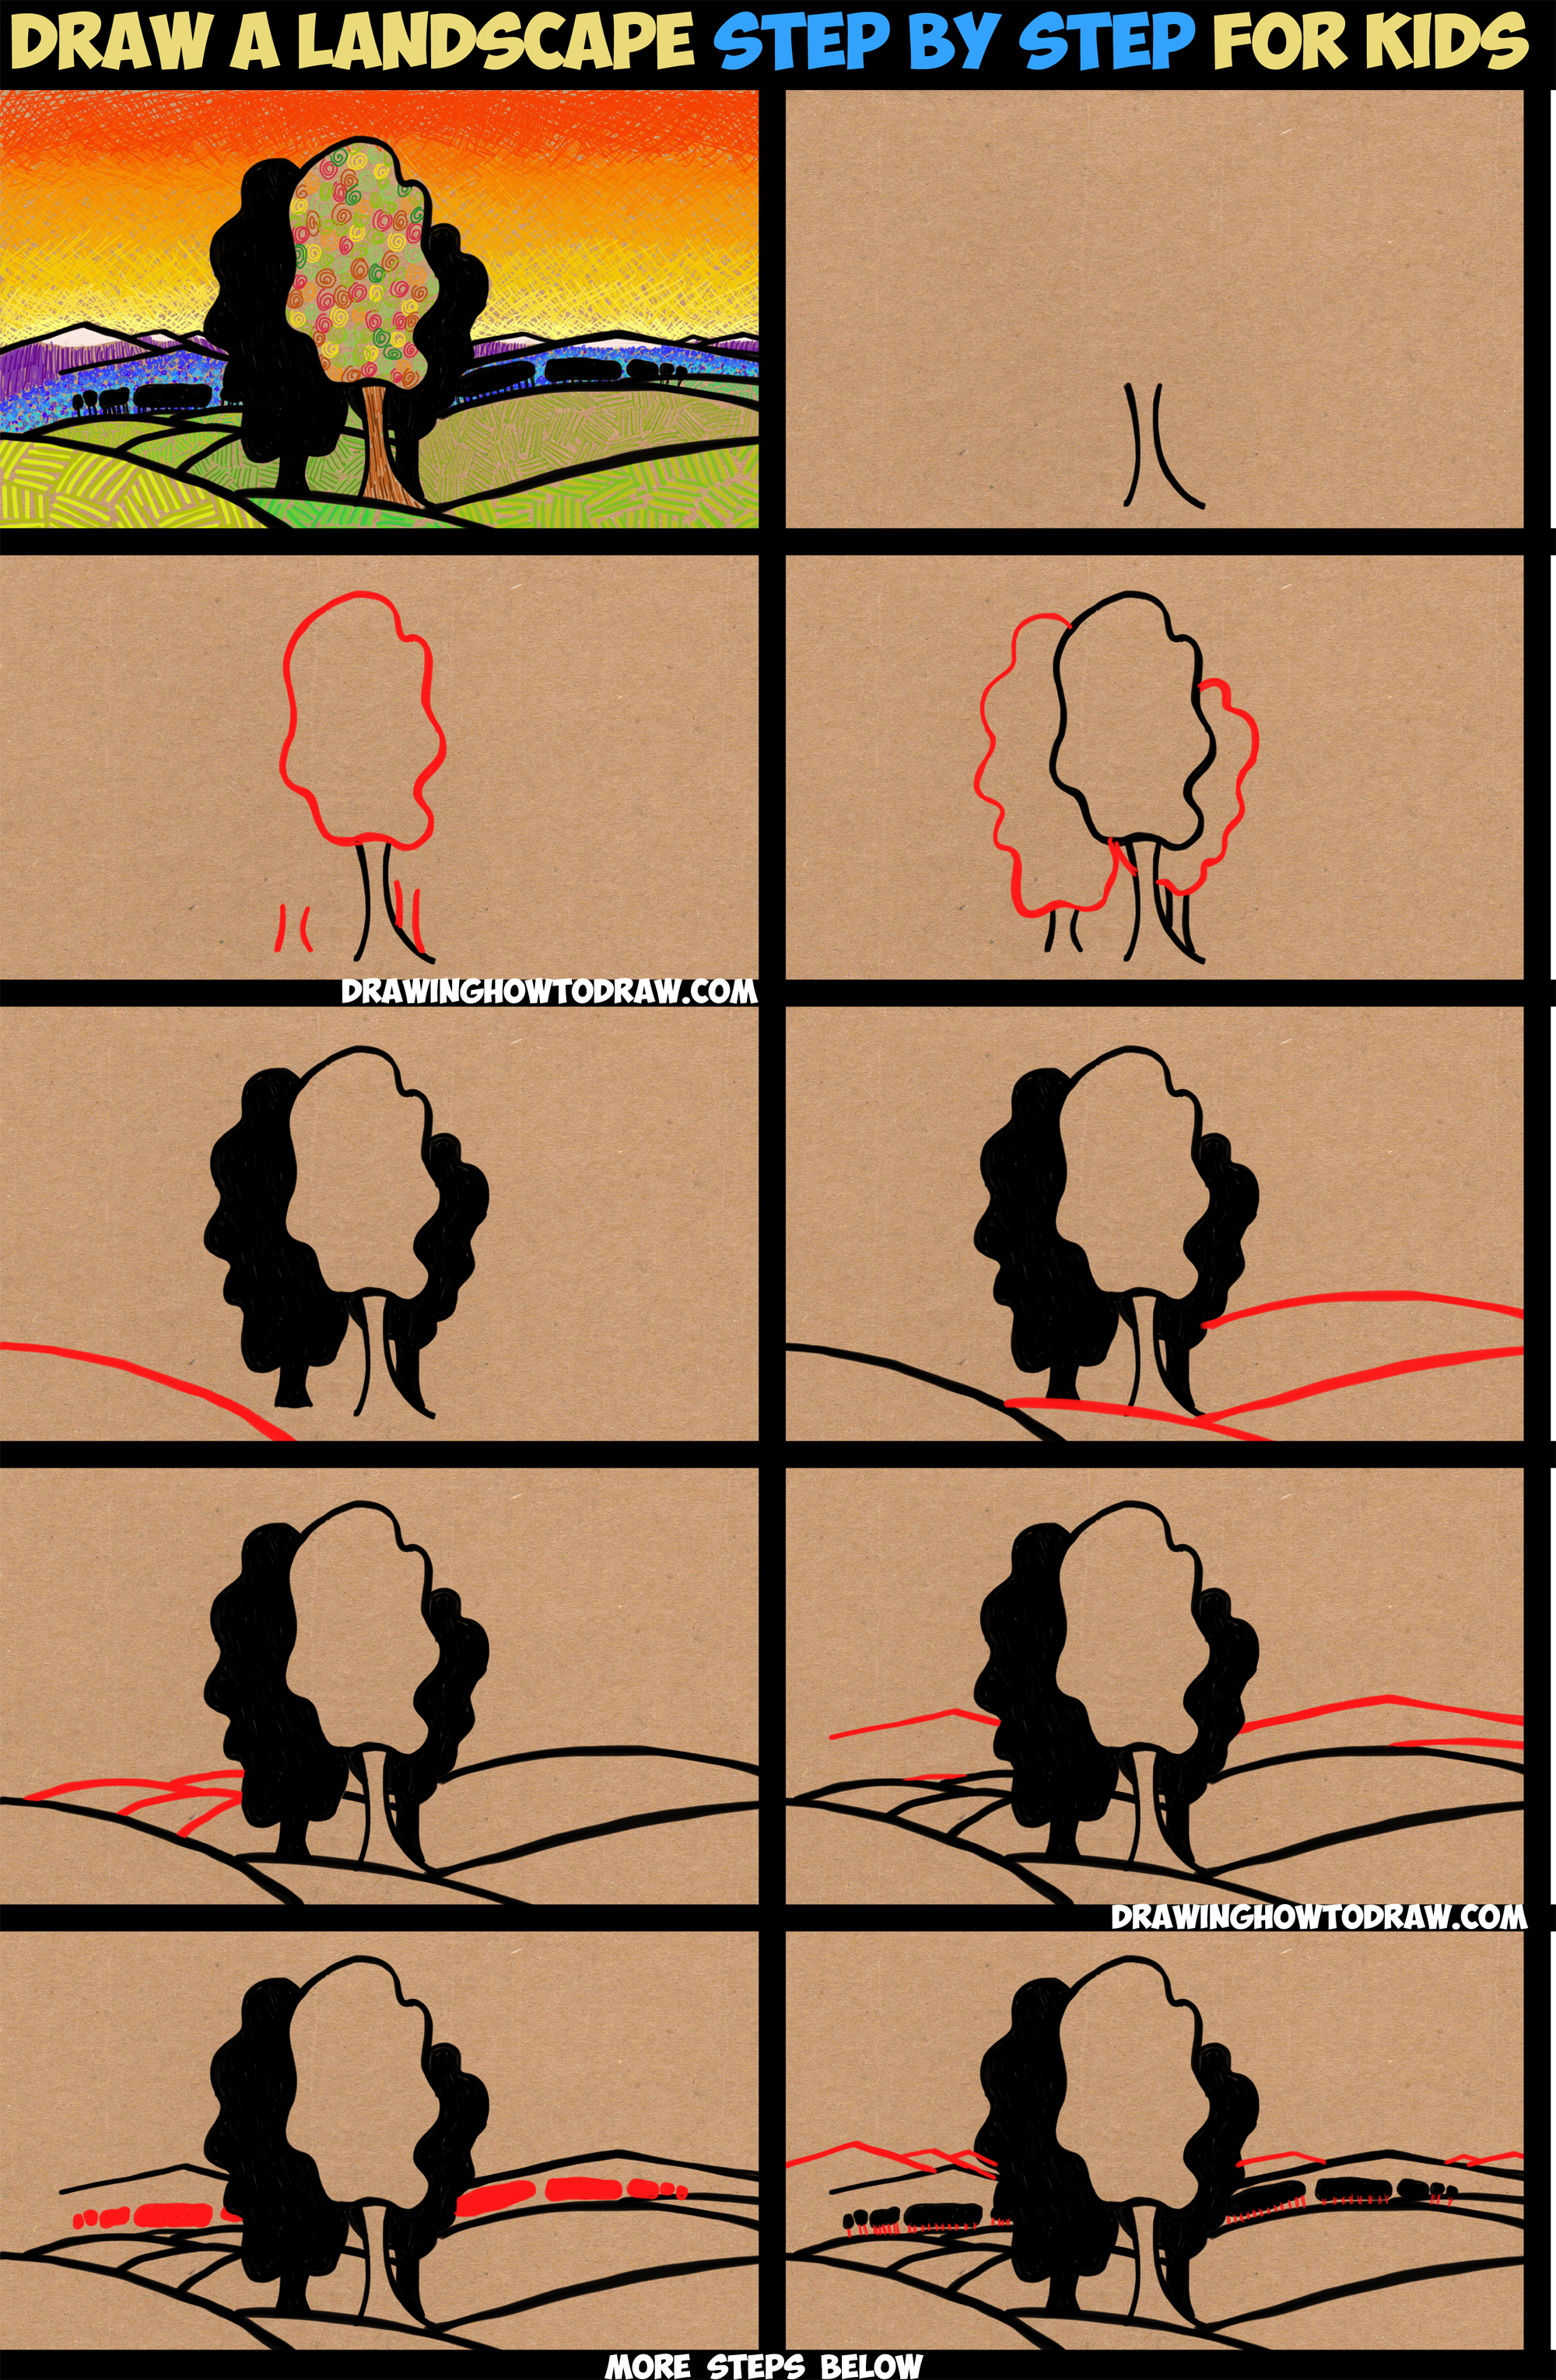
Written-Out Step by Step Drawing Instructions
(Step 1) Draw 2 curved lines for the first tree trunk.
(Step 2) Draw a cloud-like shape for the top of the tree. Draw 2 more sets of curved lines for 2 more tree trunks.
(Step 3) Draw 2 more cloud shapes for the tops of the 2nd and 3rd tree.
(Steps 4-6) Fill in the 2nd and 3rd tree with black. Draw curved lines for hills.
(Step 7) Draw 2 more curved lines for hills and then draw tops of triangles for mountains.
(Step 8) Draw a bunch of blocky / oval-y shapes for trees.
(Step 9) Draw lines for the bottoms of the far away trees. Draw more tops of triangles for mountains.
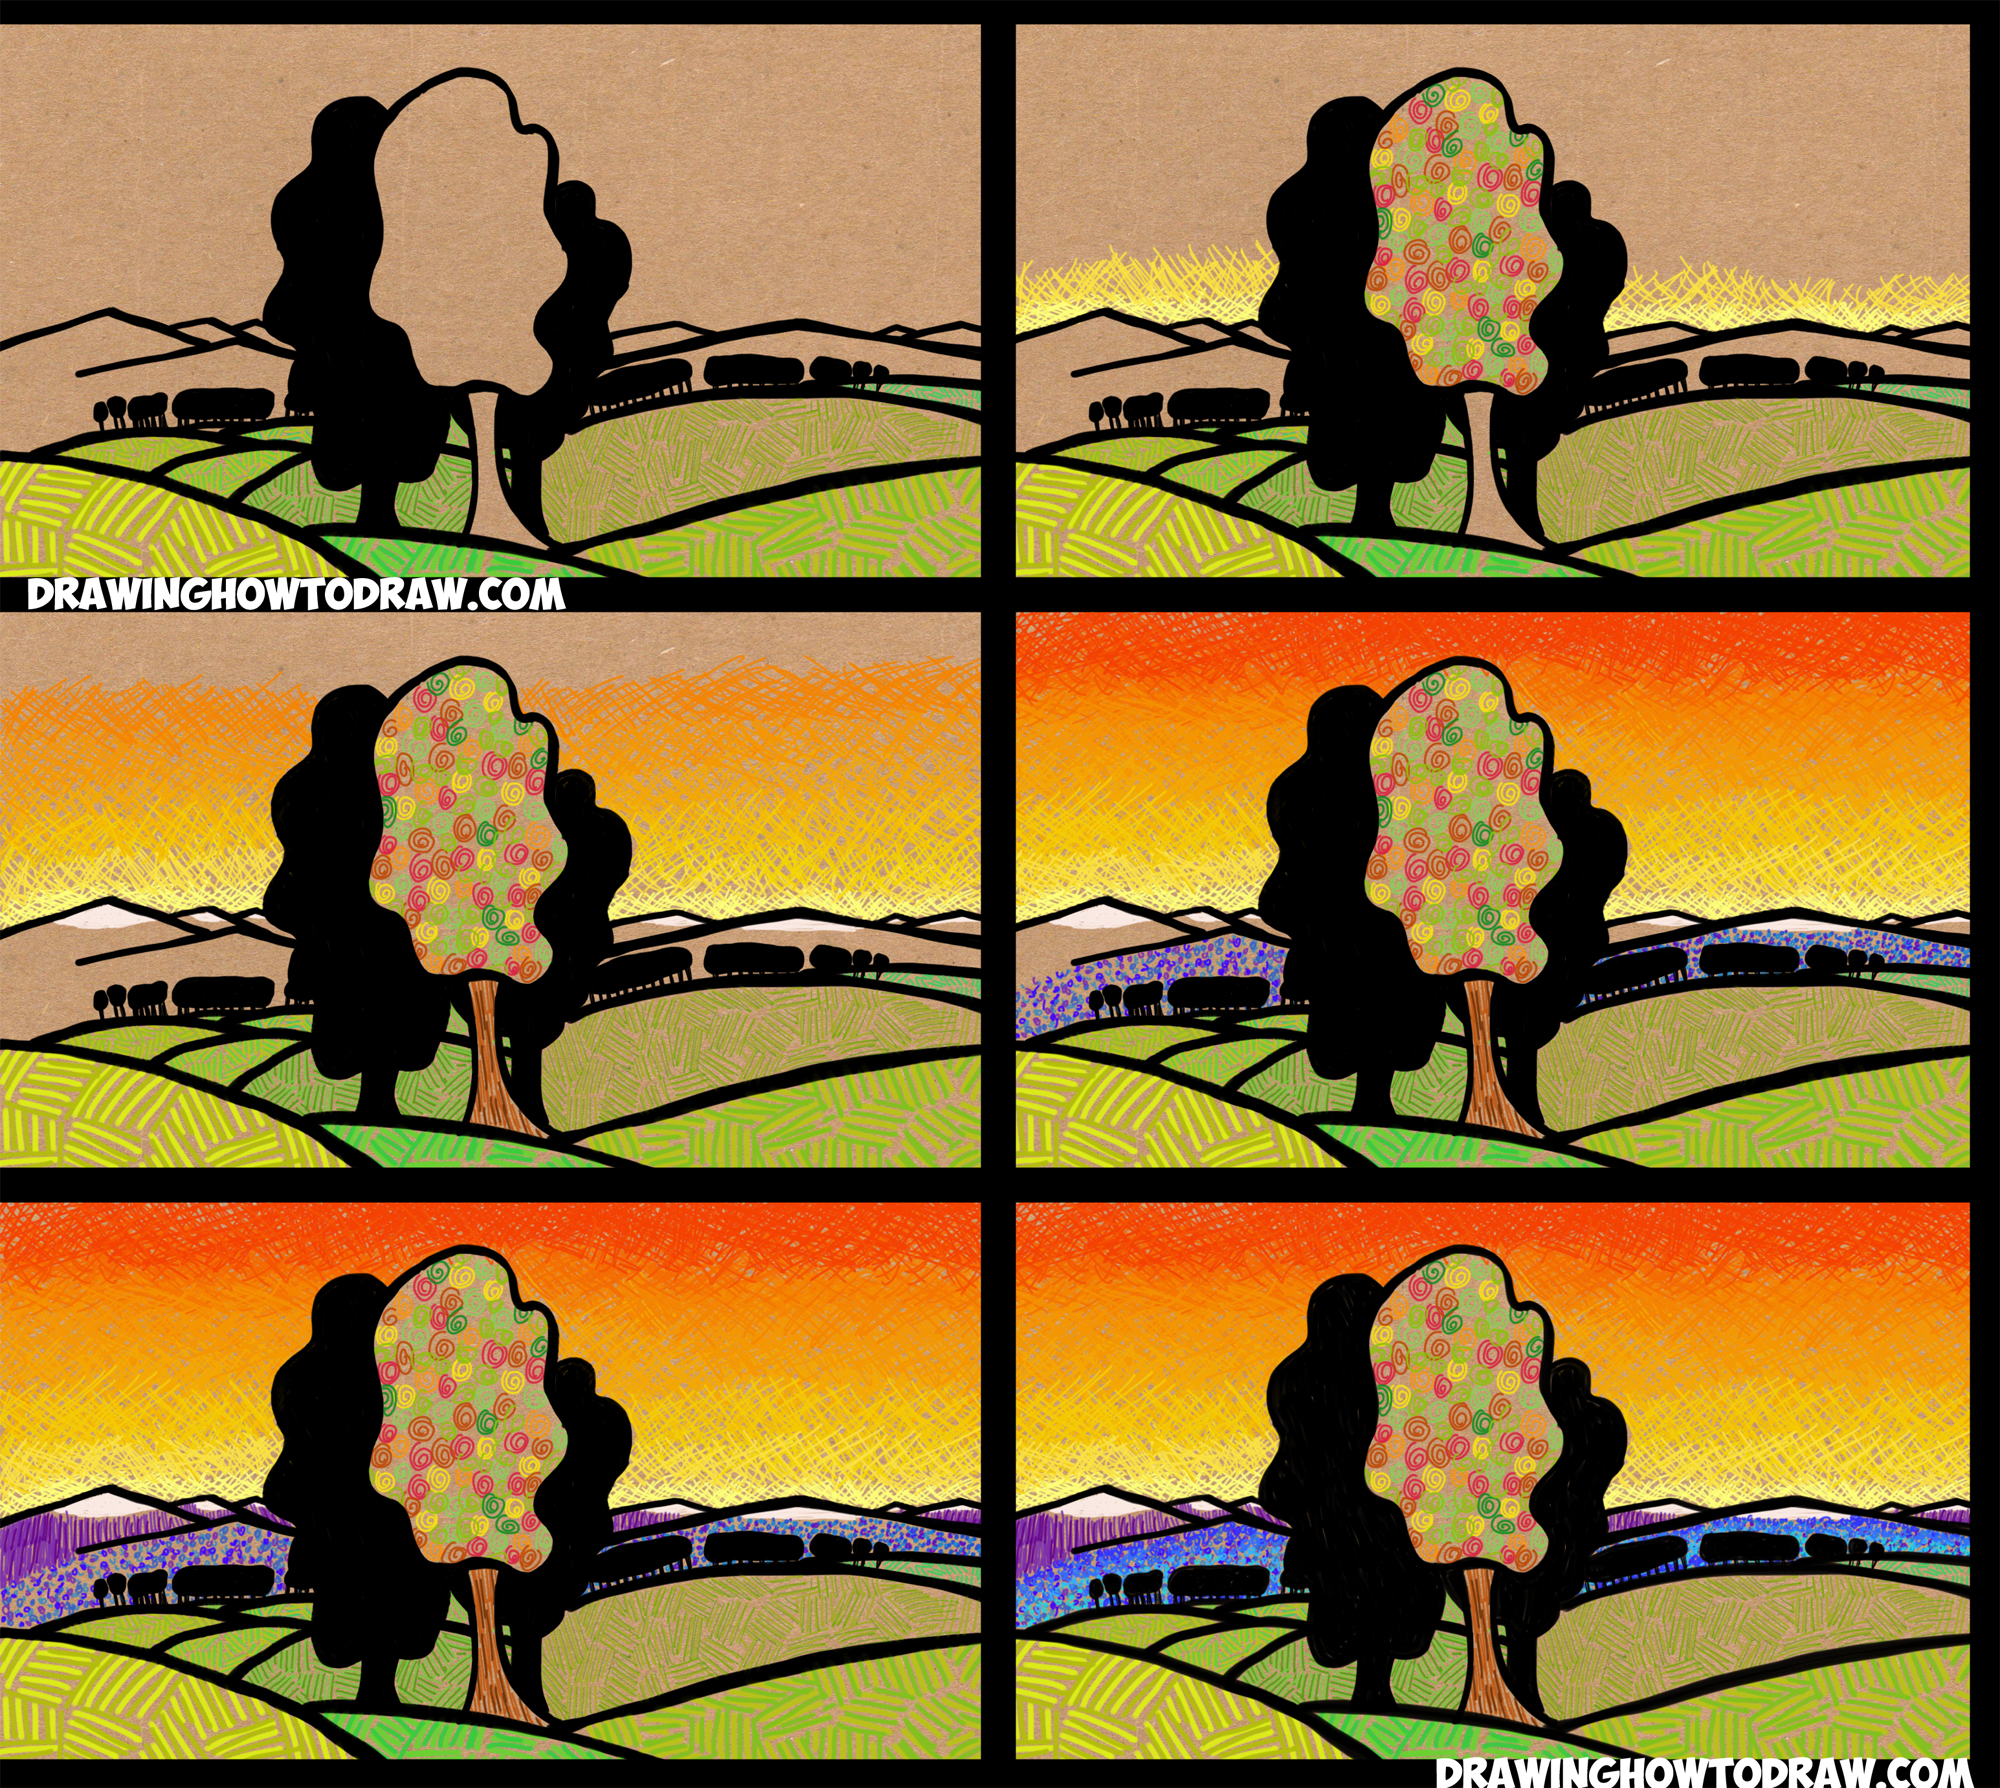
(Step 10) Choose patterns that you want to add to your hills – you don’t have to use the patterns that I used.
(Step 11) Add pattern to your center tree. Start drawing the sunset. I used letter ‘x’ shapes as my pattern for the sunset, but you can use whatever pattern you choose. For the sunset, go from yellow at the bottom up to red at the top. You will use light yellow, darker yellow, light orange, darker orange, red.
(Rest of the steps) Use a different pattern for the mountain and hills.
Technorati Tags: landscapes, landscapes for kids, sunset, sunsets, mountain, mountains, trees, hills, texture, patterns


