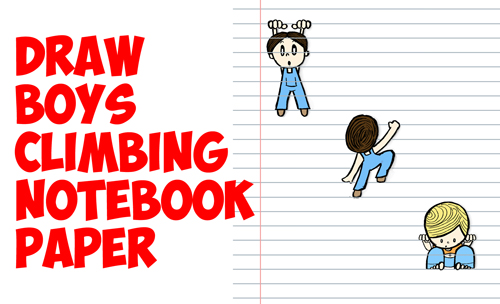

Today I’ll show you how to draw a super cool picture of boys climbing a piece of notebook paper. This is so much fun to draw and when drawn on a piece of paper can trick the eye into thinking there are really cartoon characters climbing on your lined notebook paper. We have broken down this tutorial into simple steps. Happy Drawing!
You Might Also Like Our Other Cool Stuff Tutorials
[ad#draw]
(Step 1) Very lightly draw pencil lines across a piece of paper (with a ruler). Use a piece of notebook paper to figure out how to space the lines properly. Number some of the lines 1 through 18.
(Step 2A) Draw sideways #8 shapes for fingers on line #1.
(Step 2B) Draw an oval for another finger on each hand. Draw a letter ‘U’ shape for the face.
(Step 2C) Draw a wide/short oval for each thumb. Draw an upside down letter ‘v’ shape for the boy’s bangs.
(Step 2D) Draw a letter ‘C’ shape for each ear. Draw outward turned lines for the body.
(Step 2E) Draw a sideways #3 shape for the hair. Draw the bottom of a rectangle for the collar.
(Step 2F) Draw oval eyes. Draw an upside down letter ‘V’ shape in between the legs (with a curved line on top of it).
(Step 2G) Draw some lines.
(Step 2H) Draw 2 lines for each arm. Draw an oval mouth.
(Step 2I) Draw lines in the hair. Draw curved line eye brows. Draw an oval in each eye. Draw a letter ‘U’ for each foot. Draw the bottom of a rectangle for the pocket. Draw a curved line nose.
(Step 3A) Draw an oval in the center of the page, a bit above the #10 line.
(Step 3B) Draw the bottom of a rectangle and two lines.
(Step 3C) Draw 2 lines for each arm.
(Step 3D) Draw a #3 shaped right hand. Draw a ‘?’-like shape for the right leg. Draw a curved line for the thumb on the left hand.
(Step 3E) Draw 2 lines.
(Step 3F) Draw a few more lines and a curved line on the left hand.
(Step 3G) Draw a sideways letter ‘C’ shape for each foot. Draw a curved line in between the legs.
(Step 3H) Draw curved lines for hair. Draw a curved line for the bottom of the left pants leg.
(Step 4A) Draw an oval on the right side of the page, slightly above line #17.
(Step 4B) Draw a sideways #7 shape for bangs. Draw upside down letter ‘U’ shapes for legs.
(Step 4C) Draw ovals for eyes and thumb toes.
(Step 4D) Draw ovals for toes…they get smaller as you further from the center.
(Step 4E) Draw oval fingers.
(Step 4F) Draw some lines.
(Step 4G) Even more lines.
(Step 4H) Draw curved liens for hair. Draw letter ‘U’ shaped elbows. Draw a curved line in the pants legs.
(Step 4I) Draw some curved lines and an oval belly button.
(Step 5) Use a blue pen to draw over the pencil notebook paper lines. If the boys’ body part is above the line, then the notebook paper line will not be drawn…because it will be hidden. For example, for the top boy the fingers are above the line, so the line is not drawn inside the fingers.
(Step 6) Erase the pencil lines and color in the boys. Draw a red line on the left side of the page.
(Step 7) IF you want to, draw a shadow on the right side of each boy. Also draw a gray oval under each boy, all the way at the bottom of the page.
I hope that you enjoyed this tutorial…come back soon for more!
You Might Also Like Our Other Cool Stuff Tutorials
Technorati Tags: cool effect, cool trick, 3d trick, 3d effect, optical illusion, notebook paper, climbing, cartoon boys
Today, I'll show you how to draw a cartoon girl pointing at herself with step-by-step…
Today, I'll show you how to draw a crying cute little cartoon guy who is…
Today, I'll show you how to draw an adorably super-cute cartoon owl on a witch's…
Today I will show you how to draw a super cute baby-version of Winnie The…
Today I'll show you how to draw the famous Pusheen cat from social media, such…
Today I'll show you how to draw this super cute chibi version of Deadpool from…
View Comments
Epic pictures I loved this!!!
Thanks Grace!