


Today I’ll show you how to draw a car in two pt perspective. This is a hard tutorial so it might take a bit of effort on your part. You will be drawing this car (convertible) using two point perspective techniques.
If you want a more detailed guide to perspective, we have a few of them here.
You Might Also Like Our Other Perspective Drawing Tutorials
[ad#draw]
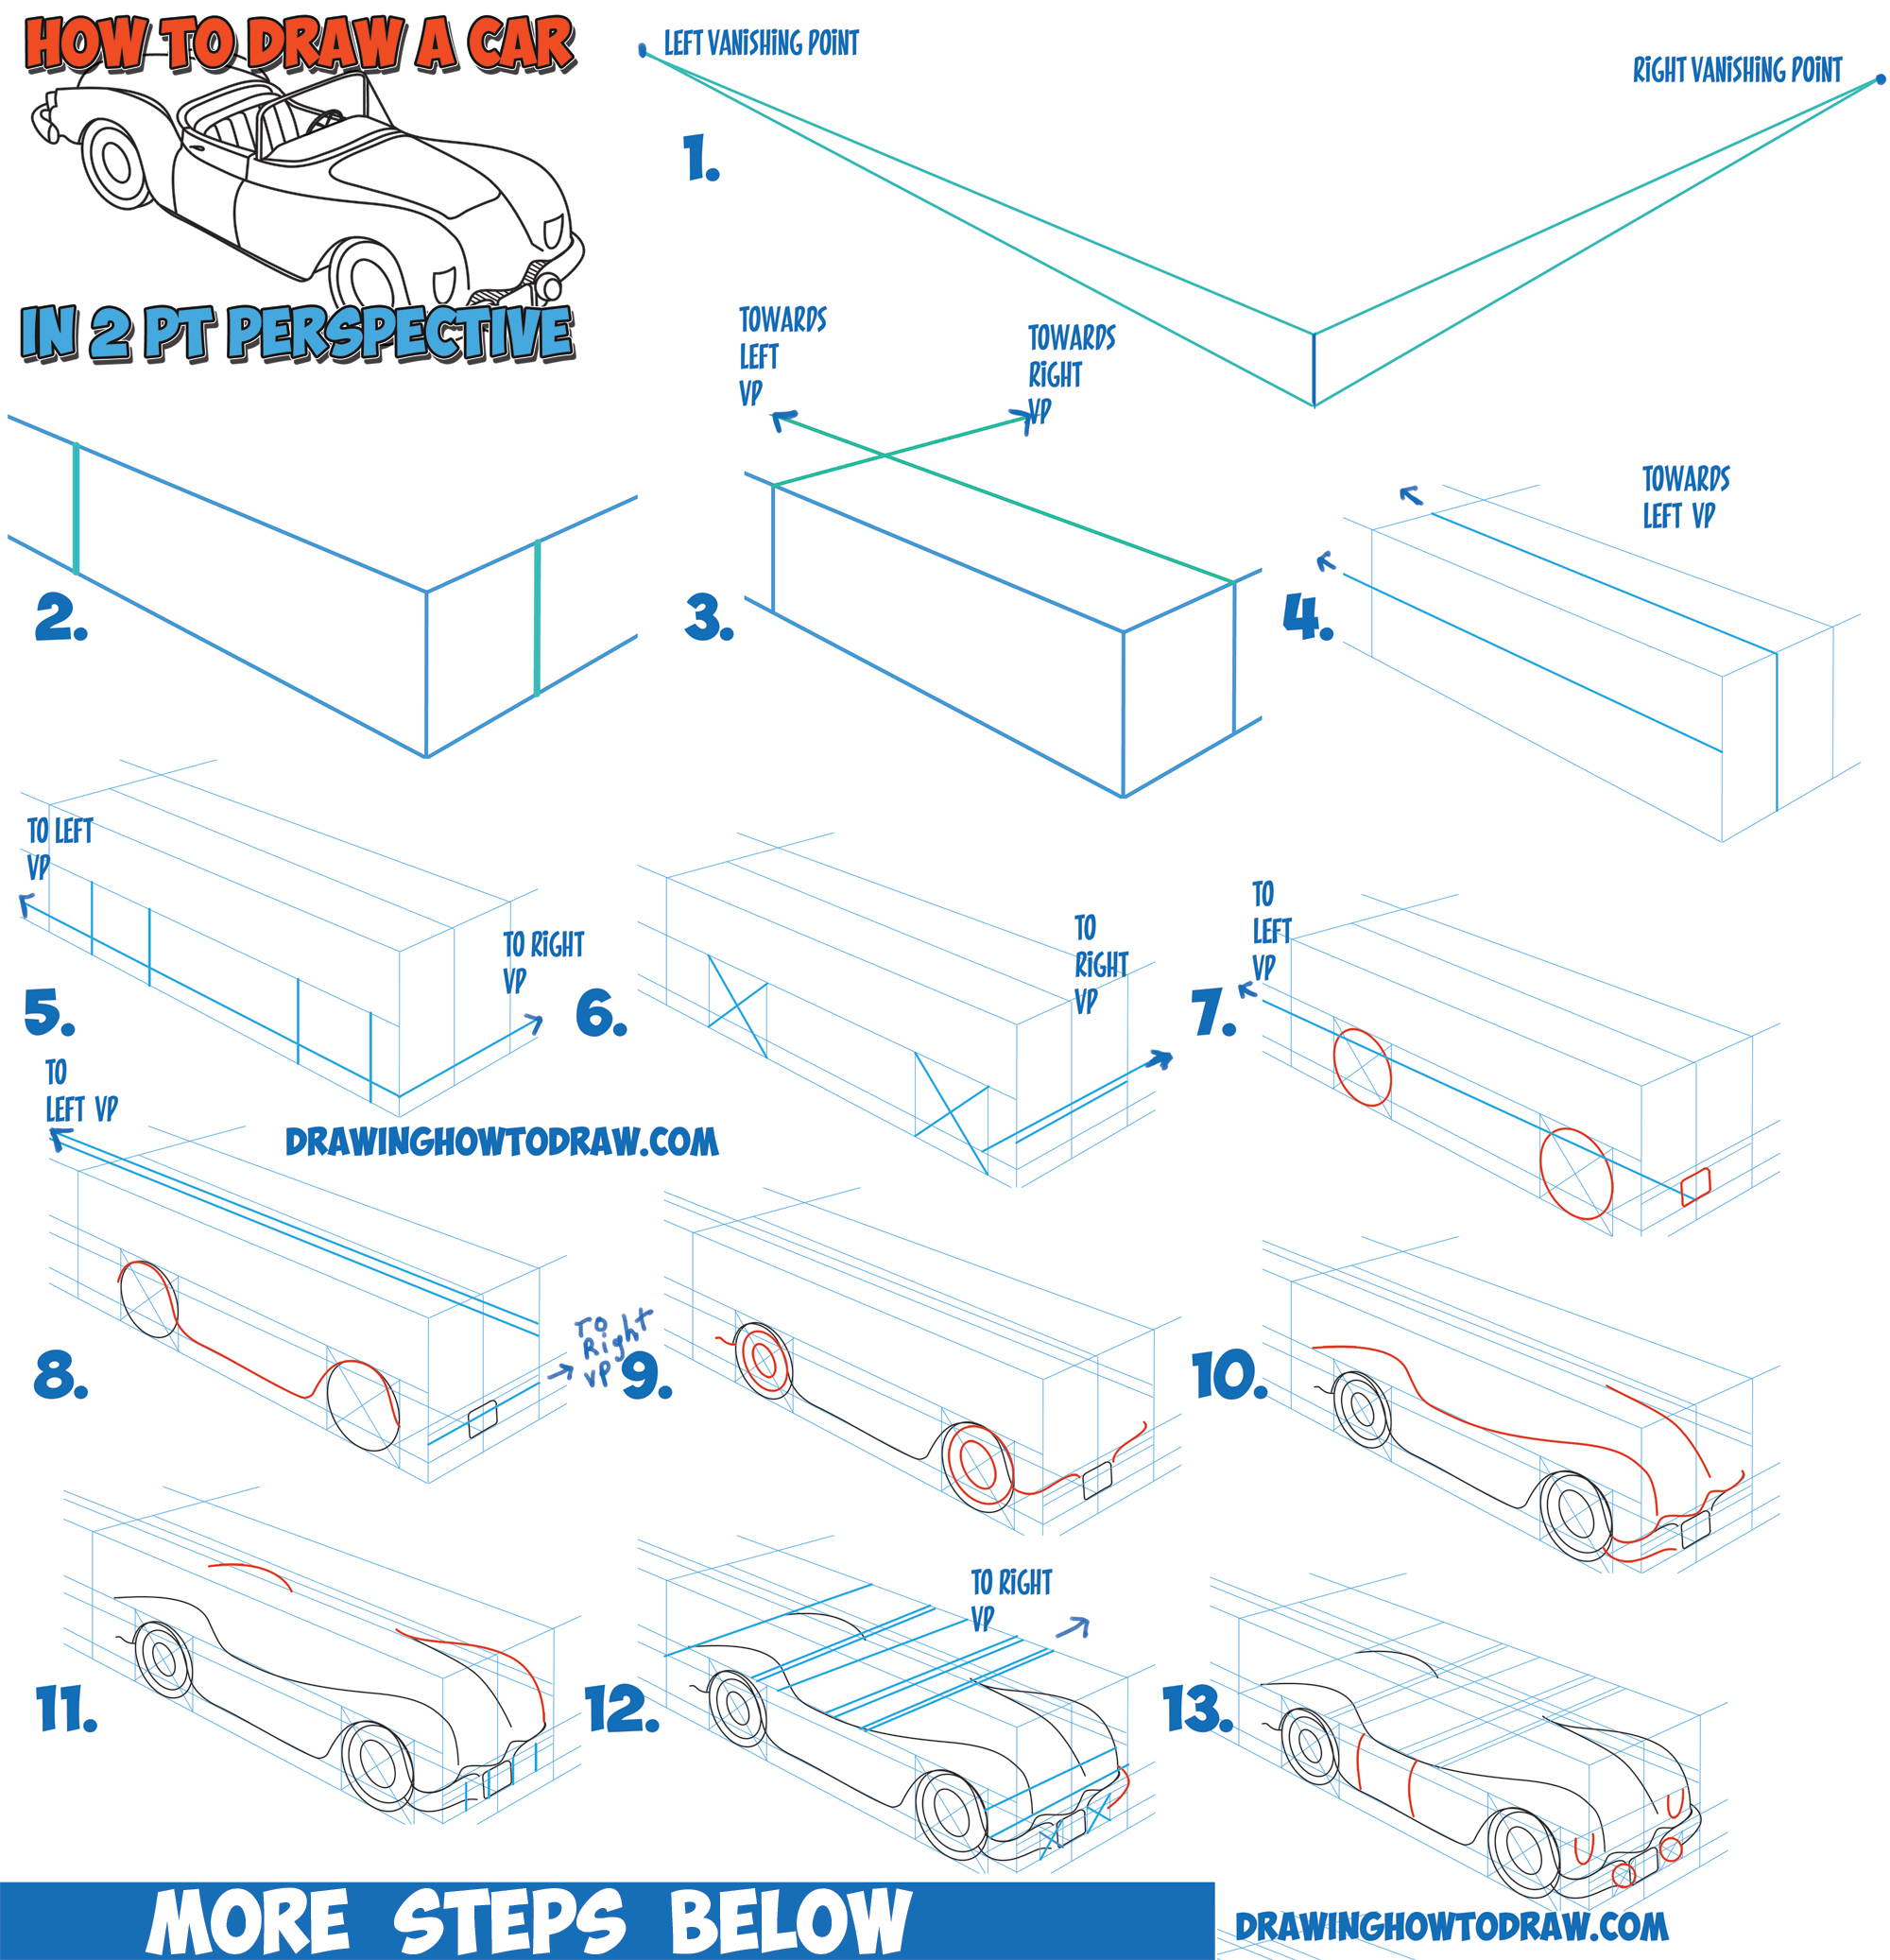
All blue lines in this tutorial are guide lines. Guide lines are there to guide you but are erased at the end. For this reason, please draw them very lightly…just dark enough to help you.
(Step 1) Draw a vertical line. Draw two points – one on the right and one on the left. Draw lines from the top and bottom of the vertical line to both vanishing points.
(Step 2) Draw 2 vertical lines.
(Step 3) Draw one line to the left and one to the right vanishing points.
(Step 4) Draw a vertical line half way through the square in the front. Then draw a line to the left vanishing point. Draw another line to the left vanishing point as well.
(Step 5) Draw lines to the left and right v.p. Also draw 2 vertical lines for each tire (2 tires are showing). The tire that is further back is slightly smaller because it is farther away.
(Step 6) Draw a letter ‘x’ through each tire’s square. Draw 2 more lines to the right v.p.
(Step 7) Draw circles for tires in the tire squares that you drew. Draw a rounded rectangle in the front of the car.
(Step 8) Draw 2 lines to the left vanishing point and one to the right v.p. Draw 2 sideways ‘?’ shapes on the side of the car.
(Step 9) Draw 2 circles in each tire. Draw sideways ‘?’ shapes.
(Step 10) Draw a sideways #3-like shape that is much rounded. Also draw a curvy letter ‘m’ shape on the bumper. Draw some other curved lines as well.
(Step 11) Draw vertical guide lines on the bumper. Also draw some more curved lines as well.
(Step 12) Draw some lines to the right v.p. Draw a letter ‘x’ in the squares that are on the front bumper.
(Step 13) Draw curved lines for the door. Draw circles where the ‘x’ shapes you drew were.
(Steps 14-22) Just follow the drawings above and draw them on your drawings as well.
Then erase all the guide lines and darken the lines that need it.
If you want a more detailed guide to perspective, we have a few of them here.
You Might Also Like Our Other Perspective Drawing Tutorials
Technorati Tags: how to draw a car, draw a car, car, convertible, convertable, how to draw a car in two pt perspective, perspective, perspective drawing, 2 pt perspective, two point perspective, automobile
Today, I'll show you how to draw a cartoon girl pointing at herself with step-by-step…
Today, I'll show you how to draw a crying cute little cartoon guy who is…
Today, I'll show you how to draw an adorably super-cute cartoon owl on a witch's…
Today I will show you how to draw a super cute baby-version of Winnie The…
Today I'll show you how to draw the famous Pusheen cat from social media, such…
Today I'll show you how to draw this super cute chibi version of Deadpool from…