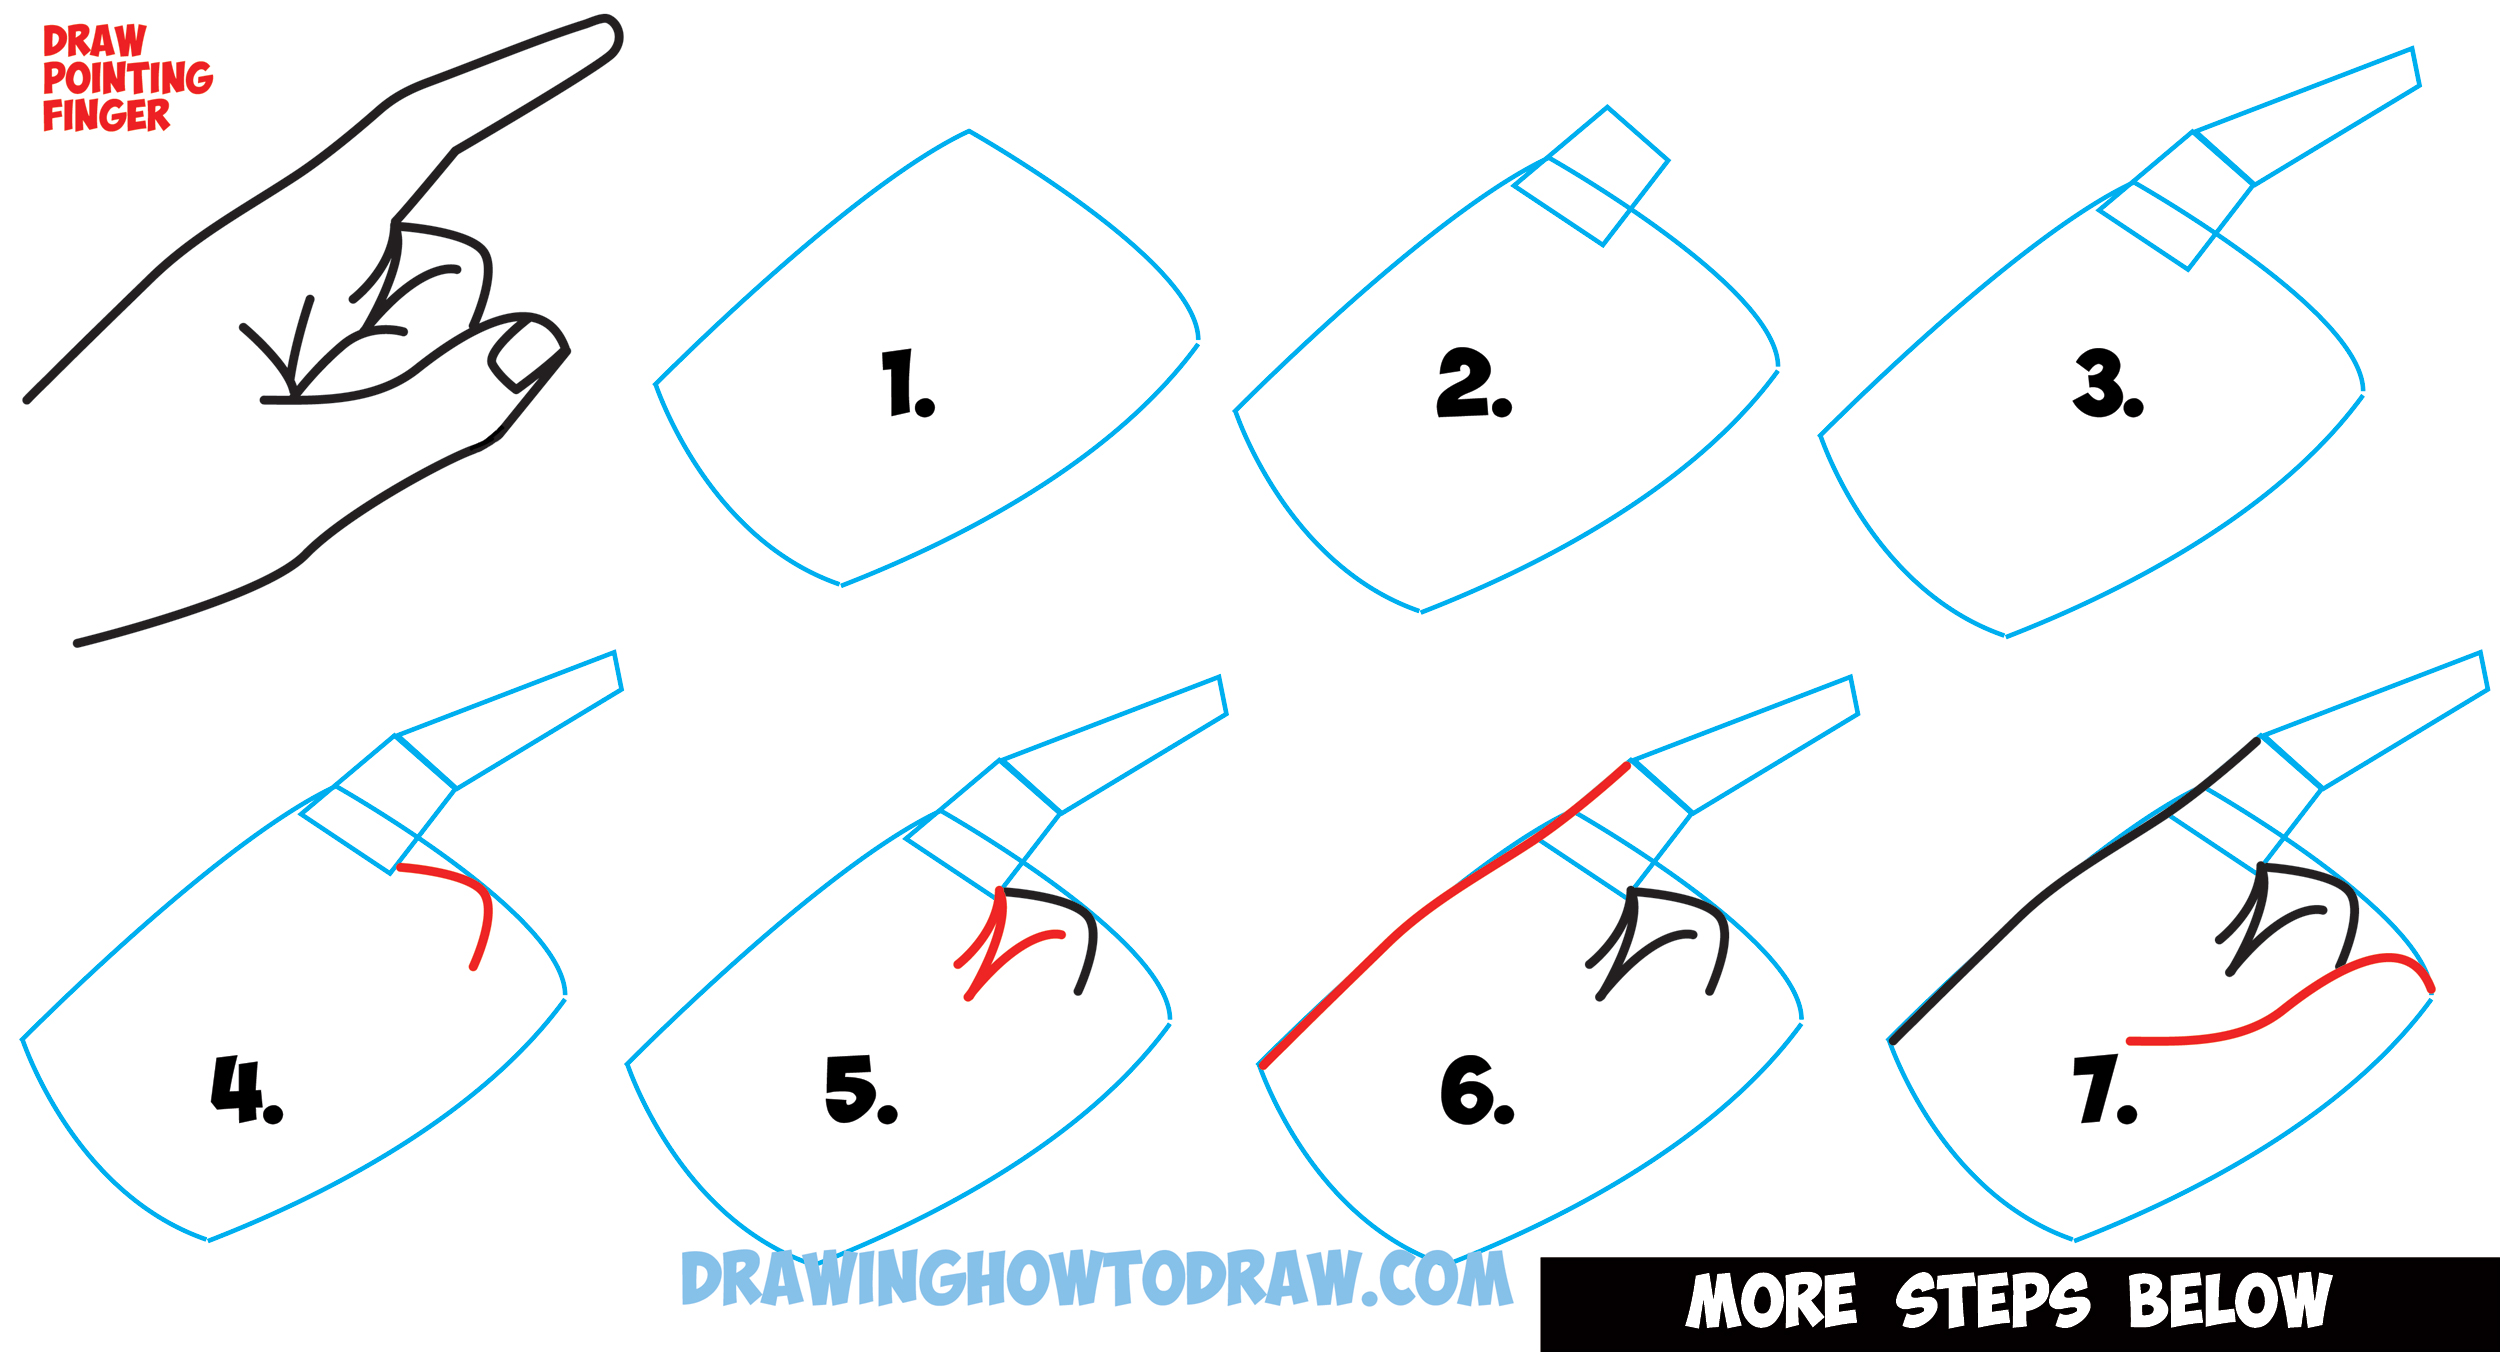
Today I’ll show you how to draw a pointing hand from the side view, or in other words a hand with a pointing finger. This drawing lesson will help you draw a pointing finger in the easiest way possible, using basic shapes, letters, and numbers. Have fun and happy drawing!
You Might Like Our Other Hand Tutorials
Learn How to Draw a Cartoon Pointing Hand Side View : How to Draw Pointing Fingers – Simple Step by Step Drawing Lesson for Beginners
[ad#draw]
Written-Out Step by Step Drawing Instructions
(Step 1 – 3) Draw the basic shapes that make up the pointing hand. All blue lines in this tutorial are guide lines. Draw guide lines lightly as they are there to guide you but will be erased at the end.
(Step 4) Draw a #7 shape (just a bit curvier).
(Step 5) Draw a letter ‘N’ shape.
(Step 6) Use the guide lines to help you draw the left side of the hand. Just make it dip at the top.
(Step 7) Draw a backwards ‘?’ shape on the far right.
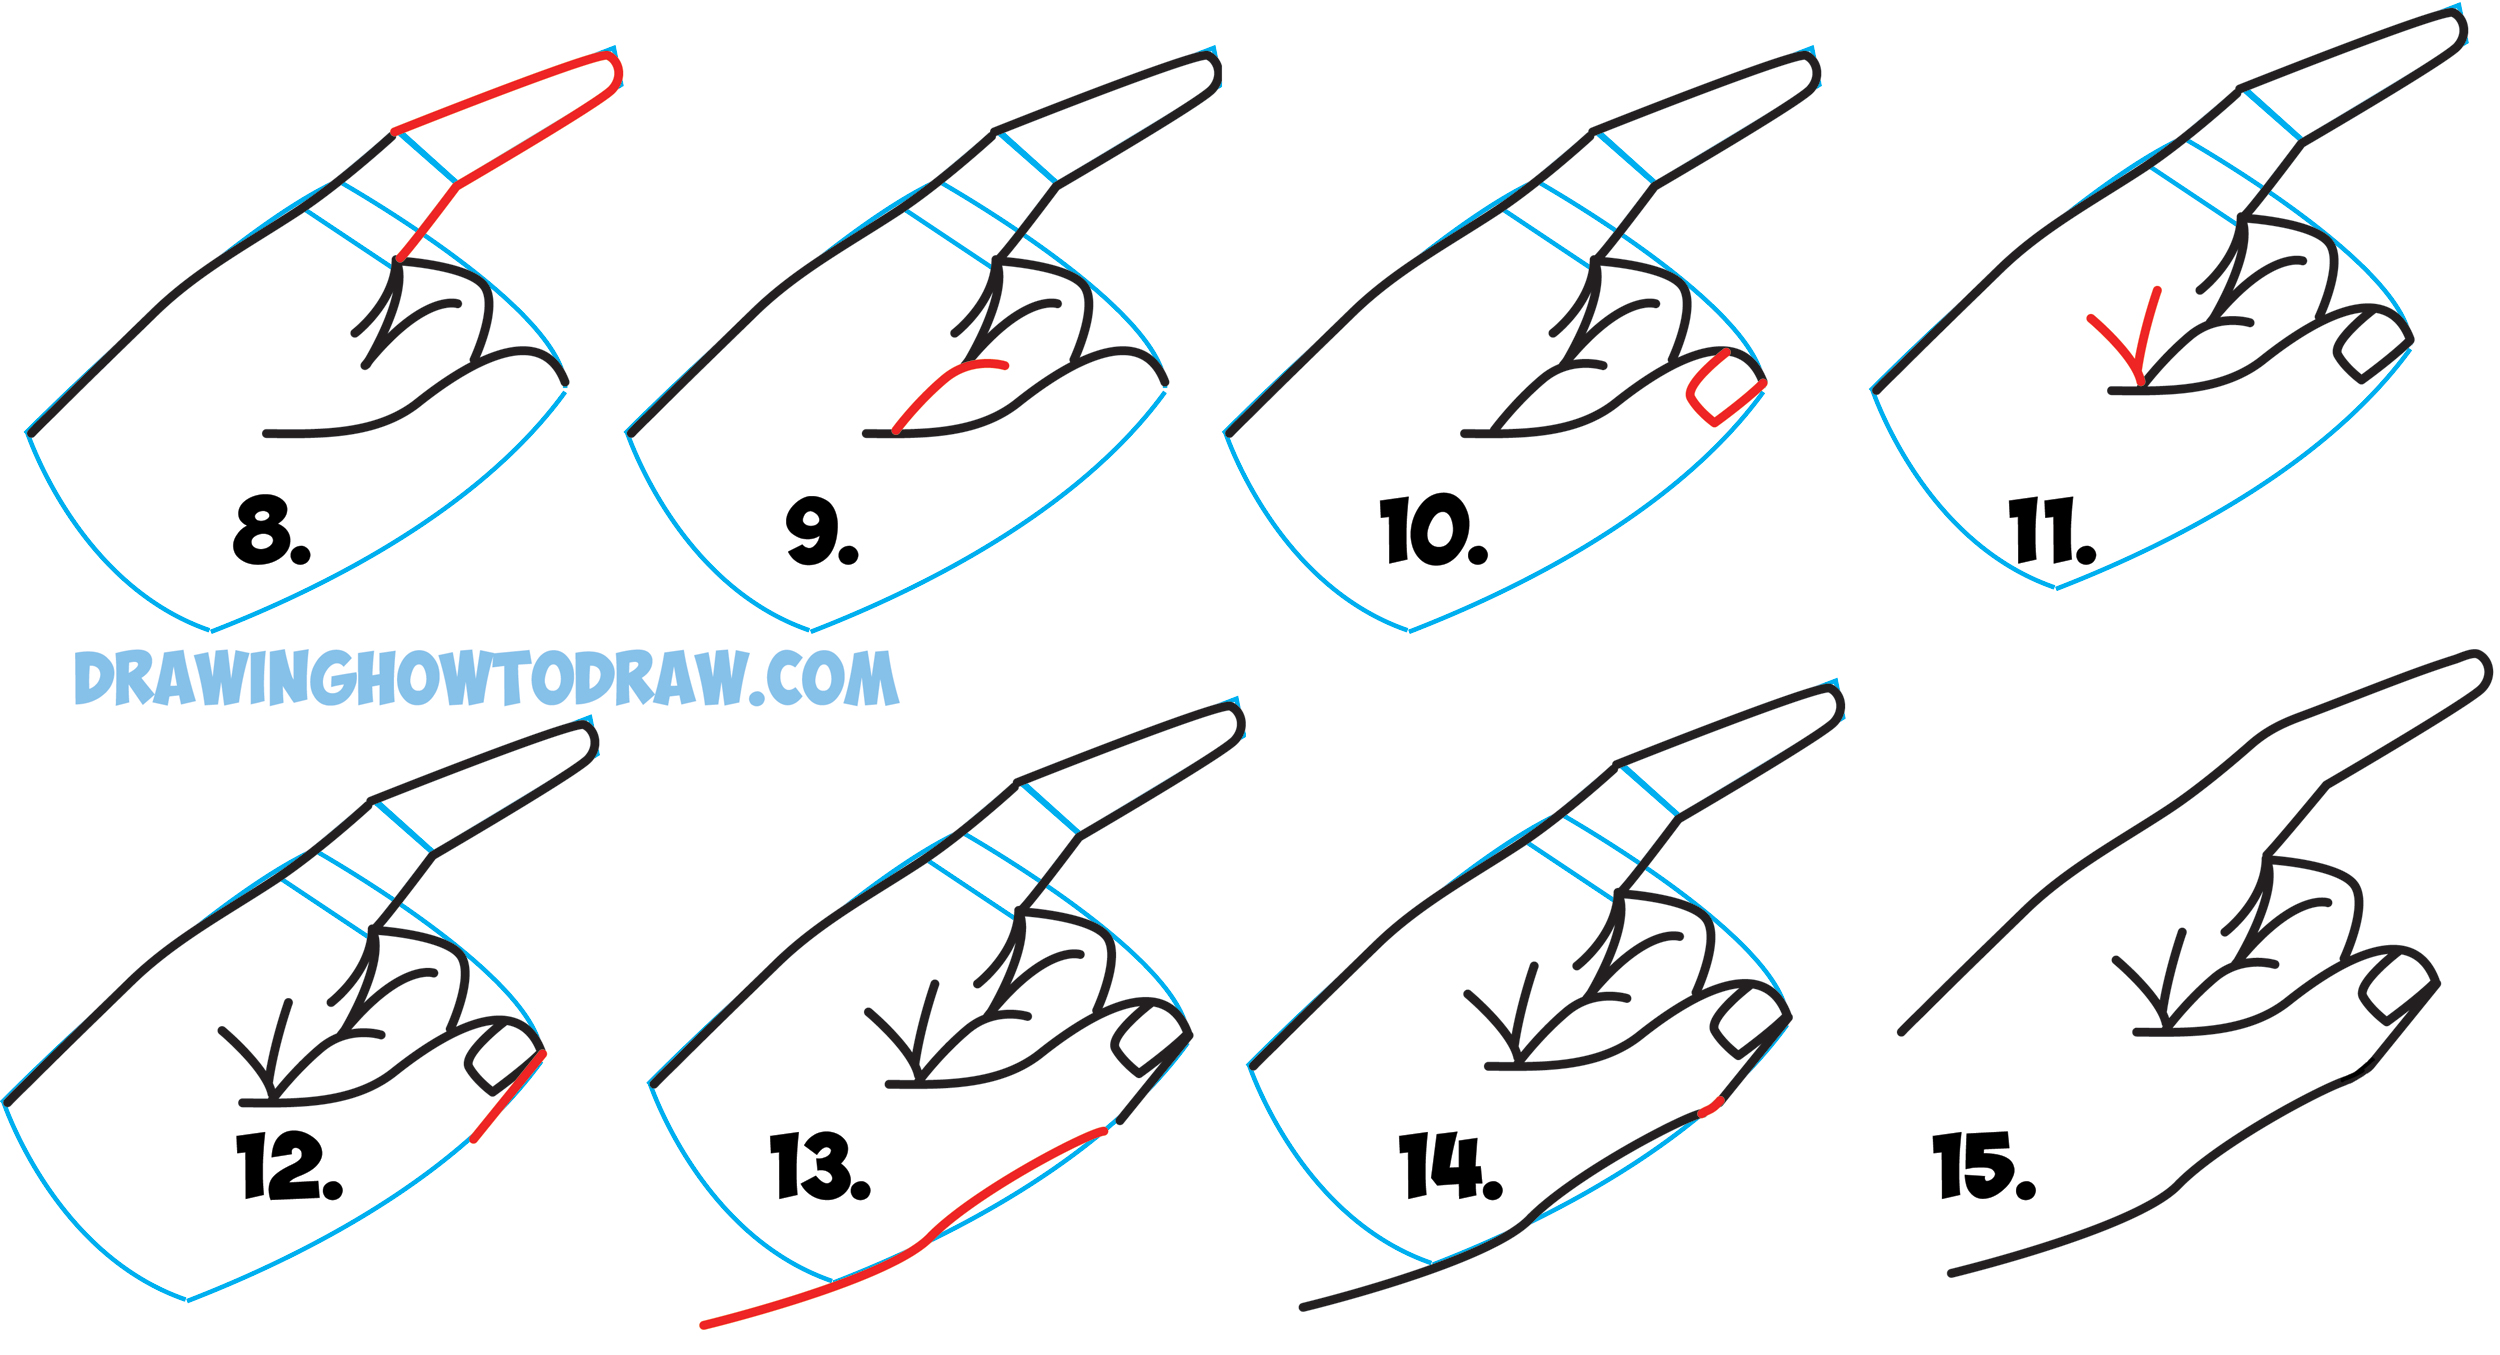
(Step 8) Use the guidelines to help you draw the pointing finger. Just make the tip curvier.
(Step 9) Draw an upside down letter ‘j’ shape.
(Step 10) Draw part of a rectangle for the thumb’s nail.
(Step 11) Draw a letter ‘v’ shape.
(Step 12) Draw an outward turned line on the thumb.
(Step 13) Draw a line that dips outwards.
(Step 14) Draw a curved line connecting both thumb lines that you have drawn.
(Step 15) Erase guide lines and smooth out the lines.
You Might Like Our Other Hand Tutorials
Technorati Tags: pointing finger, hand pointing, hand pointing side view, pointing finger side view, how to draw hands, how to draw hand poses, how to draw pointing finger, how to draw pointing hand

