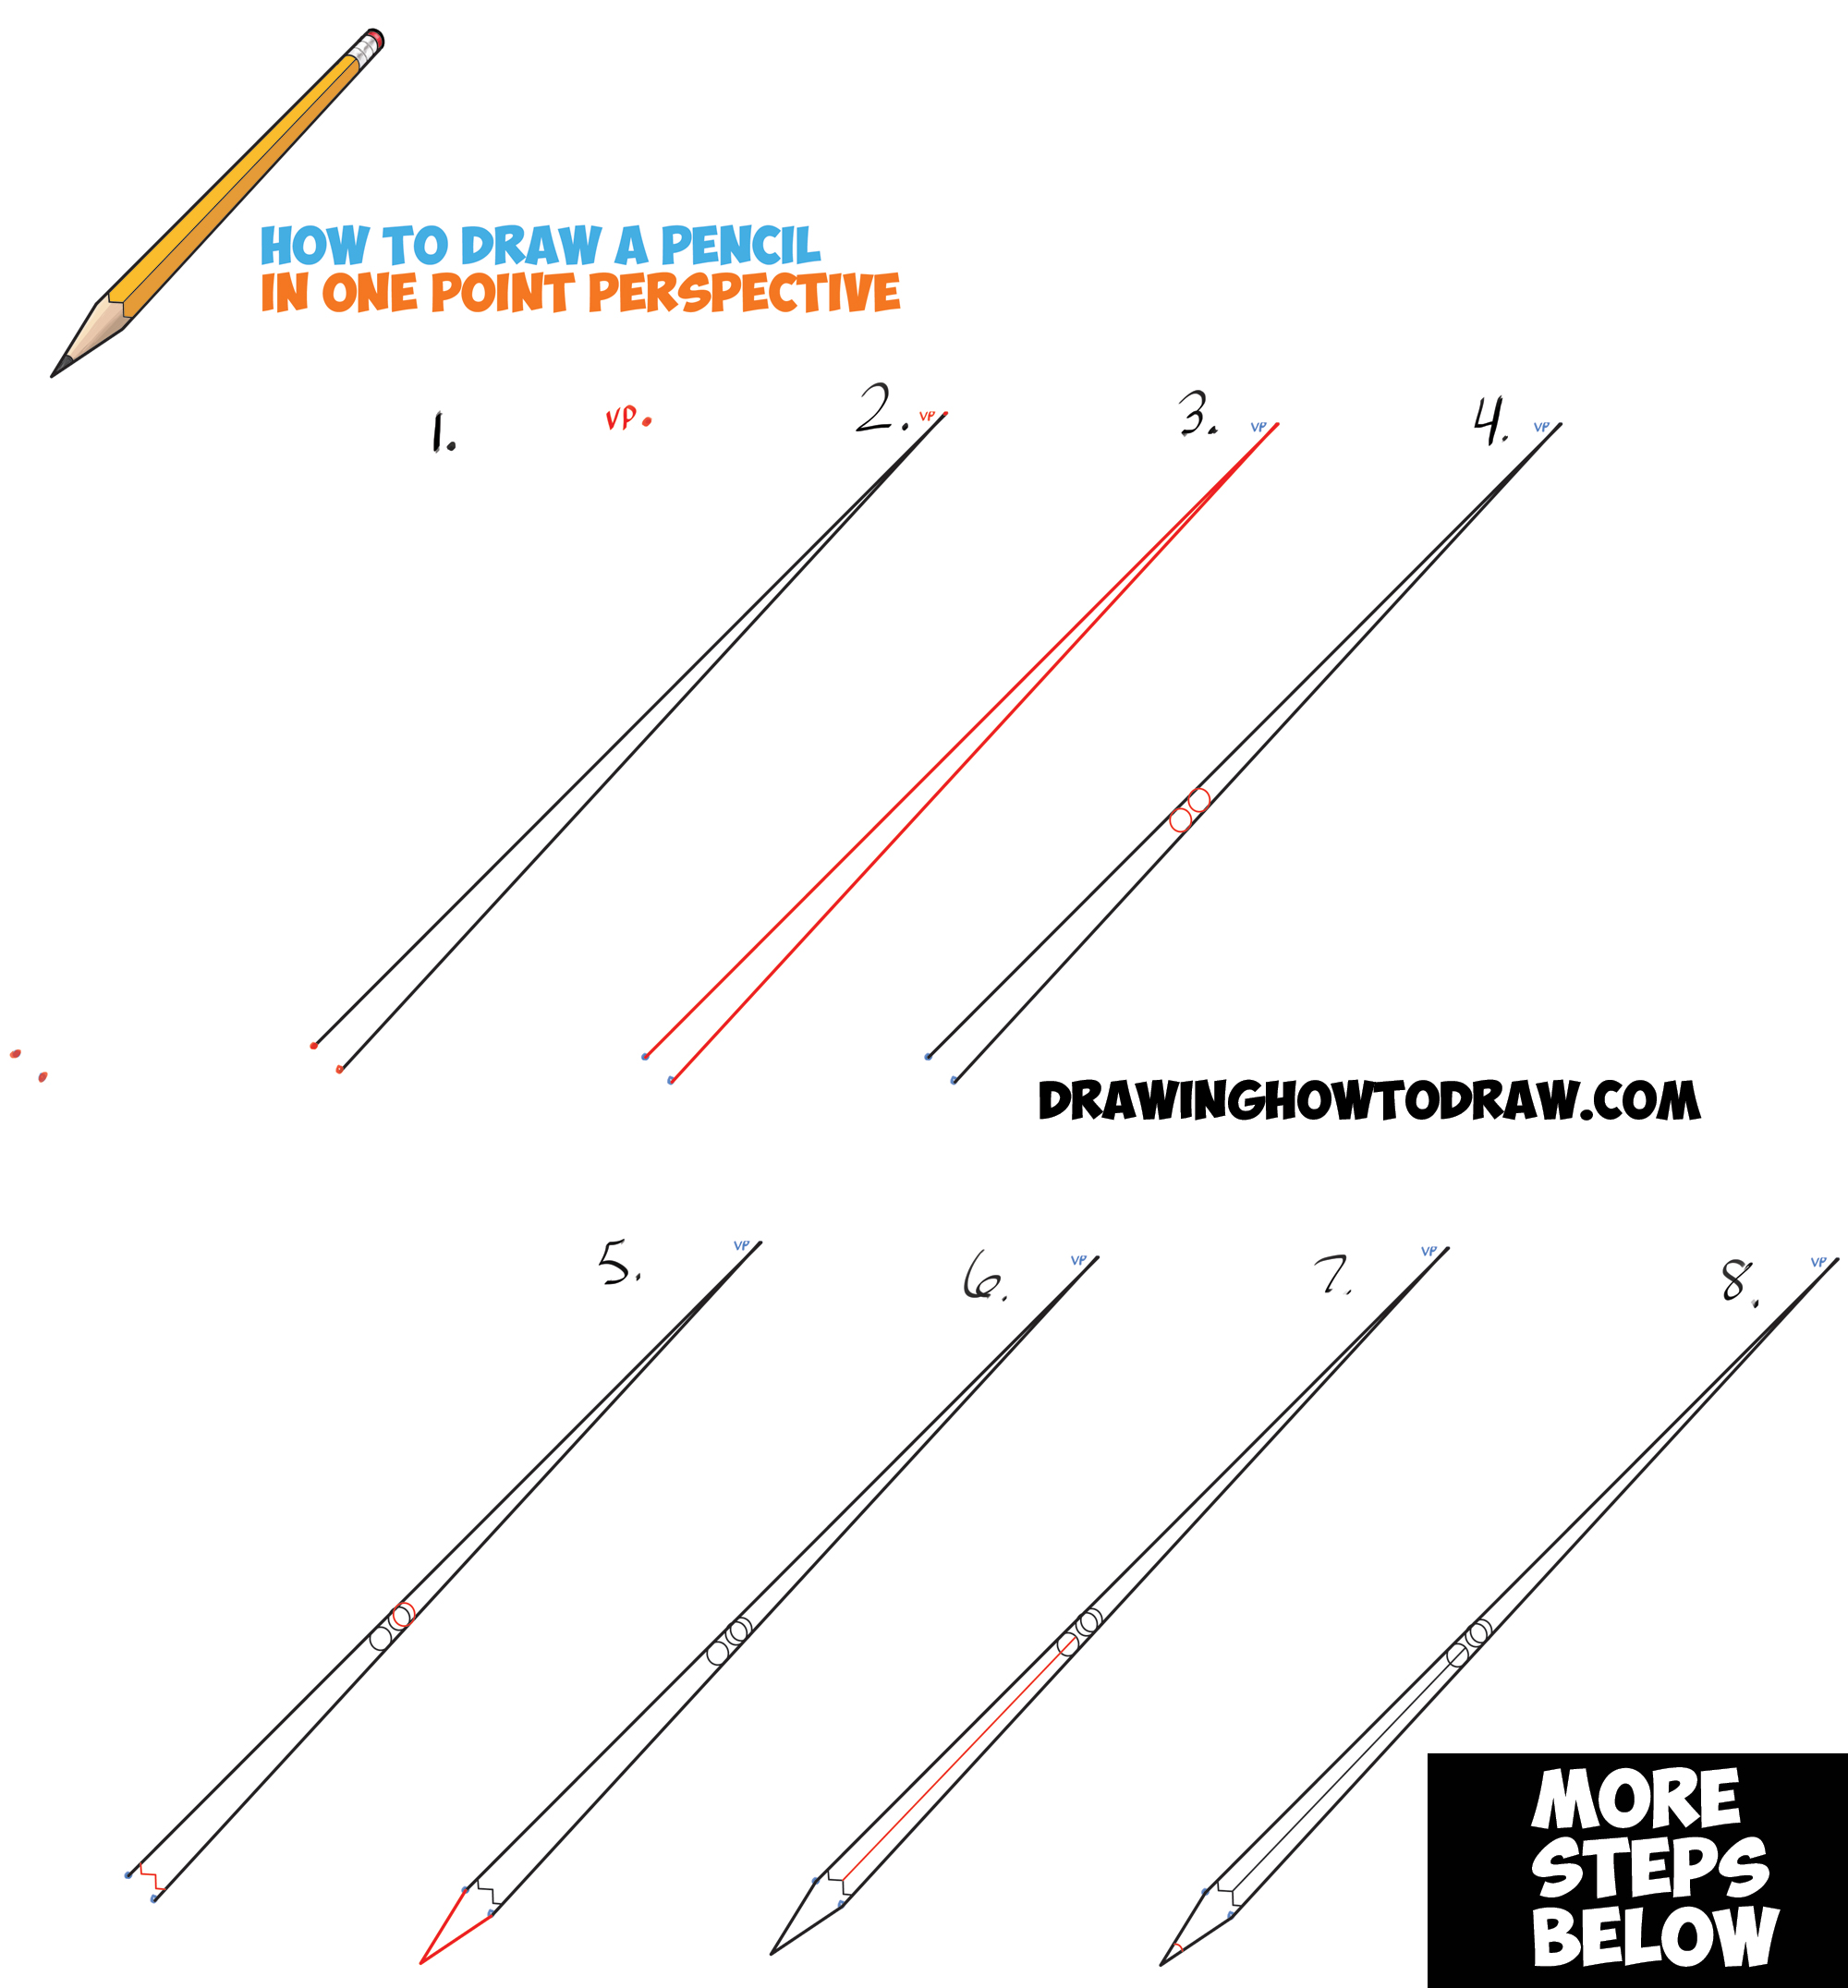
Today I will show you how to draw realistic pencils using 1 pt perspective drawing techniques. We have broken the tutorial into many simple steps to help you thru the process. It is very easy, just get a ruler or straight edge out and we will get started. Happy Drawing!
If you want a more detailed guide to perspective, we have a few of them here.
Learn How to Draw Realistic Pencils Using One Point Perspective Techniques – Simple Steps Drawing Lesson
[ad#draw]
Written-Out Step by Step Drawing Instructions
(Step 1) Draw 3 dots in the formation that I show you in the illustration above. The one dot that is alone is the vanishing point, which is the point at where the lines appear to recede to.
(Step 2-3) Use a ruler to draw a line from the 2 points back to the vanishing point (vp). Sorry 2 and 3 appear to be the same.
(Step 4) Draw circles within the lines, as I have.
(Step 5) Draw another circle within the lines, as well as a letter ‘w’ shape.
(Step 6) Draw a letter ‘v’ shape for the point.
(Step 7) Draw a line in the center of the pencil.
(Step 8) Draw a curved line for the point of the pencil.
(Step 9) Add 3 curved lines to the metal part of the pencil.
(Step 10-12) Okay I really seem to be having a problem – I’m tired…any way – add color to your pencil as I have.
If you want a more detailed guide to perspective, we have a few of them here.
Technorati Tags: realistic pencil, pencil, how to draw pencils, how to draw a pencil, how to draw realistic pencils, drawing realistic pencils. one point perspective, perspective drawing, 1 point perspective

