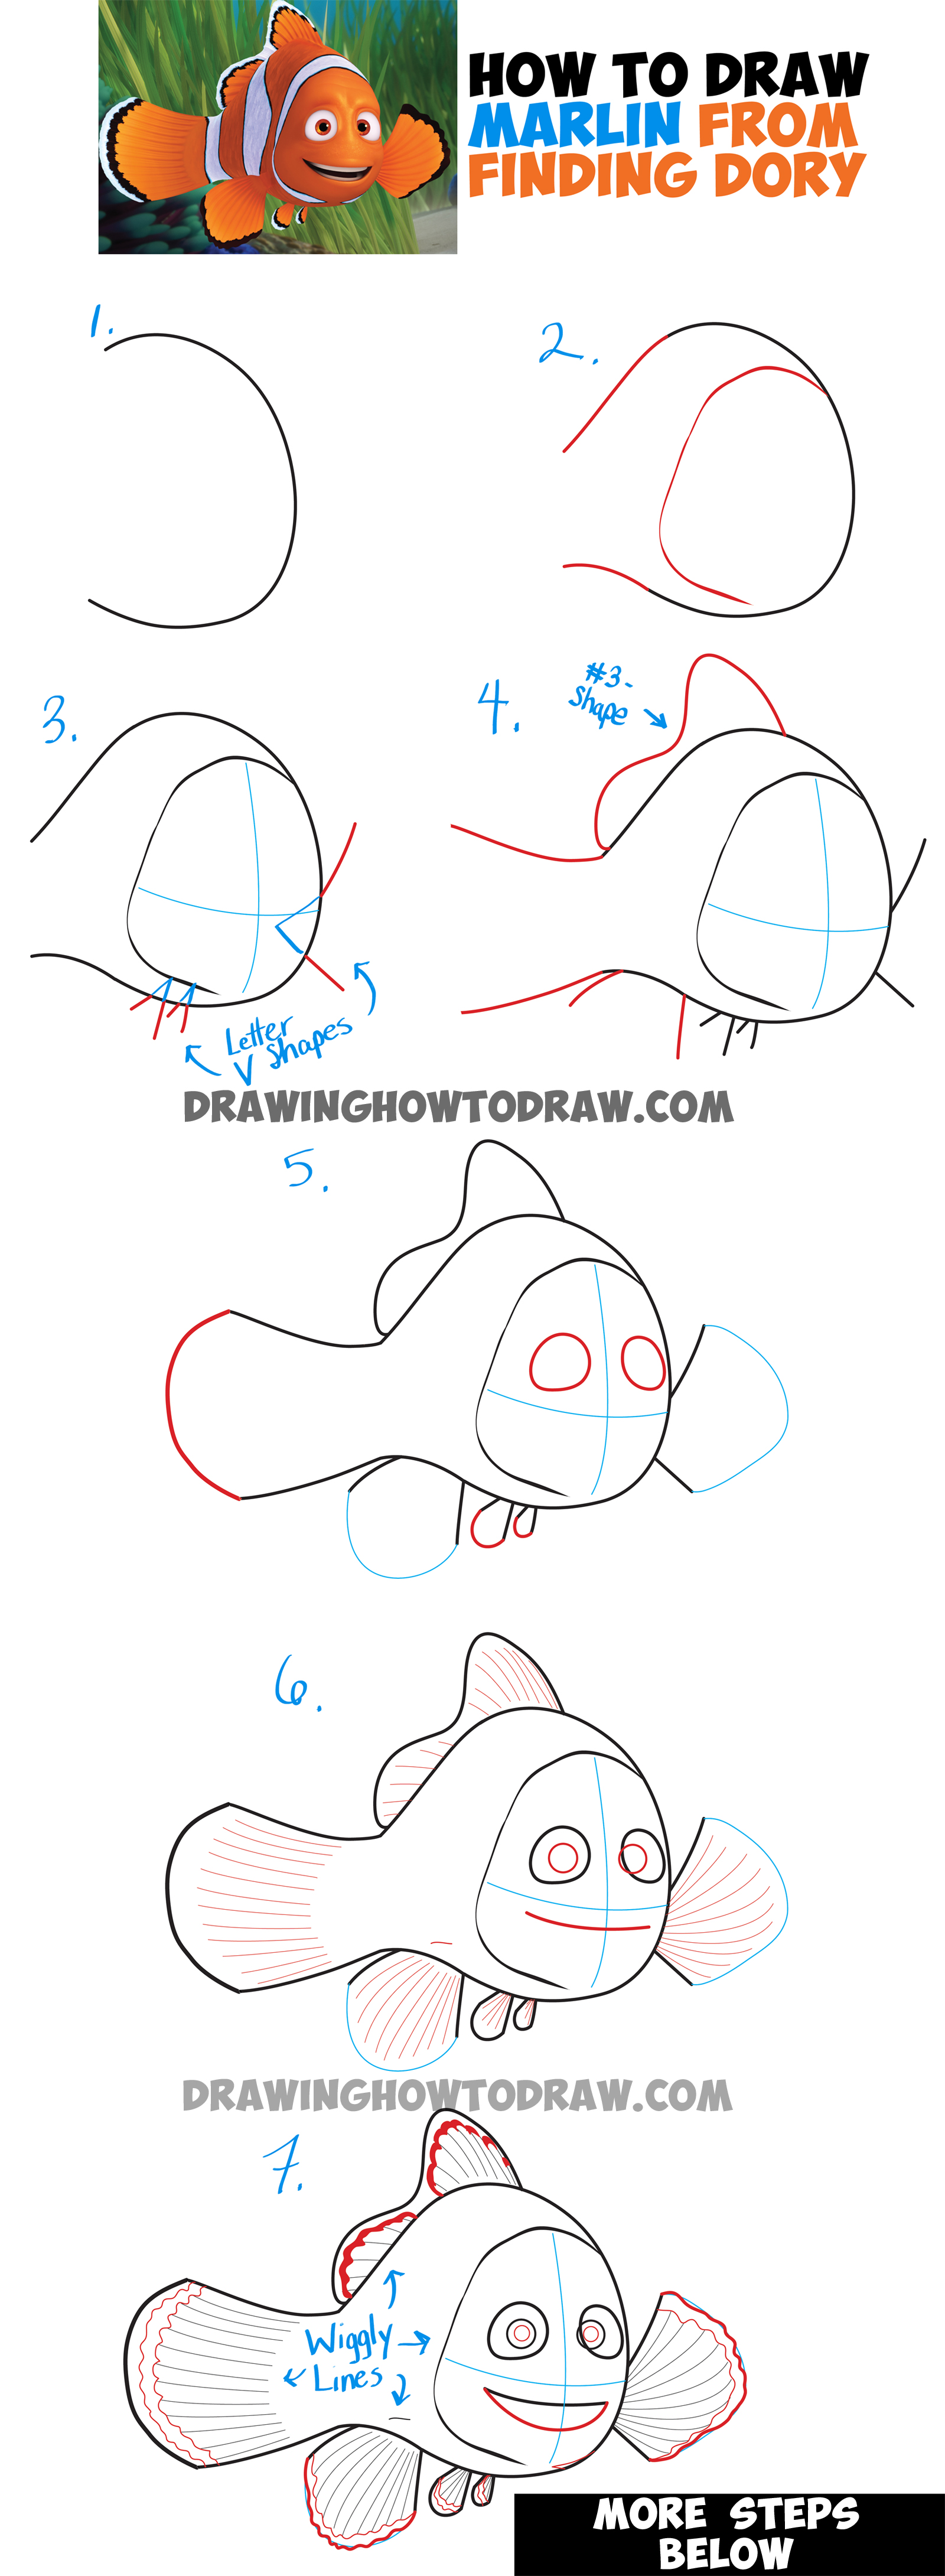
Today I will show you how to draw Marlin from Finding Dory and Finding Nemo. He looks a lot like his son, Nemo, but there are slight differences. I will guide you through the instructions with easy-to-follow steps. Have fun and Happy Drawing!
You Might Enjoy Our Other Disney Characters Tutorials. Finding Nemo Characters, or Other Fish / Underwater Creatures Lessons
Learn How to Draw Marlin from Finding Dory and Finding Nemo – Simple Steps Drawing Lesson
[ad#draw]
Written-Out Step by Step Drawing Instructions
(Step 1) Draw a backwards letter ‘C’ shape.
(Step 2) Draw 2 lines at the left side of the letter ‘C’ shape. Draw a letter ‘C’ shape inside the shape.
(Step 3) Draw guidelines through the face. Draw letter ‘V’ shapes for the fins.
(Step 4) Draw a #3-like shape for the top fin. Draw Draw lines for the back fin. Draw lines down for the bottom back fin.
(Step 5) Draw odd-shaped ovals for eyes. Draw letter ‘C’ shapes on ends of fins…lightly draw the ones that are in blue – these will be drawn over later.
(Step 6) Draw lines in the fins. Draw circles in the eyes. Draw a line for the mouth.
(Step 7) Draw wiggly lines. Draw circles in the eyes again. Draw a curved line at the bottom of the mouth.
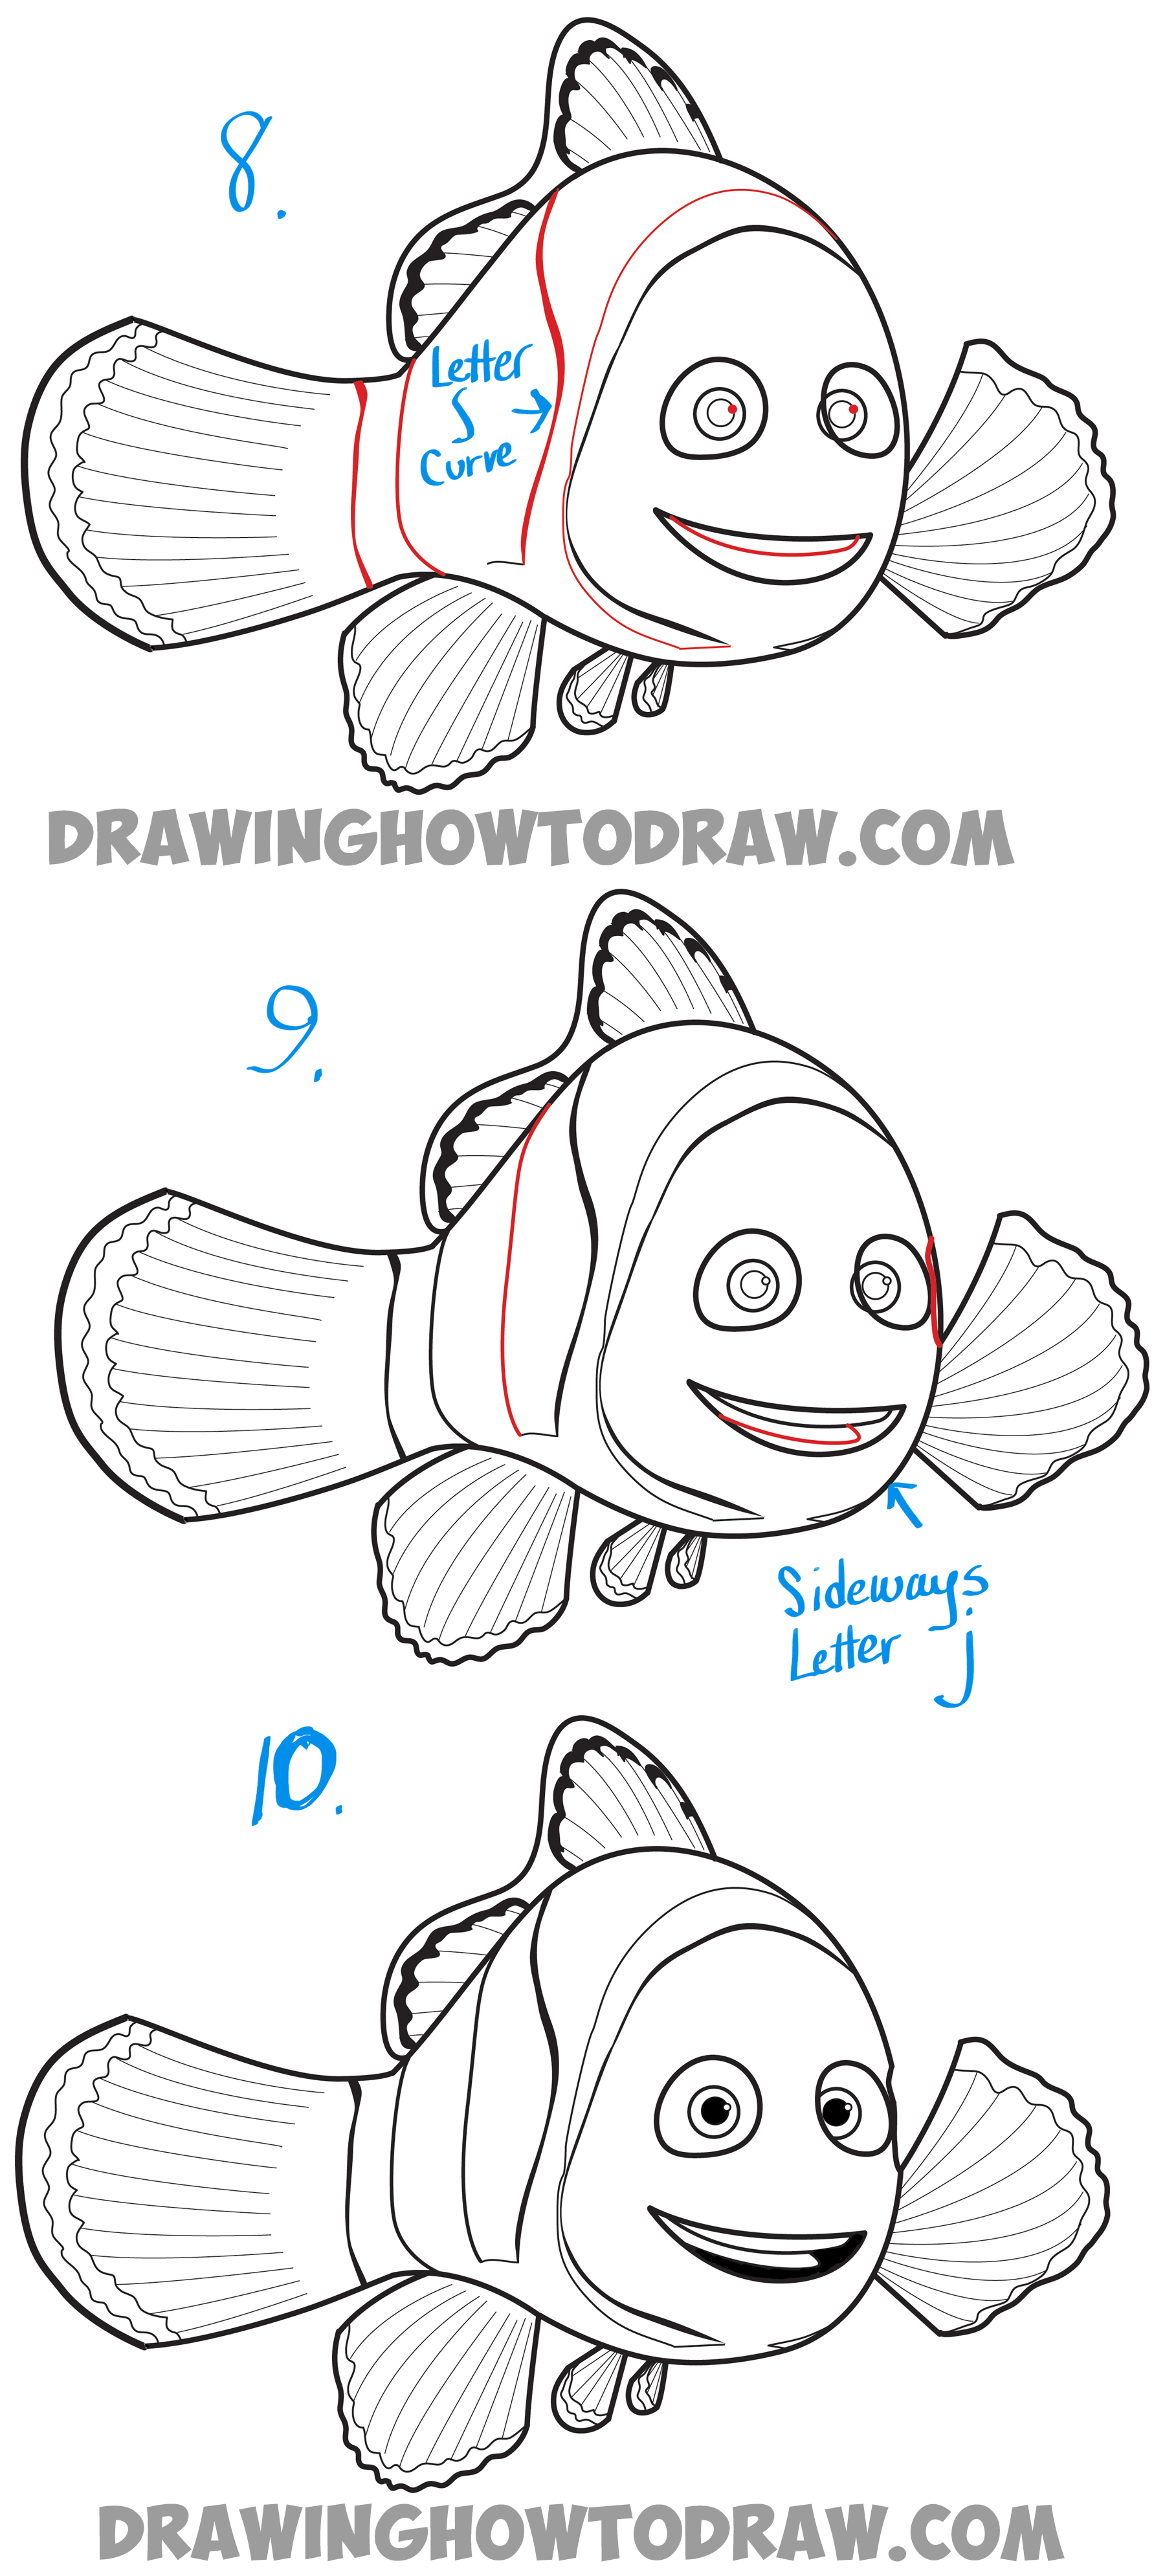
(Step 8) Draw small circles in the eyes. Draw a curved line in the mouth. Draw some of the lines that are inside the fish…one of them is a bit of a flattened letter ‘S’ shape.
(Step 9) Draw another line inside of the fish. Draw a sideways letter ‘J’ shape inside of the mouth. Draw a curved line to the right of the right eye.
(Step 10) Finish up the drawing and color Marlin in if you choose to.
You Might Enjoy Our Other Disney Characters Tutorials. Finding Nemo Characters, or Other Fish / Underwater Creatures Lessons
Technorati Tags: marlin, how to draw marlin, marlin from finding dory, marlin from finding nemo, how to draw nemos dad, nemos dad, finding dory, finding nemo

