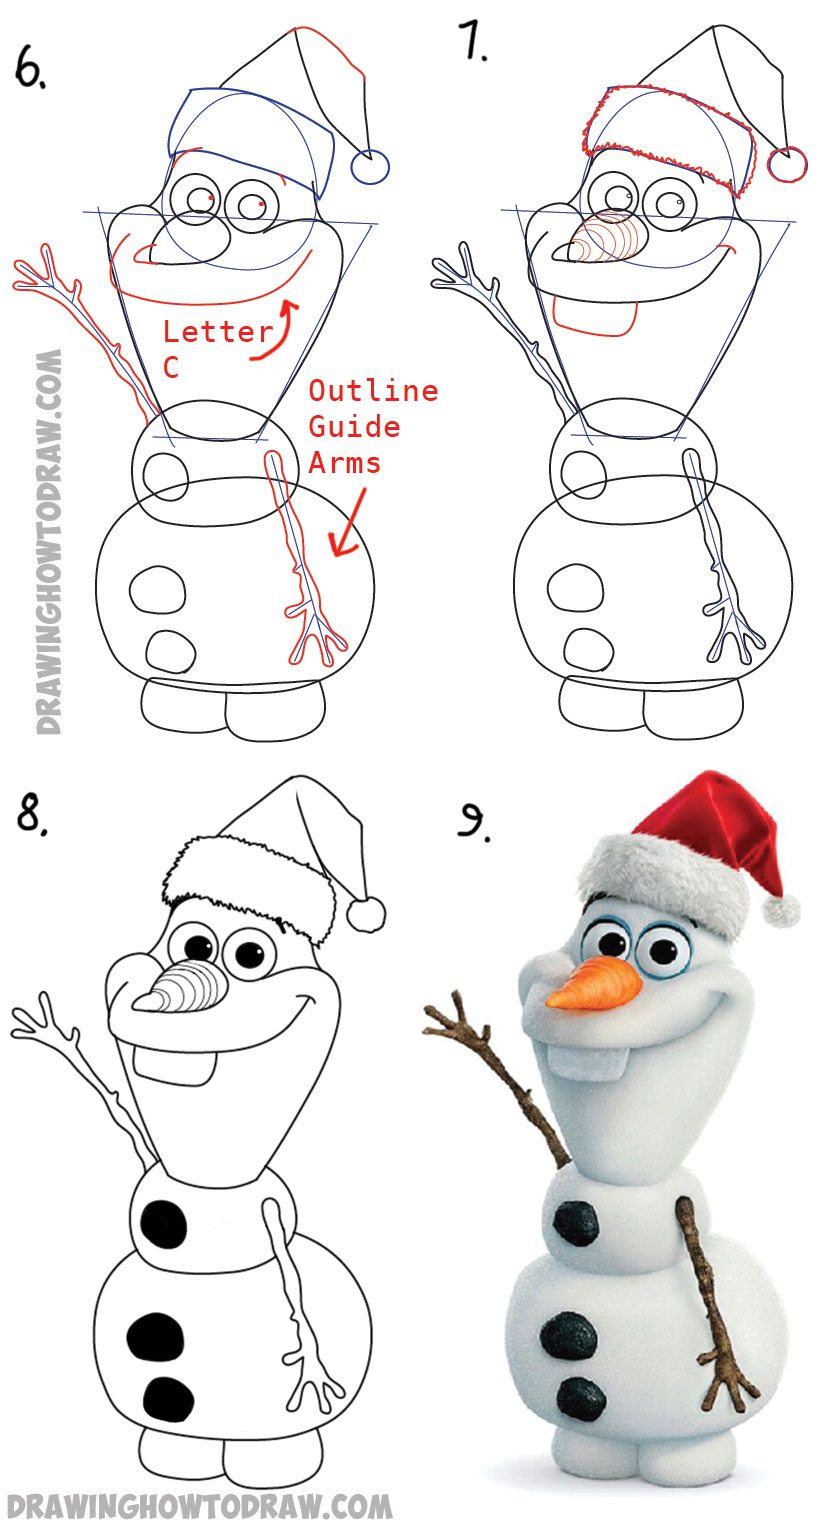
Learn how to draw Olaf, from Disney’s Frozen, wearing a Santa Claus Hat to celebrate Christmas. Olaf is pretty easy to draw, and we will teach you how to do it with easy steps. Draw this popular snowman now!
You Might Also Enjoy Our Other Christmas Drawing Tutorials
How to Draw Olaf with Santa Claus Hat On Step by Step Drawing Tutorial

[ad#draw]

Written-Out Step by Step Instructions
(Step 1) Draw 2 ovals to form a #8.
(Step 2) Draw basic shapes that make up Olaf’s head. Draw a sideways, capital letter ‘B’ shape for Olaf’s feet.
(Step 3) Draw upside down letter ‘J’ shapes on sides of face. Lightly draw curved rectangle for bottom of Santa’s hat. Also lightly draw guidelines for arms.
(Step 4) Draw letter ‘N’ shape at top of hat. Draw curved line at both sides of face. Draw circles in snowman’s face. Draw curved line at bottom of face.
(Step 5) Draw circles in eyes. Draw letter ‘D’ shape for nose. Draw odd-shaped ovals for stones on snowman’s body. Lightly draw guidelines coming out of the guide arms.
(Step 6) Draw curved line at top of hat. Draw curved lines for eye brows. Draw a letter ‘c’ shape at end of nose. Draw a sideways letter ‘C’ shape for smile. Outline guide arms.
(Step 7) Draw zig-zaggy shapes for bottom of hat and for the pom pom at end of hat. Draw curved lines in the nose. Draw a curved line at end of smile. Draw a rectangle for teeth.
(Step 8) Darken lines and color in black the stones and eyes.
You Might Also Enjoy Our Other Christmas Drawing Tutorials
Technorati Tags: frozen, disney frozen, olaf, santa olaf, santa claus hat, santa hat olaf, christmas, drawing christmas, how to draw olaf
