Learn how to draw boxes and cubes with these simple step by step instructions. You might think they look hard to draw, but they are quite simple to make once you know the steps. Also learn how to shade these boxes as well.
You Might Also Like Our Other Geometric Shapes Lessons
How to Draw Boxes and Cubes with Shading & Shadows Step by Step Drawing Lesson
[ad#draw]
Written Out Step by Step Instructions
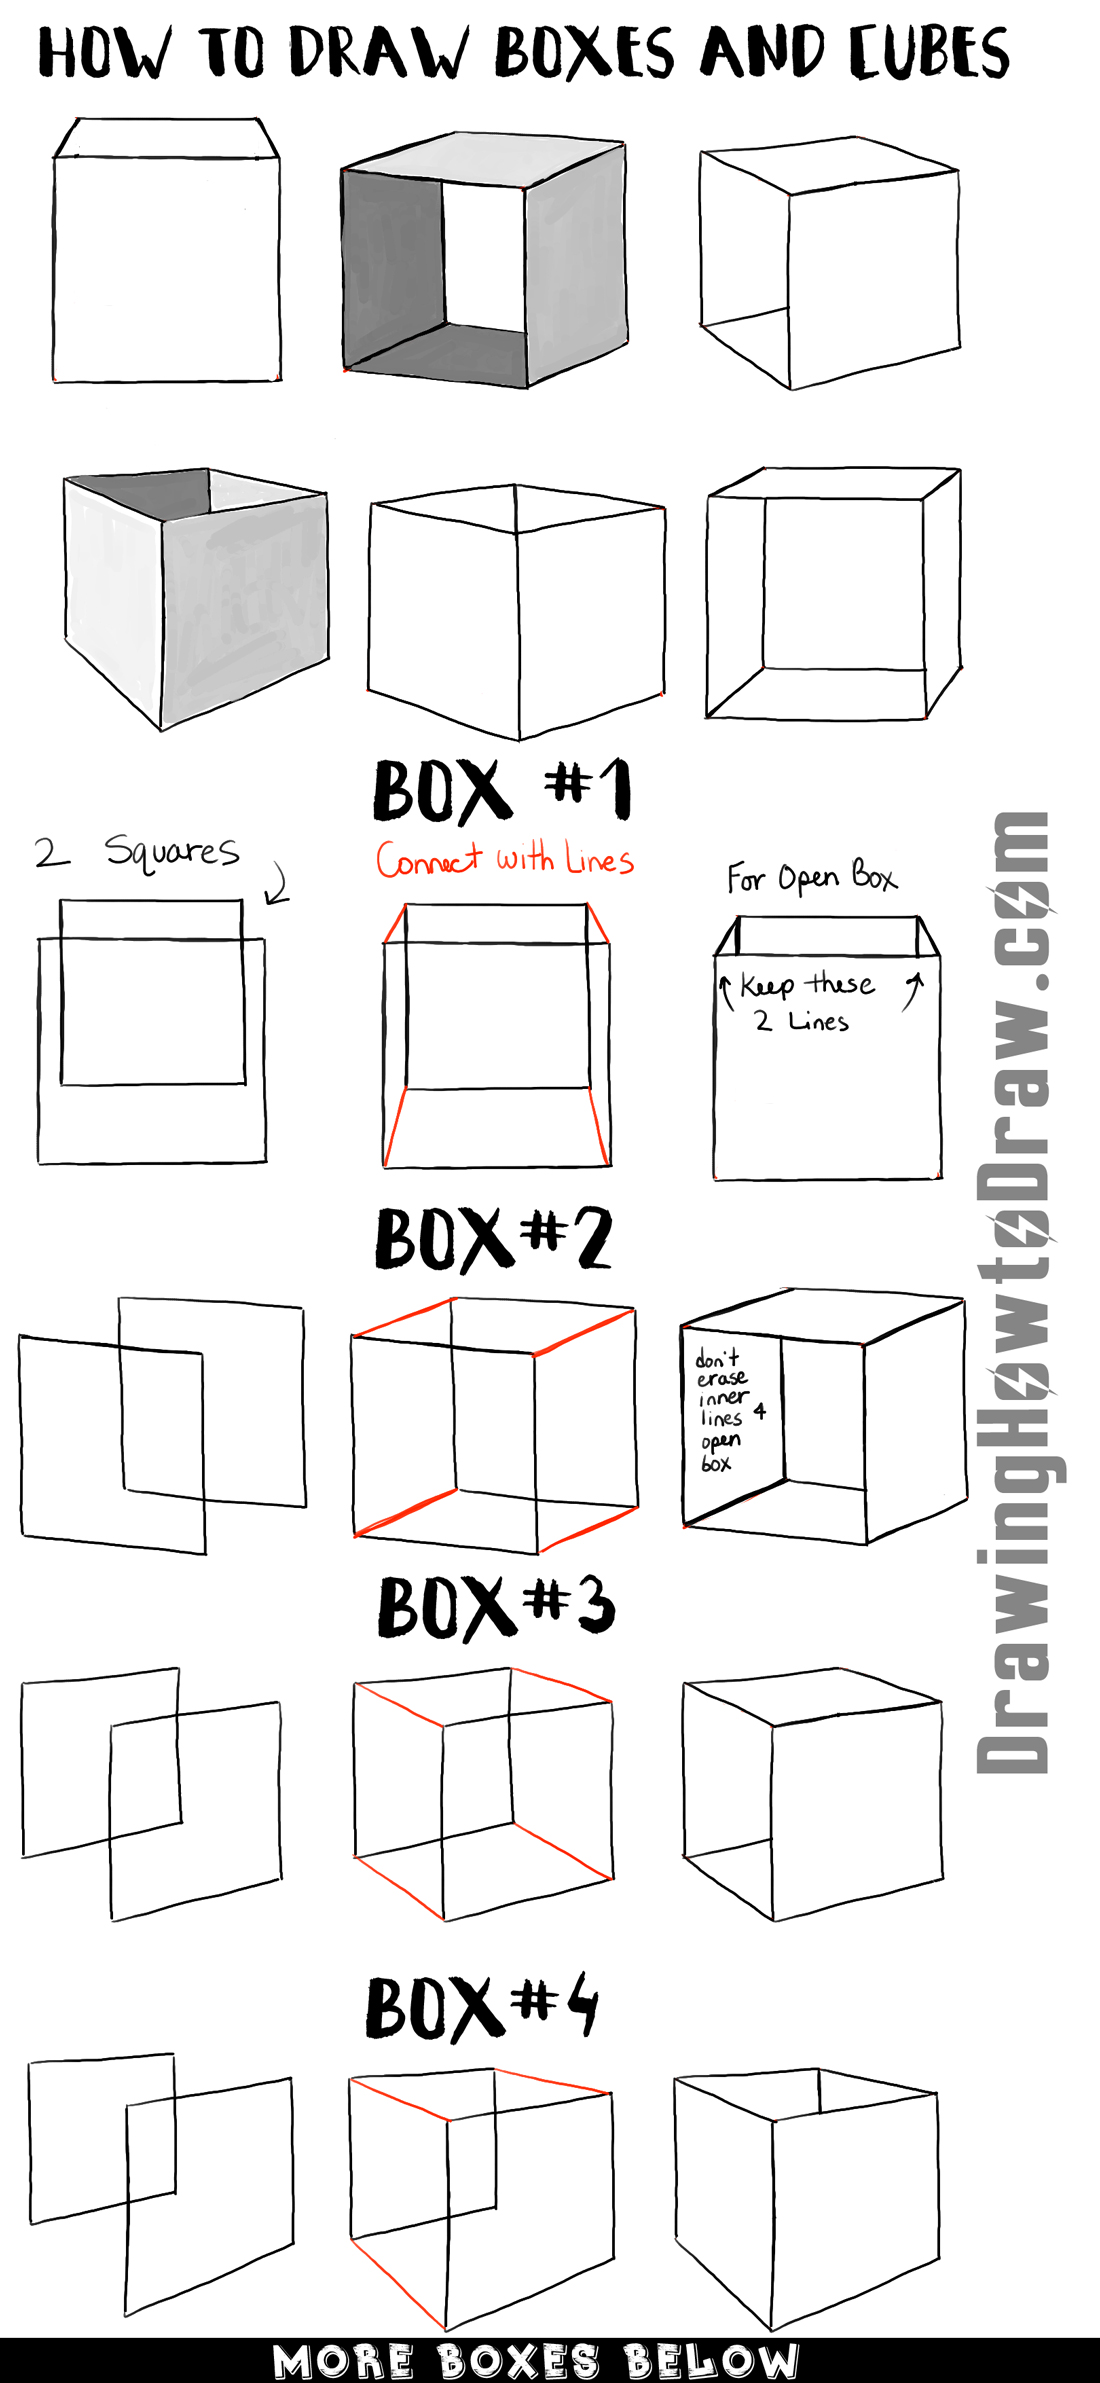
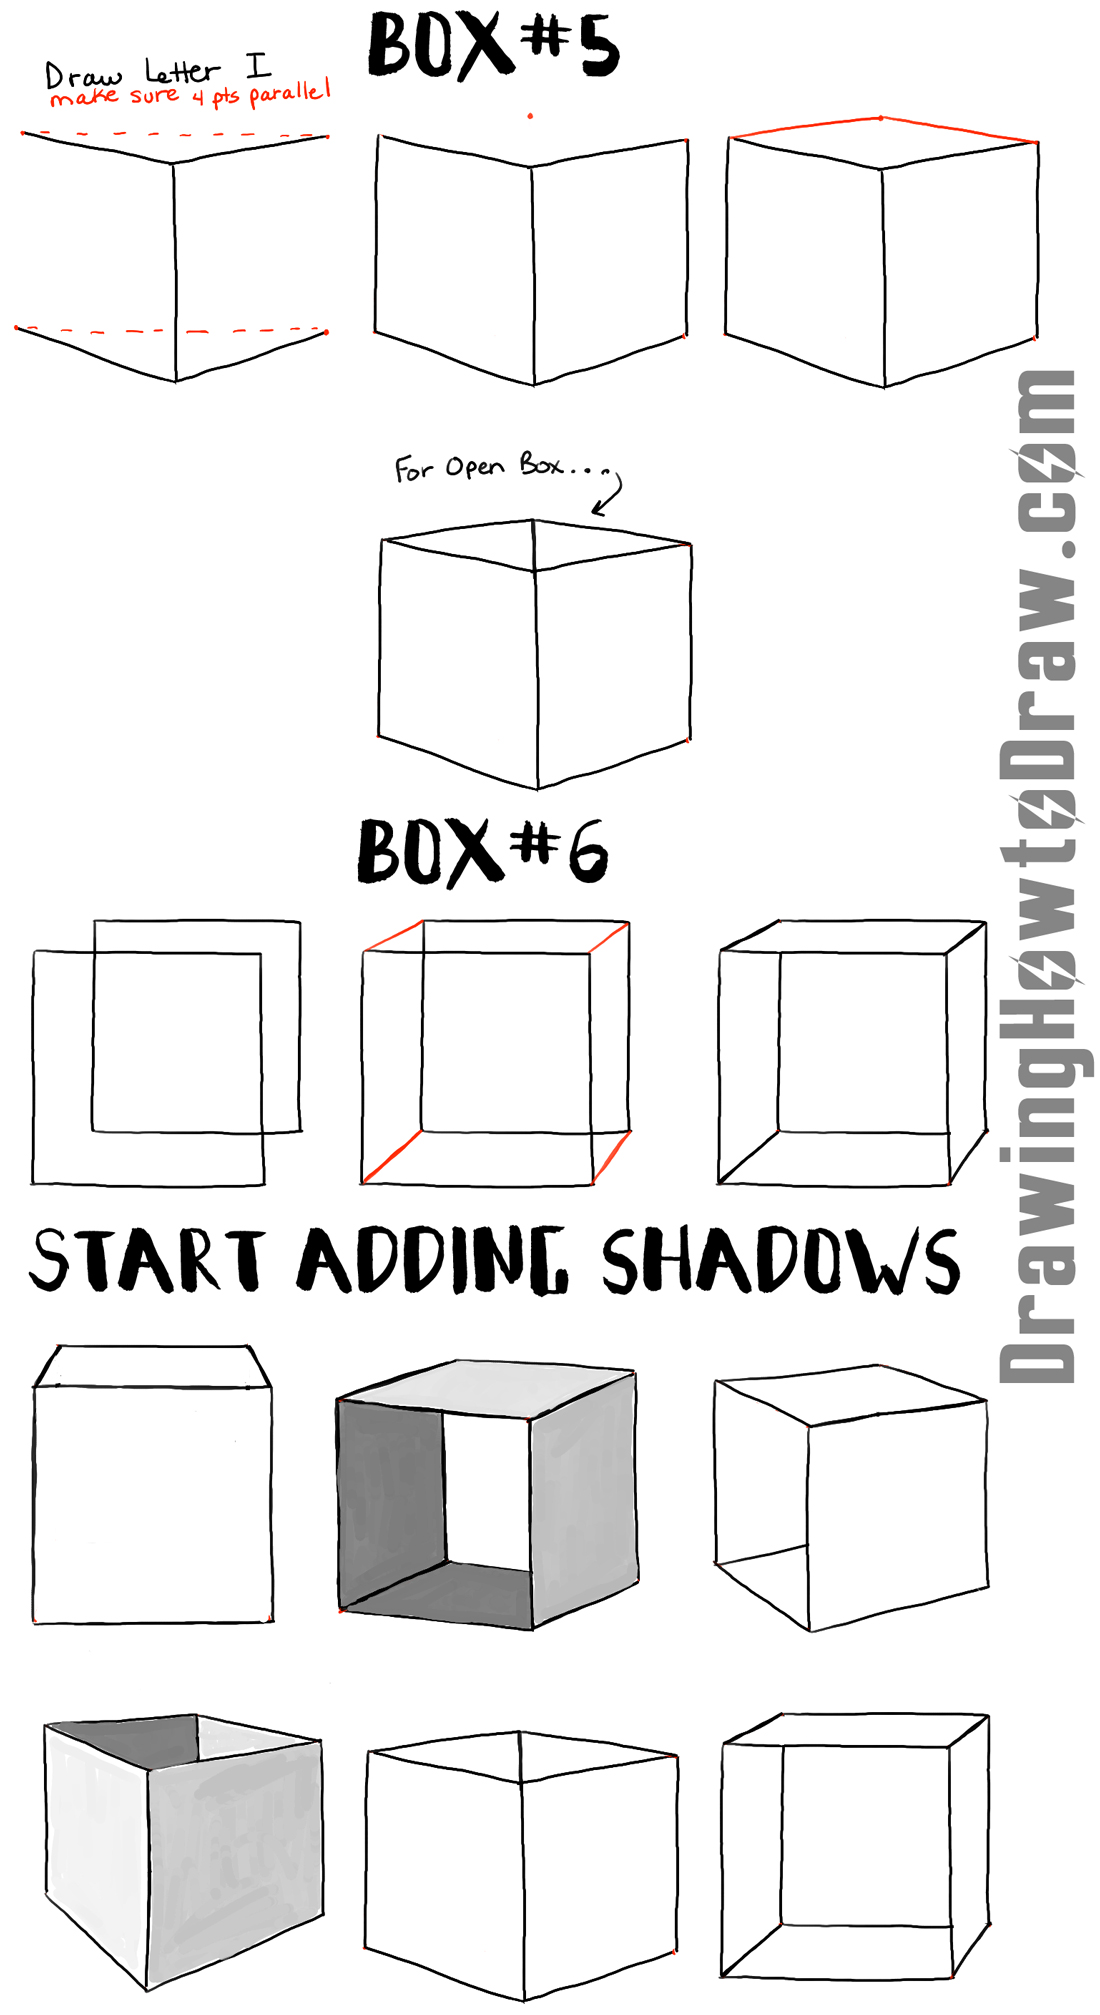
For all of these cubes and boxes (other than box #5), you can see that all you need to do is to draw two boxes. Then connect the boxes with four lines. Some of the boxes you draw at an angle, but just the same, you connect these boxes with straight lines. If a boxes is closed, then you erase lines that would be behind the front of the box. For example, if you had a box in front of you, the front of the box would hide the back of the box, right? Well use this knowledge to help you. Erase any lines that the front of the box would hide. So, in order to draw an open box, you would simply not erase the lines where the open part of the box will show.
Box #5 is a bit trickier. As you see, the corner of the box is headed straight forward. This makes it a bit more difficult. However, I will show you an easy way to draw it. Draw two horizontal lines (I drew them as red dashed lines). Then draw a letter ‘I’ – like shape. The top and bottom of the I, instead of being horizontal, should instead slant upwards toward the red dashed lines. Then draw a point above/in the center. Then connect the top 3 points together.
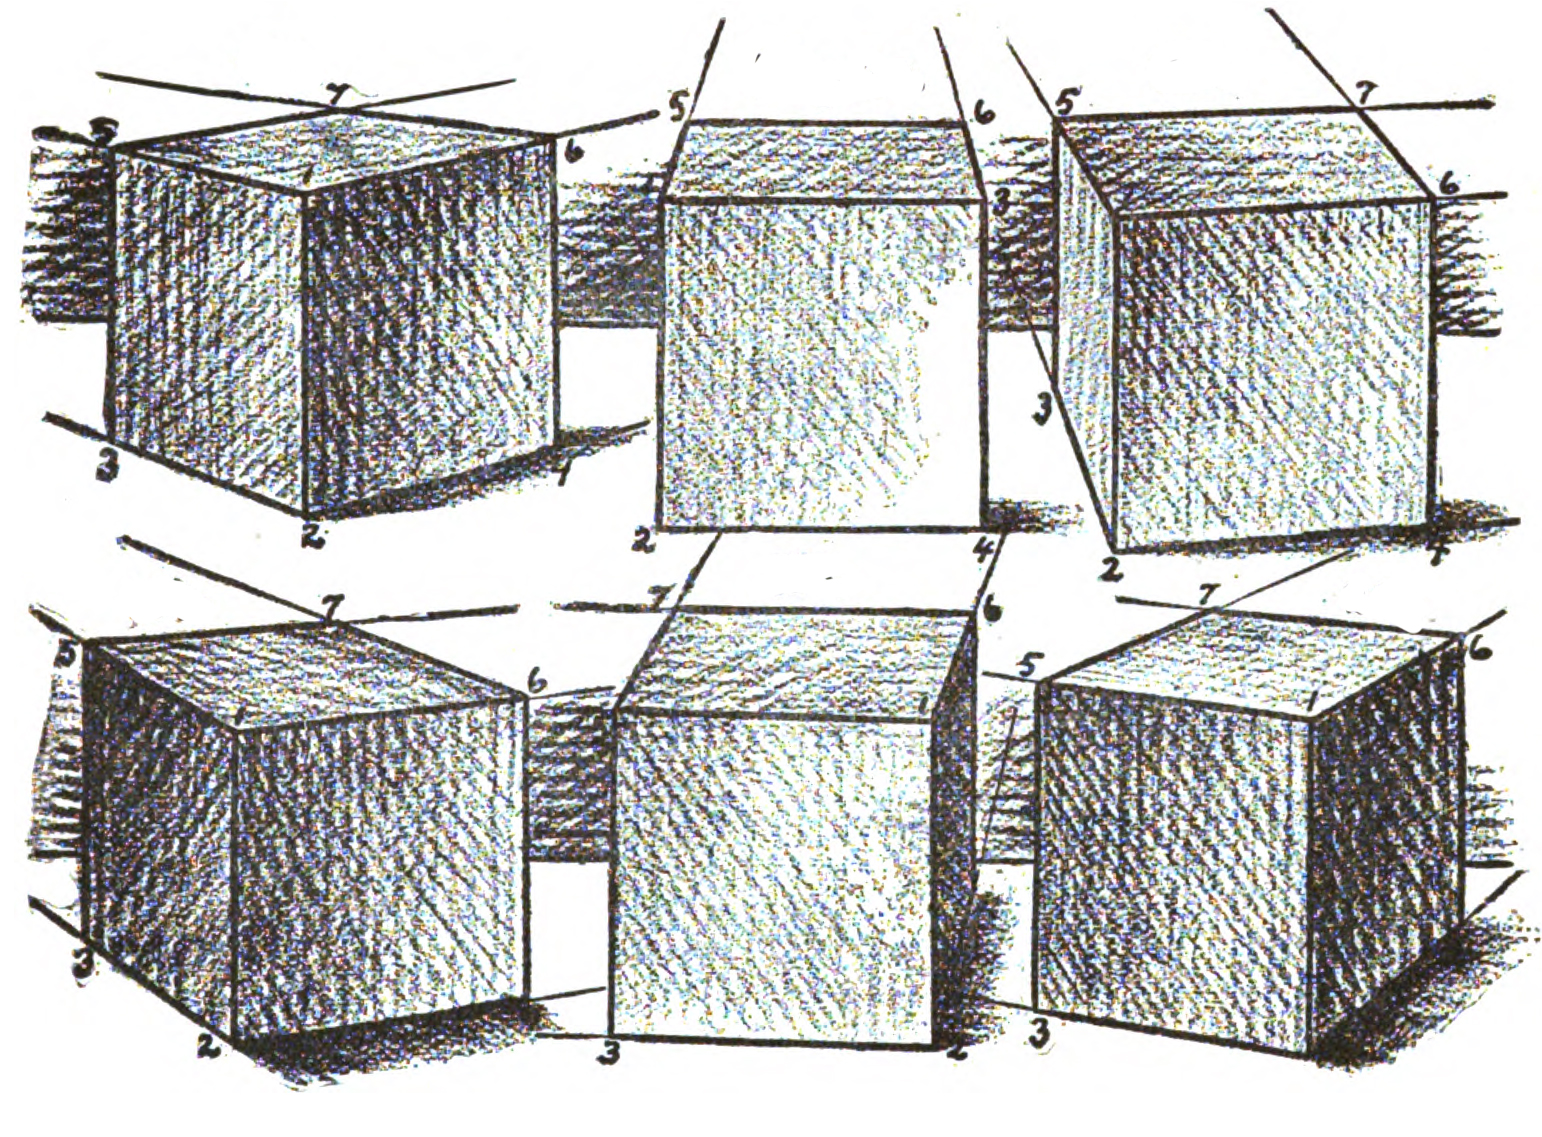
I showed you two examples of shading boxes/cubes. Try shading the remaining boxes. See how it goes for you. Ask me, if you have troubles.
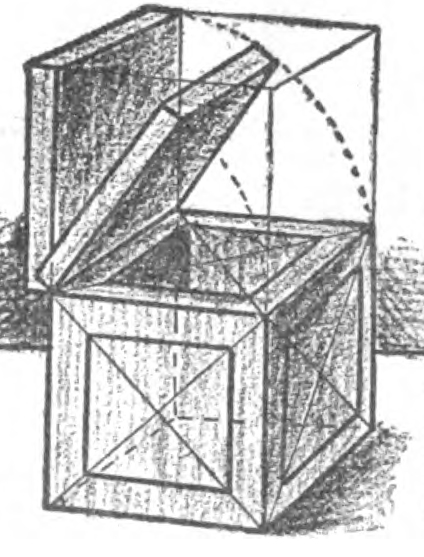
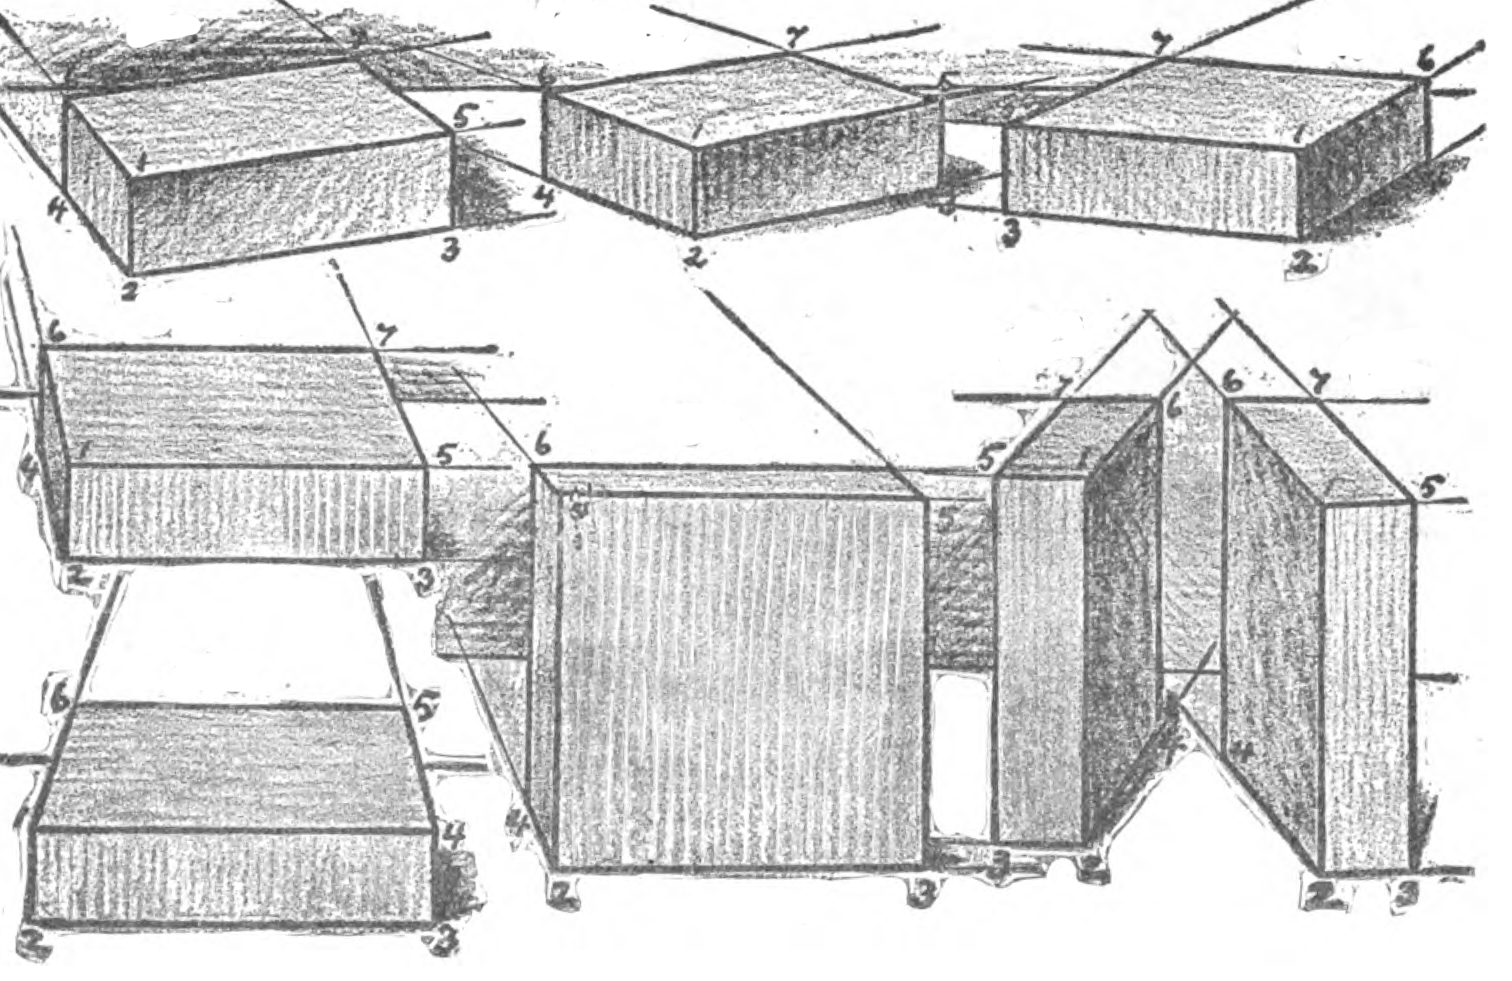
MORE EXAMPLES OF SHADING BOXES AND CUBES
You Might Also Like Our Other Geometric Shapes Lessons
Technorati Tags: drawing cubes, how to draw cubes, boxes, how to draw boxes, shading boxes, shading cubes, shadows, shading, shade
Thank Your for your geometric boxes tutorials. I will use it in our Art studio as an exercise.