Today we will show you how to draw Long Stem Roses. Learn how to draw Long Stem Roses with the following simple step to step tutorial.
Here is an easier Long Stem Rose Drawing Lesson if you would prefer.
How to Draw Long Stem Roses with Easy Step by Step Drawing Tutorial
Step 1
First, draw an oval with a letter ‘C’ shape inside.
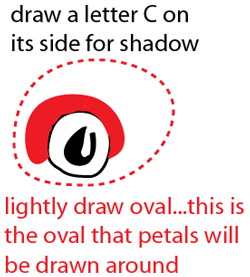
Step 2
Draw a letter ‘C’ shape on its side for the shadow. Lightly draw an oval, this is the oval that the petals will be drawn around.
[ad#draw]
Step 3
Draw some petals around the oval. As you can see the petals are number ‘3’ shaped.
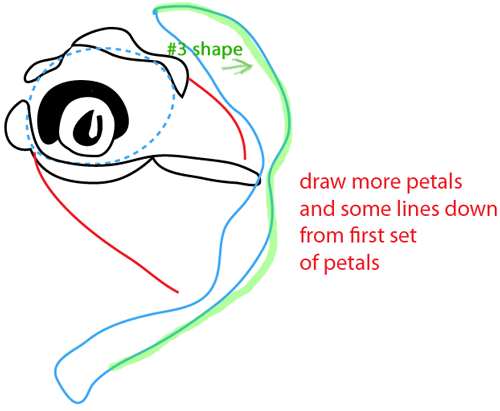
Step 4
Draw more petals and some lines down from the first set of petals.
Step 5
Draw some more petals shaped like number ‘3’.
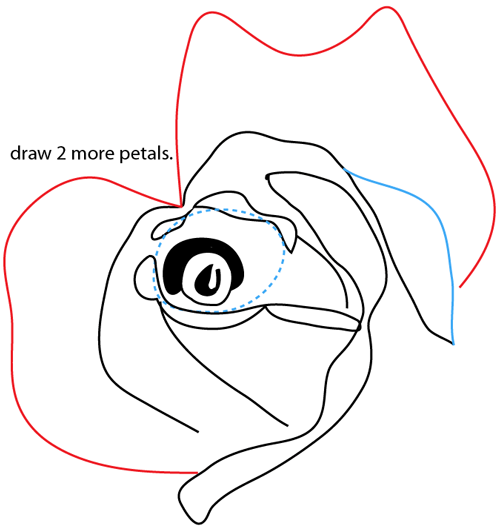
Step 6
Draw two more petals.
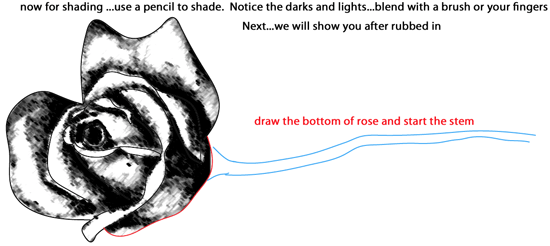
Step 7
Draw the bottom of the rose and start the stem. Now for the shading use a pencil to shade. Notice the darks and lights, blend with a brush or your fingers. Next, we will show you after rubbed in.
Step 8
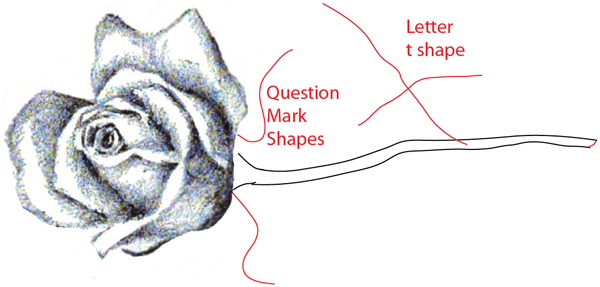
Draw two question mark shapes and a letter ‘t’ shape.
Step 9
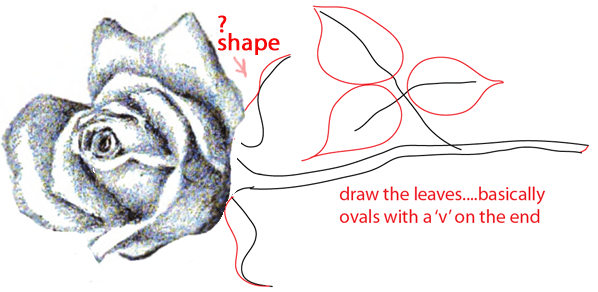
Draw the leaves, basically ovals with a letter ‘v’ shape on the end.
Step 10
Now just add a few more finishing details.
Finished Drawing
I hope that this tutorial helped you to draw Long Stem Roses and that you had a lot of fun
Here is an easier Long Stem Rose Drawing Lesson if you would prefer.
Technorati Tags: How to draw a Long Stem Rose, How to draw Long Stem Roses, How to draw roses, How to draw a rose, rose, roses, Long Stem Roses, Long Stem Rose







first time using the site loved it anyway it was amazing
This is crazy. I love this website. It has taught me so much aout drawing other things. So thanks for all the tutorials.