Page : 1 2
Step 6
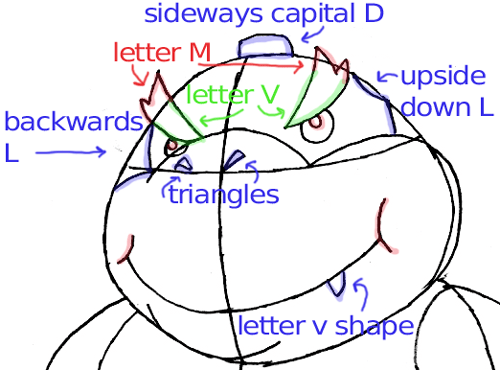
Now, lets continue with the face. Draw the eyebrows…each made up of a letter ‘V’ and a letter ‘M’. Draw triangular nostrils. Draw circle pupils in the eyes. And follow the rest of the directions, detailed in the picture.
Step 7
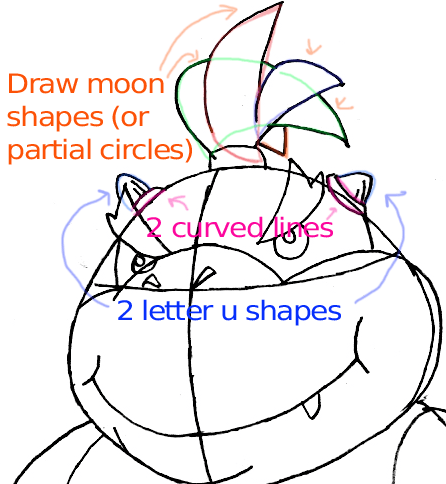
Now draw moon-shapes on top of his hat. Also draw his horns by drawing 2 curved lines connected by 2 lines for the bottoms of the horns…and for the top of the horns, and upside down letter ‘U’.
Step 8
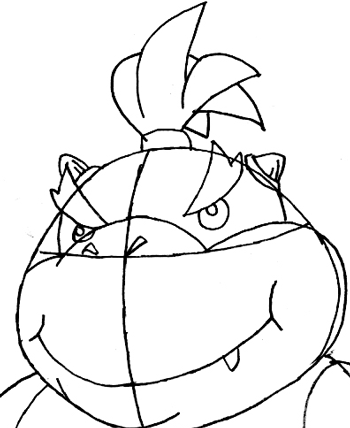
This is what your Bowser Jr. should look like now.
Step 9
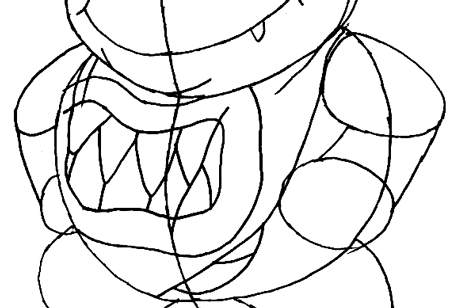
Then draw his bib with the gnashing teeth design. Use triangles for the teeth.
Step 10
Draw fingers on right hand by drawing backwards letter ‘J’ shapes. Add in the shell, including those little spikes peeking from the back.
Step 11
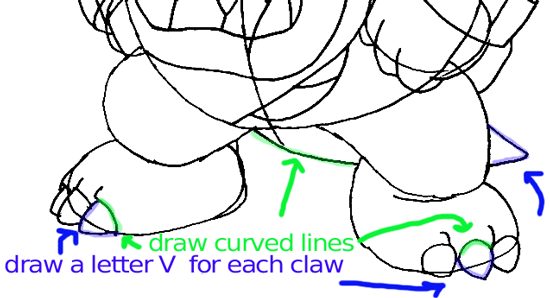
Then, the legs. 3 spiky claws per foot. The tail comes next, peeking from the back.
Step 12
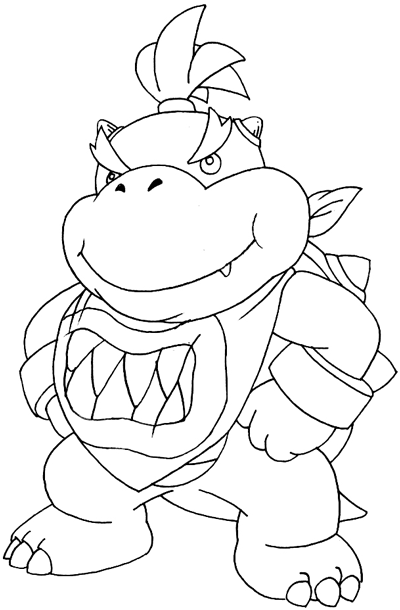
Darken the lines and give Bowser Jr a good outline and you’re done.
Finished Drawing
Now colorize your Bowser Jr. drawing if you want to. I hope that this tutorial helped you that you had a lot of fun
Here are Even More Mario Kart Characters and Super Mario Bros Characters
Technorati Tags: Bowser Jr, Bowser Jr., Bowser junior, how to draw bowser jr, drawing bowser jr, baby bowser, wii game, Mario, Mario Kart, Wii mario kart game, Mario Kart Wii, Kart, drawing characters, game characters, Nintendo, drawing lessons for kids, drawing tutorials
Page : 1 2
Pages: 1 2



This really taught me how to draw him.Even my friends are impressed! Thanks!