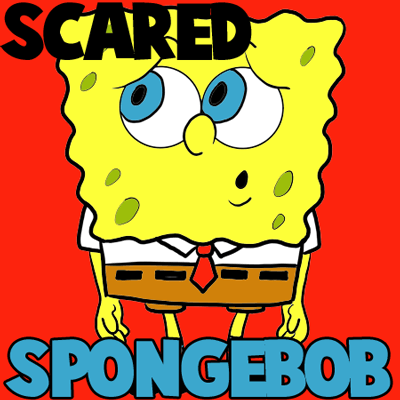

Even Spongebob Squarepants gets scared sometimes. Today, I will show you how to draw him with wide-eyed, terrified expression on his face. The following simple-to-follow drawing lesson is in a step-by-step format that is easy enough to follow. Have fun.
Here are Even More Tutorials With Spongebob Squarepants & Other Characters


To start drawing the depressed Spongebob Squarepants character, you will need to start off with a basic shape. Lightly sketch the shape that you see above (just draw a rectangle that is bigger at the top and smaller at the bottom.) This will be the main part of his body.
Now draw squiggly lines all around 3/4 of the shape that you sketched in the previous step (see the picture above). Below the squiggly lines draw Spongebob’s pants area by drawing a line (the tie is going to be in the center, that is what the space is for but you don’t have to draw the blank in the middle). Draw 4 filled-in rectangles below this line for the belt area.
Now its time to draw Spongebob Squarepants’ tie by drawing an open-at-the-top circle and the 2 outward slanted lines connected by a letter ‘V’ like shape. Also draw Spongebob’s pants by drawing a rectangle like shape below the squiggly lines that you drew in step #2. Also draw the pants legs.
Draw Spongebob Squarepants’ shirt sleeves by drawing a letter ‘L’ shape on the left and a backwards letter ‘L’ on the right side. Draw Spongebob’s shirt collars by drawing a letter ‘W’ like shape around the tie. Draw his legs as well by drawing curved, thin, rectangle-like shapes.
Draw upside down question mark shapes for each arm. Also draw a number ‘8’ like shape for each shoe.
Now fill in the number ‘8’ like shapes to make them look like shoes…draw rectangles for the shoe’s soles. Draw a line for the top of each sock. Also draw a number ‘3’ like shape for the left thumb…draw a backwards number ‘3’ like shape for the right thumb.
Now draw two letter ‘J’ like shapes for the left hand’s fingers. Draw 2 backwards letter ‘J’s for the right hand. Also find the center of Spongebob’s face by drawing a line down the center in both directions.
Now draw a center to the bottom half of Spongebob’s face and draw a guideline. Draw a letter ‘s’ like shape on the left hand. Draw an upside down question mark on the right hand. Draw 2 circles for Spongebob’s eyes.
Draw a curved line for each of Spongebob’s eye lids. Draw a letter ‘c’ like shape for the nose. Draw a downwards curved line at the top of the lids.
Draw backwards letter ‘c’ in each eye.
Draw an oval in each of the eyes for the pupils of the eyes. Draw an oval for the mouth and an upwards curved line under it.
This is what Spongebob Squarepants should look like.
Here is what a colorized Spongebob Squarepants would look like. Use the above colors. I hope that you had fun.
There are many more Spongebob drawing tutorials … and many other facial expressions to draw for him. We also have other characters. Here are Even More Tutorials With Spongebob Squarepants & Other Characters
Technorati Tags: draw scared spongebob, scared spongebob, scared spongebob squarepants, draw terrified spongebob, terrified spongebob, petrified spongebob, draw spongebob, draw spongebob squarepants, drawing spongebob, drawing spongebob squarepants, how to draw spongebob, how to draw, drawing cartoons, spongebob squarepants, spongebob, how to draw spongebob squarepants, drawing for kids, learn how to draw, drawing lessons, drawing tutorials
Today, I'll show you how to draw a cartoon girl pointing at herself with step-by-step…
Today, I'll show you how to draw a crying cute little cartoon guy who is…
Today, I'll show you how to draw an adorably super-cute cartoon owl on a witch's…
Today I will show you how to draw a super cute baby-version of Winnie The…
Today I'll show you how to draw the famous Pusheen cat from social media, such…
Today I'll show you how to draw this super cute chibi version of Deadpool from…
View Comments
This website is the best one I've used ???
Thank you!!!
this website awesome
its awesome ! i was not so good at art but now i am !
i have looked for a drawing site and i must say this is simply the best i found it easy to follow the instructions and drew a fab drawing.
Thats great!!! I'm proud of you. :)