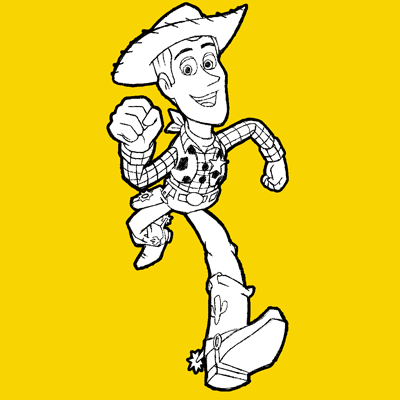

Toy Story 1, 2, and 3 is a very popular Movie and most kids and adults love those Disney Pixar movies. The star characters of the movie are Woody and Buzz Lightyear. Today, I will show you how to draw Woody from Toy Story. Have fun.
Here are Even More Toy Story Drawing Tutorials
Start off lightly sketching a circle for Woody’s face. Then lightly draw guidelines around the circle (as if it were a ball) to help you place the facial features. Woody is looking towards the right, so the guidelines are closer to the right. This is called the cross section for the face. The vertical line determines the “center” of the head where the nose is placed, and the horizontal line determines where the eyes will be placed.
After you draw the circle for Woody’s face, draw a ‘u’ shape below it for his chin and then turn it into a lollipop with a curved stick, but add a thin “v” shape at the bottom of the circle. The curved stick will be Woody’s spine.
Draw a round cornered rectangle for his body and neck. Also sketch cross-guidelines for this as well.
Draw two stick sets for his arms and circles for hands.
Draw two stick sets for his legs. He is running so some foreshortening is occurring (this is when an object or part of a figure seems much larger than it should appear because it is closer to you).
Add some muscle to the arms and legs…this is like adding mass and form to the stick figure.
Now lets start focusing on the face a bit. Use the cross-hair guidelines to place the facial features. Draw 2 circles along the horizontal line (noticing where they are in relation to the vertical (up and down) line. Within the circles…draw 2 much smaller circles within each eye for his pupils and irises. Draw the top of the mouth right below the circle.
Draw eyelids for each eye by drawing a downwards curved line on the top of each eye. Draw the nose (sort of a ‘J’ like shape). Draw the bottom curve of Woody’s mouth. Draw a letter ‘C’ like shape for Woody’s ear now.
Now draw the right side of the mouth and the tongue (together they look like a number 2 that is sideways). Draw a curved line for the inside of Woody’s ear. Also draw 2 curved lines that connect for each eyebrow.
Draw a little letter ‘c’ like shape inside the ear. Draw the teeth as well.
Now finish drawing his face and hat. The hat is an oval shape on the left side that turns into a sideways letter ‘v’ shape on the right. Also draw the top of the hat by drawing a sideways letter ‘J’. Remember that his cowboy hat has stitches at the rim.
Draw his clothes and fingers. Look at his right-hand’s fingers…they look like letter ‘J’s and the thumb could be seen as an oval. Remember that Woody has five fingers unlike most cartoon characters. Draw plaid shirts by drawing curved lines around his body and then crossing in the other direction.
Draw his pants and boots.
Erase your guide lines, darken the outside lines and you’re done drawing Woody.
Here are Even More Toy Story Drawing Lessons (Including Buzz Lightyear)
Technorati Tags: draw woody, drawing woody, draw woody from toy story, drawing toy story, draw toy story, how to draw woody, toy story, drawing for kids, how to draw, drawing lessons, drawing tutorials
Today, I'll show you how to draw a cartoon girl pointing at herself with step-by-step…
Today, I'll show you how to draw a crying cute little cartoon guy who is…
Today, I'll show you how to draw an adorably super-cute cartoon owl on a witch's…
Today I will show you how to draw a super cute baby-version of Winnie The…
Today I'll show you how to draw the famous Pusheen cat from social media, such…
Today I'll show you how to draw this super cute chibi version of Deadpool from…
View Comments
I feel like I'm the oldest person this site In my teens and can't even draw a circle
Keep trying...it just takes practice.
It helped. thank you. ;)
This was GREAT!! It helped me sooo much i finished it and it came awsome!
IMPOSABULAND CON FUSING
awsome but tiring