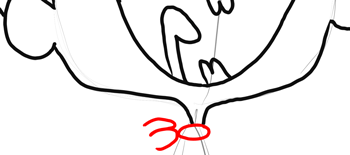
Step 14
Now write the number ’30’ to start off the handkerchief that is around Flapjack’s neck.
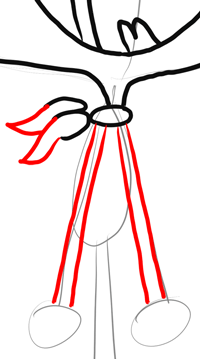
Step 15
Now finish off the Handkerchief by drawing a sideways letter ‘M’ shape (as seen above). Also draw an arm on either side of Flapjack’s body by drawing 2 lines that point towards the left and 2 lines that point towards the right.
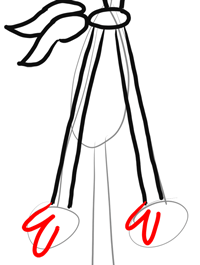
Step 16
Draw a backwards number ‘3’ on each hand, for fingers.
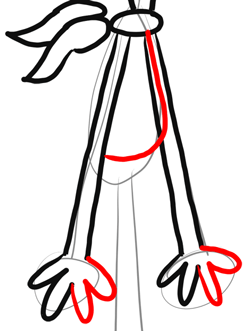
Step 17
Draw a letter ‘J’ shape for Flapjack’s belly. Now draw a number ‘3’ for fingers on both hands.
Step 18
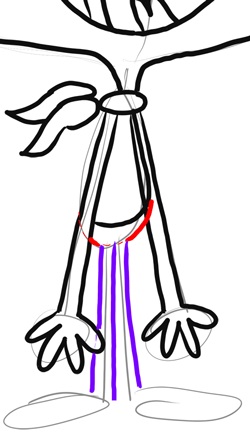
Draw a letter ‘u’ above the legs. Draw 3 lines, one pointed slightly towards the left, straight line, then a line pointed slightly towards the right.
Step 19
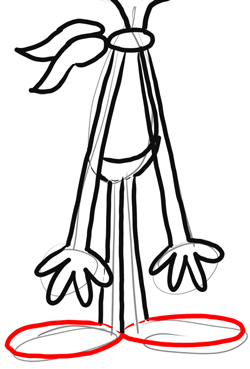
Draw an oval for each foot.
Step 20
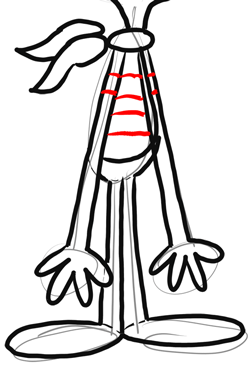
Draw stripes on Flapjack’s shirt belly and sleeves.
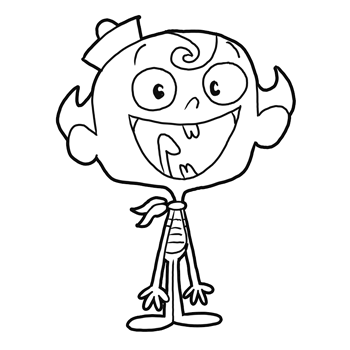
Step 21 – Finished Drawing of Flapjack
Now you just have to erase lines that you don’t need and outline the ‘correct’ lines with a pen or marker. If you are having problems figuring out which lines to erase, then reference my drawing (above) for help. With the thick outside dark marker line, darken the outside lines to make it look sharp. Doesn’t Flapjack look Awesome?!
Technorati Tags: draw flapjack, drawing flapjack, Marvelous Misadventures of Flapjack, how to draw flapjack, flapjack, flapjack drawing, drawing lessons, drawing tutorials, how to draw, drawing for kids, step by step drawing
wow this is helpfull
Thanks i love flap jack!