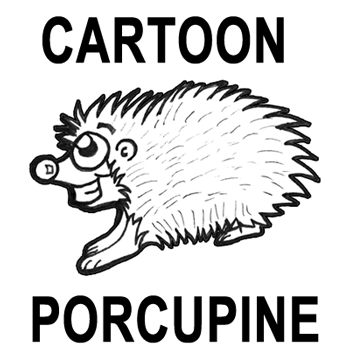
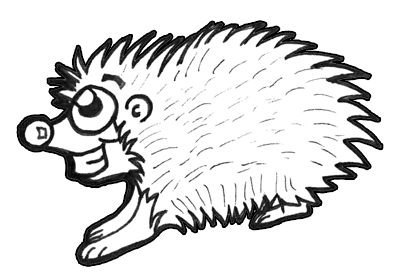
Porcupines are adorable, with their adorable little faces popping out of all of their spikey thorns. I thought that it would be fun to draw cartoon porcupines today so I have put together a simple step by step tutorial for kids of all ages, teens, and adults. Build up the porcupine’s form with simple shapes, letters, and numbers. Enjoy the cartooning lesson.
How to Draw Cartoon Porcupines with Easy Step by Step Drawing Lesson
Step 1
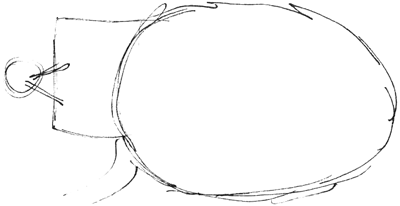
First, draw the basic shapes that make up the form of the porcupine. For example, draw an oval for the porcupine’s body and a rectangle for his head.
Step 2
What you see above is the porcupine’s head…find the center by drawing a horizontal and vertical line through the center of the rectangle. In the middle, top section of the rectangle draw the porcupine’s eye. Firstly, draw a circle (highlighted in green). Within that circle, draw a smaller circle (highlighted in pink). Then at the top left hand side of the green circle, draw another circle that is about the same size of the one highlighted in pink.
Step 3
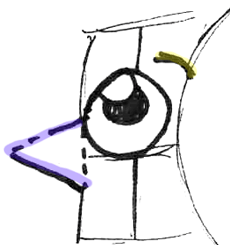
Now draw the beginnings of the porcupine’s nose / snout. Draw a triangle like shapes (highlighted in purple). Also draw the porcupine’s eyebrow (highlighted in yellow).
Step 4
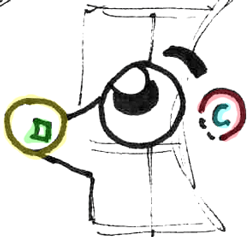
Draw a circle at the end of the triangle that you drew in step #3 (highlighted in yellow). Draw the highlight by drawing a curved rectangle (highlighted in green). Draw a circle (highlighted in pink) with a letter ‘c’ (highlighted in blue) for the porcupine’s ear.
Step 5
Draw a backwards capital letter ‘E’ (highlighted in blue) for the porcupine’s mouth.
Step 6
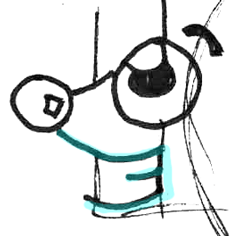
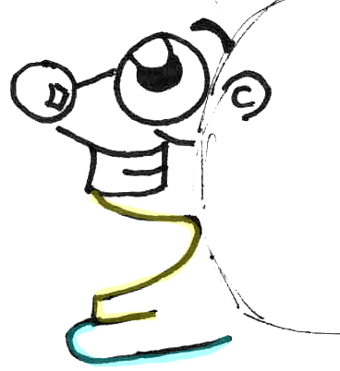
Draw a number ‘2’ like shape (highlighted in yellow) right under the mouth that you just drew. Draw a sideways letter ‘J’ like shape under the ‘2’ shape (highlighted in blue).
Step 7
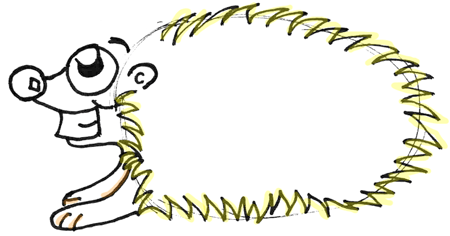
Draw zig-zaggy letter ‘M’ like shapes all around the porcupine’s oval shape (highlighted in yellow). Also draw the rest of the front leg’s features (highlighted in orange).
Step 8
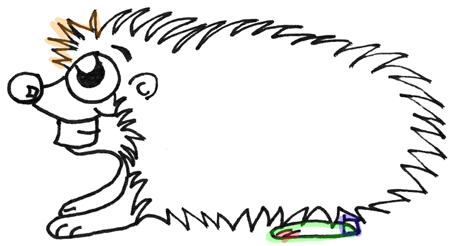
Draw the front zig-zaggy hair (highlighted in orange). For the back foot, draw an oval (highlighted in green), and a rectangle (highlighted in purple)…with 2 lines for fingers (highlighted in orange).
Step 9 – Finished Cartoon Porcupine Drawing Tutorial
Now just erase lines that you don’t need and outline the ‘correct’ lines with a black pen or marker. Making thick, interesting lines instead of the thin pencil lines makes quite a difference in the end result, doesn’t it? If you are having problems figuring out which lines to erase, then reference my drawing (above) for help. Now you will have an amazing cartoon drawing of a cartoon whimsical porcupines to show off to your friends.
Technorati Tags: draw porcupines, how to draw porcupines, drawing porcupines, draw cartoon porcupines, drawing cartoon porcupines, porcupines, cartoon porcupines, comic porcupines, how to draw, drawing lessons, drawing tutorials, drawing for kids, cartooning, draw cartoons, draw comics

Thx man love it!!!!!
thanks buddy