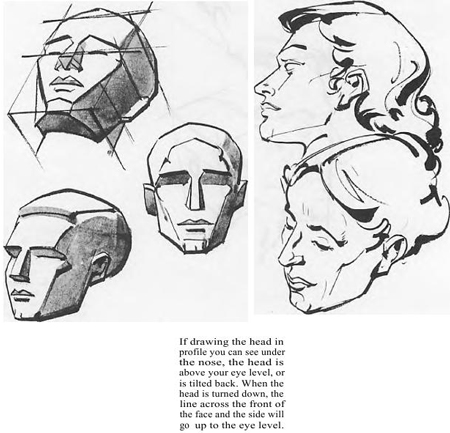
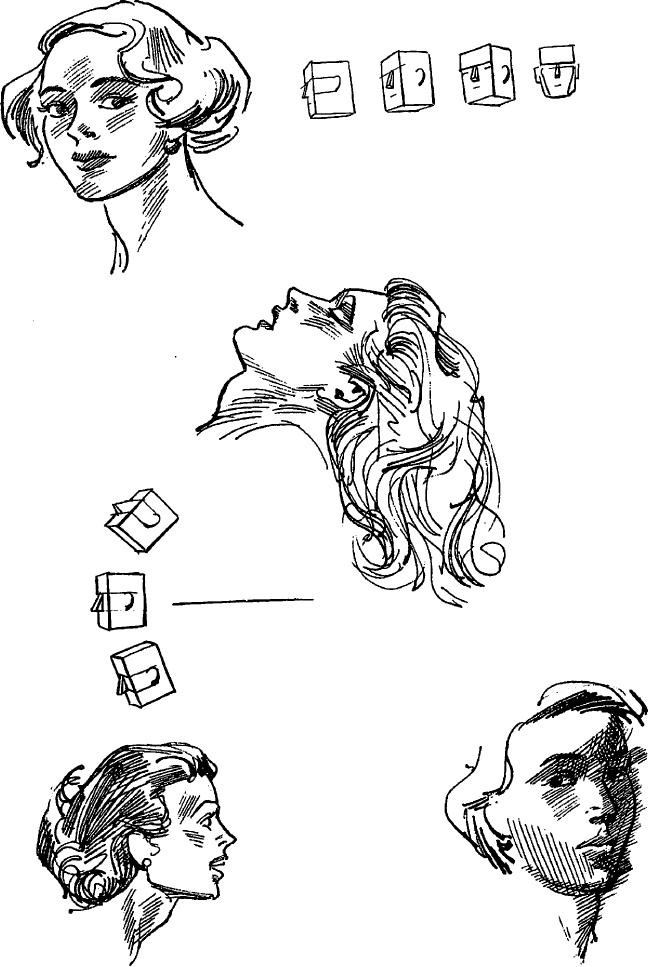
You can better understand the head in perspective by thinking of it as having six sides and being cube-like in structure. A cube establishes the front, side, bottom and top of the head quickly. After you can draw a cube in any position in perspective, then learn the bone structure and shape of the head and you will be able to place it in whatever position you choose.
The modeling of a head in light and shade becomes easier with the major planes established. On the front of the face, keep the forehead square, the cheek bones flat, the area under the nose and around the mouth round, and the jaw triangular.
Here's a simple way to place the features accurately when drawing a head. First draw a vertical line down the middle of the face. Then draw a horizontal line halfway between the top of the head and the bottom of the jaw, on which to align the position of the eyes. Halfway between the eyes and the chin place the base of the nose; and half- way between the base of the nose and the chin place the center line of the mouth. Remember the space between the eyes is the same as the length of another eye. The length of the ear is the same as the distance between the top of the eye and the base of the nose. The width of the mouth will correspond with the distance between the eyes when they are focused straight ahead.
While the length, breadth and thickness of features may vary on different people, it is important to have a basis from which to start. When drawing the entire figure, first establish the size of the head in order to proportion the rest of the figure to its size.
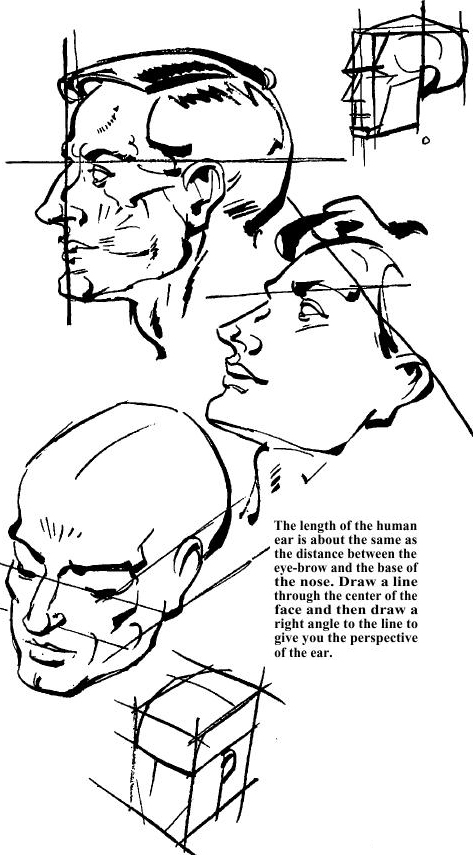
The length of the human ear is about the same as the distance between the eye-brow and the base of the nose. Draw a line through the center of the face and then draw a right angle to the line to give you the perspective of the ear.


In the above picture, you can see shading of the human face / head. Shade the head with the idea of giving your drawing an illusion of solidity. At first use as few tones as possible. Start with three simple planes: light, medium and dark. The planes facing the light are white, the side planes are a medium tone, and all underneath planes are dark. After this is well understood you may proceed with as many tones as you wish, trying at no time to lose the three tones you start with. Remember, all the shading in the world will not improve a bad drawing.


The only movable bone of the head is the jawbone (Inferior maxillary). The two knob-like heads fit into sockets in the temporal part of the skull just behind the entrances to the eardrums. The flat, pointed ends in front of the knobs slide under the Zygomatic arch. The large muscle called the masseter controls the mastication andgrinding of food. The masseter is attached from under the Zygomatic archto the end of the lower jaw.The temporal muscle raises and lowers the jaw. It comes from thetemporal part of the skull to the top ridge of the Inferior maxillary.

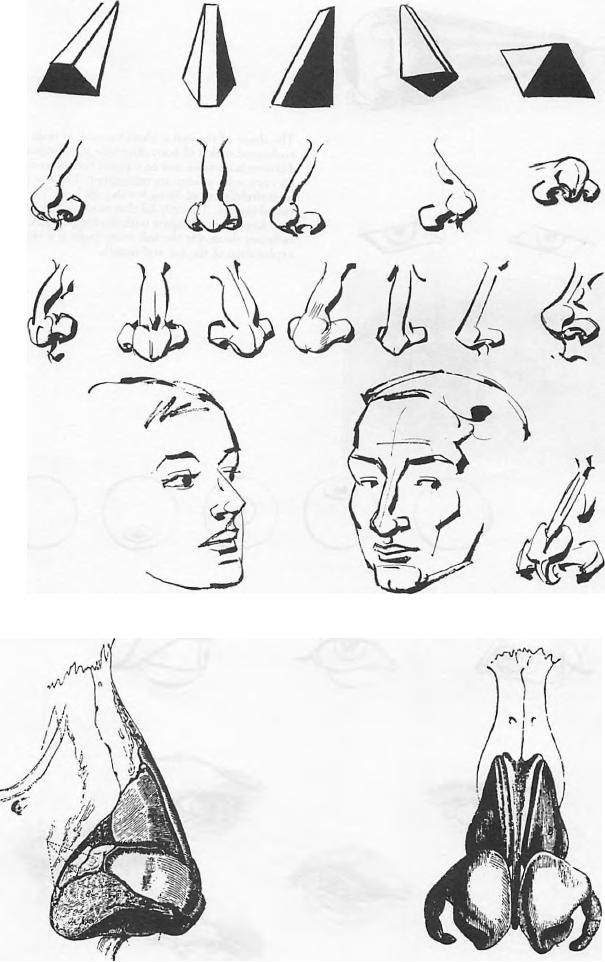
Look at the images above. The muscles that control the mouth are called the Buccinators (cheek muscles) and the muscles of expression are called lesser and greater Zygomatics. They are connected from the Zygomatic arch down to the circular ring of cartilage surrounding the mouth.
The features are the parts of the face that give it expression. When they are immobile the face is blank and expressionless. The features normally express what the brain is thinking. It is important to know their structure in order to best express the emotions of the figure. A great deal of time is spent by students of the drama learning how to transmit to the audience the character of the role they are playing. Many times the features convey quickly what would take a great many words to explain.
Facial expression plays an important part in the fine and commercial arts. Michelangelo said a great deal with the expressions on the faces of both his sculpture and painting.
The sale of products in commercial art depends a great deal upon the expression of people handling, using or eating them in advertisements. Man uses his features as a method of communication every day of his life. A nose is not just a blob put on a face, a mouth not just an opening and eyes not just two dots, each feature has a basic structure. Learning their shape and muscular construction will aid a great deal in your ability to create better pictures.

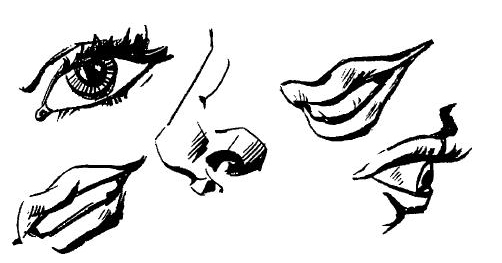
Look at the images above. The shape of the eye is almost round. It rests in a cushioned socket of bony structure surrounding it. Four main muscles, one on top and bottom and one on each side, govern its movement. The eye projects slightly out of its socket though both lids surround the eye. The only lid that moves is the upper one. Keep the eyes apart with the length of an eye between them. On the following page is a simple explanation of the ear and mouth.

Look at the above pictures and immitate to learn how to draw human ears.

Look at the example Illustrations above of female and male mouths to learn how to draw a person's mouth and lips on your own.