
To depend upon your eye to draw the human figure is
a mistake. Regardless of how many drawings you might
make in this manner, you will be constantly groping for
knowledge. Year after year, sketch classes are filled by the
same students trying to learn by this hit and miss method.
Only when you try to learn how the human figure is constructed,
does your ability to draw the human figure increase.

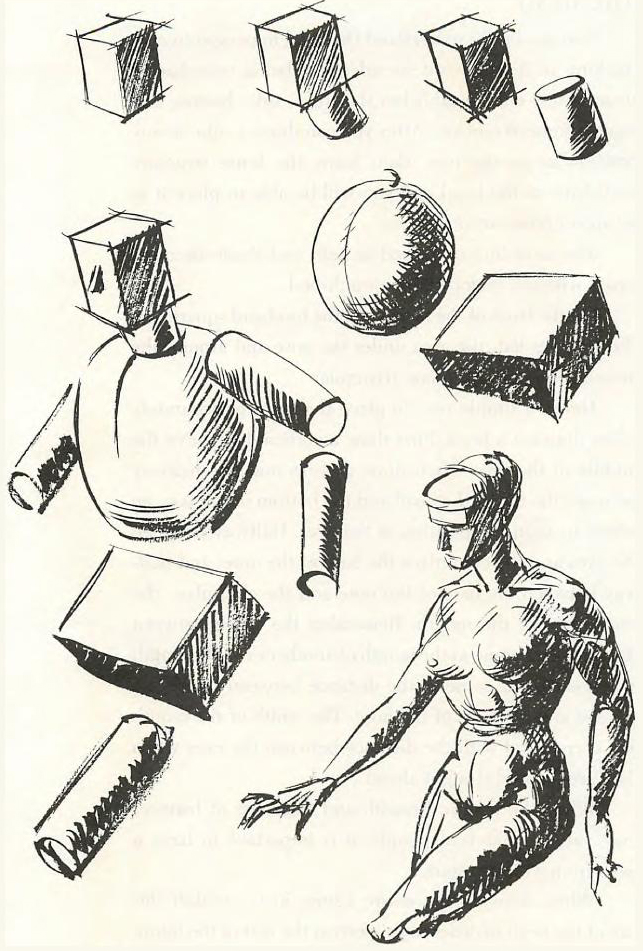
First you must learn the large simple concepts of the
figure--the head, chest and pelvis--to recognize in what
position they are when drawing from the figure. The head
should be thought of as being a square, a cube having six
sides--front and back of the head, top and bottom and two
sides. The second large mass is the chest, its concept being
round. The third large mass is the pelvic region ( or hips )
which is a square, also with six sides, back, front, two sides,
bottom where the legs connect to the body, and on top
where the chest is attached. These three major forms do
not break but can be in different positions. Attached to these
three large masses are the arms, legs, neck and abdominal
muscles. These can all twist, bend and turn.
In the first pages on anatomy, you will see these concepts
in various positions. At first make drawings using this
concept. Of course, a knowledge of perspective is necessary
in order to put the figure in different positions.
After you have made the preceding drawings, you may
go on to the following example picture where you can see
structures of the human forms starting with the head.
When starting a figure drawing, first mark the length
of your drawing from the top of the head to the bottom of
the feet. This is to avoid amputation of the figure by starting
on top and hoping to get all of the figure on the page. Drawing
at random is a bad practice and results in bad amputation of
the figure. After marking the top and bottom of the figure, block
in the head. Then establish the pit of the neck. Make a
curved line showing direction of the chest, and then continue
that line through the abdomen to the crotch. The crotch
can be regarded as the half-way mark in the figure. This
system will also apply to the back, using the spine as the
action line.
In shading your drawing, first, keep in mind the large
masses. At the beginning, keep them simple as possible. Try
to use as few tones as possible and remember, that all the
shading in the world will not make a bad drawing good.
The drawing of the figure should not be just a series
of bumps and shading. A student learns only when he
questions the shape and function of each muscle. Only then can
he use anatomy creatively.
A famous anatomy teacher of mine at the Art Students
League once said, "I've given fifty years of my life to prove
and teach that a varicose vein is not a muscle." From that
day on I started to learn something about the human figure.


Try reducing the above figure drawings to the simple concept previously
explained. Use the three large masses, head, chest and pelvis and pipe forms of
arms and legs, to show fore-shortening and direction. If this is understood, the
following anatomical explanations will be learned much easier.


