
By the same method of measuring with the pencil at a fixed distance from the eye, notice
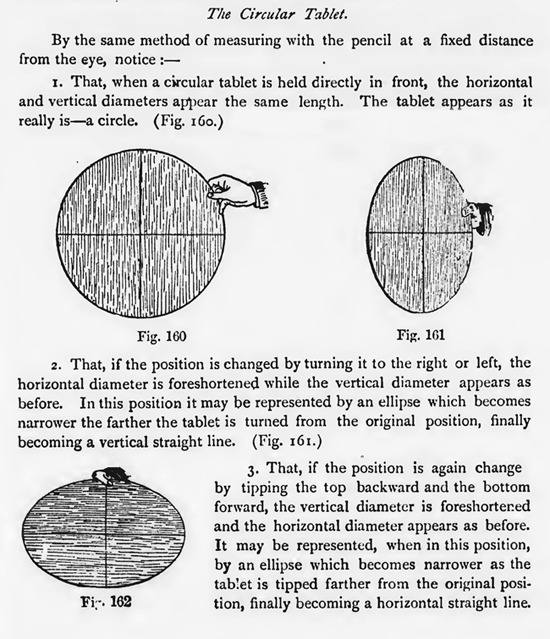
1. That, when a circular tablet is held directly in front, the horizontal and vertical diameters appear the same length. The tablet appears as it really is—a circle. (Fig. 160.)
2. That, if the position is changed by turning it to the right or left, the horizontal diameter is foreshortened while the vertical diameter appears as before. In this position it may be represented by an ellipse which becomes narrower the farther the tablet is turned from the original position, finally becoming a vertical straight line. (Fig. 161.)
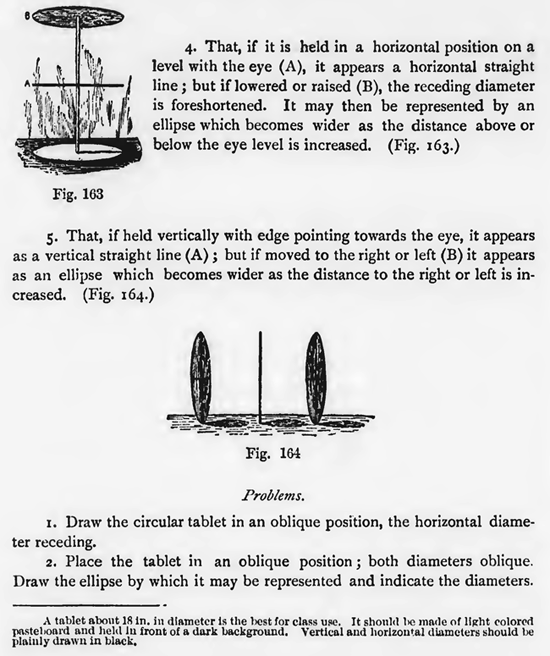
3. That, if the position is again change by tipping the top backward and the bottom forward, the vertical diameter is foreshortened and the horizontal diameter appears as before. It may be represented, when in this position, by an ellipse which becomes narrower as the tablet is tipped farther from the original position, finally becoming a horizontal straight line.
4. That, if it is held in a horizontal position on a level with the eye (A), it appears a horizontal straight line ; but if lowered or raised (B), the receding diameter is foreshortened. It may then be represented by an ellipse which becomes wider as the distance above or below the eye level is increased. (Fig. 163.)
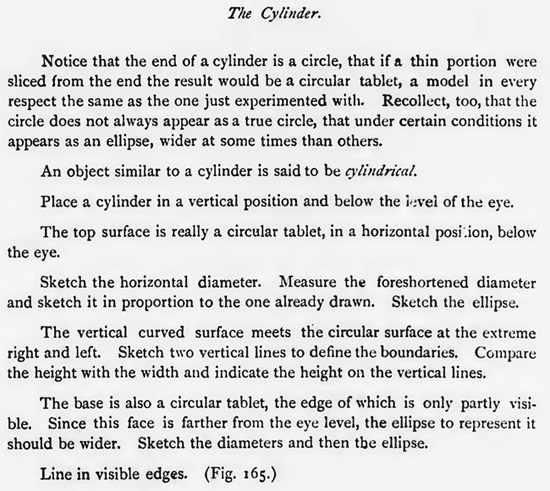
5. That, if held vertically with edge pointing towards the eye, it appears as a vertical straight line (A); but if moved to the right or left (B) it appears as an ellipse which becomes wider as the distance to the right or left is increased.
1. Draw the circular tablet in an oblique position, the horizontal diameter receding.
2. Place the tablet in an oblique position ; both diameters oblique. Draw the ellipse by which it may be represented and indicate the diameters. A tablet about IR in. in diameter is the best for class use. It should be made of light colored pasteboard and held In front of a dark background. Vertical and horizontal diameters should be plainly drawn in black.
3. Draw the circular tablet as it appears when lying on the desk in front ; both diameters receding.
4. Place the circular tablet in a slanting position ; one diameter horizontal, the other receding upward from the ground. Draw the ellipse by which it is represented and indicate the diameters.
5. Draw a group of three circular tablets each in a different position.


Notice that the end of a cylinder is a circle, that if a thin portion were sliced from the end the result would be a circular tablet, a model in every respect the same as the one just experimented with. Recollect, too, that the circle does not always appear as a true circle, that under certain conditions it appears as an ellipse, wider at some times than others. An object similar to a cylinder is said to be cylindrical. Place a cylinder in a vertical position and below the i Nei of the eye. The top surface is really a circular tablet, in a horizontal position, below the eye. Sketch the horizontal diameter. Measure the foreshortened diameter and sketch it in proportion to the one already drawn. Sketch the ellipse. The vertical curved surface meets the circular surface at the extreme right and left. Sketch two vertical lines to define the boundaries. Compare the height with the width and indicate the height on the vertical lines.
The base is also a circular tablet, the edge of which is only partly visible. Since this face is farther from the eye level, the ellipse to represent it should be wider. Sketch the diameters and then the ellipse.
Place the cylinder in different positions. Draw and compare with fig. 166 and 167.
In fig. 166 three outline sketches are shown. A may be described as to the left ; B, in front ; C, to the right.
To faciliate the taking of measurements of foreshortened diameters, Indicate two diameters at right angles and take measurements along these.
A cylinder for class use should be at least 2 ft. long, 1 ft. in diameter and of a light color, the diameters being In black.
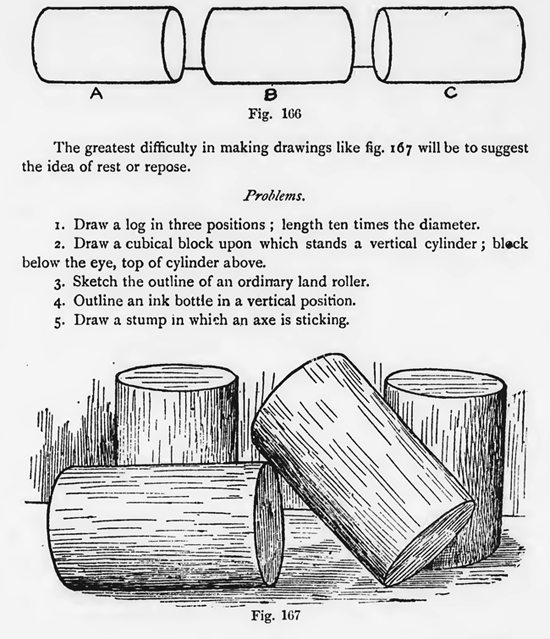
The greatest difficulty in making drawings like fig. 167 will be to suggest the idea of rest or repose.
1. Draw a log in three positions ; length ten times the diameter.
2. Draw a cubical block upon which stands a vertical cylinder; block below the eye, top of cylinder above.
3. Sketch the outline of an ordinary land roller.
4. Outline an ink bottle in a vertical position.
5. Draw a stump in which an axe is sticking.
Place these in different positions and draw their outline. Draw others from memory. A teapot, a a cup, a sugar bowl, a goblet, a fruit can, a bottle, a post, a barrel, a pail and a link of stove pipe are good examples.
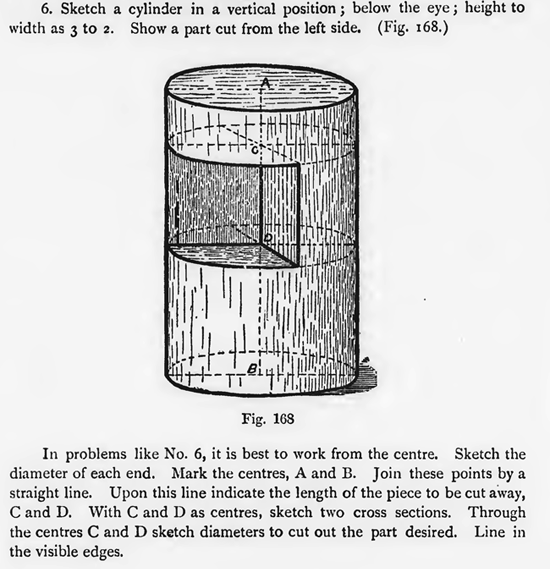
6. Sketch a cylinder in a vertical position ; below the eye ; height to width as 3 to 2. Show a part cut from the left side.
In problems like No. 6, it is best to work from the centre. Sketch the diameter of each end. Mark the centres, A and B. Join these points by a straight line. Upon this line indicate the length of the piece to be cut away, C and D. With C and D as centres, sketch two cross sections. Through the centres C and D sketch diameters to cut out the part desired. Line in the visible edges.
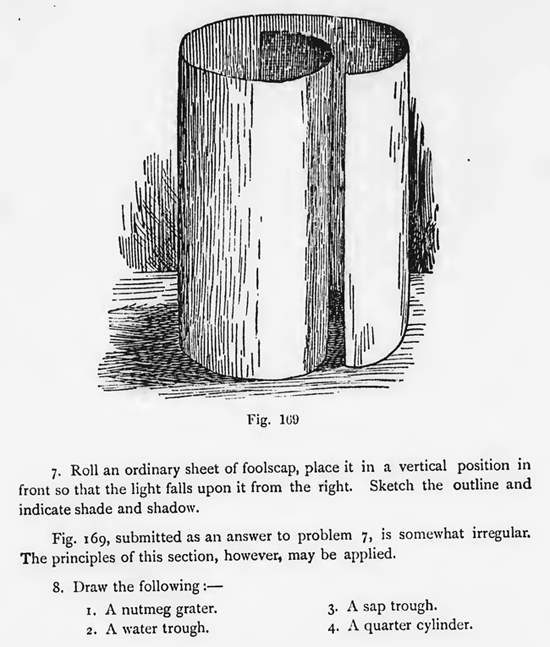
7. Roll an ordinary sheet of foolscap, place it in a vertical position in front so that the light falls upon it from the right. Sketch the outline and indicate shade and shadow.
Fig. 169, submitted as an answer to problem 7, is somewhat irregular. The principles of this section, however, may be applied.
8. Draw the following :— 1. A nutmeg grater. 2. A water trough. 3. A sap trough. 4. A quarter cylinder.
9. Draw a half cylinder ; below the eye ; rectangular surface receding at right angles to the picture plane. (Fig. 17o and 171.)
Fig. 173 shows the construction lines necessary to outline the cone. The apex is directly above the centre of the base when the base is horizontal. The base of the cone is a circular surface and will appear as a circular tablet.
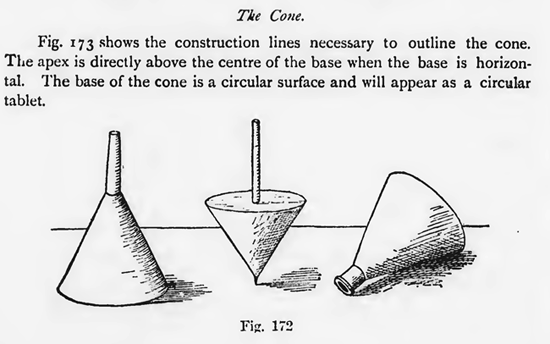
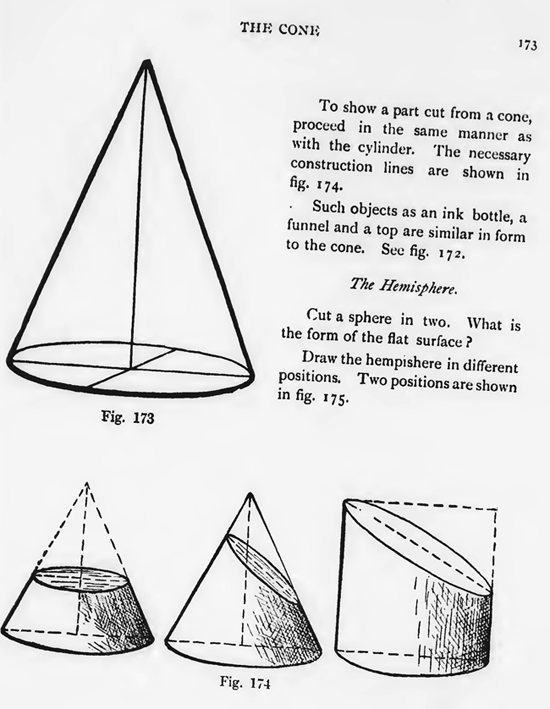
To show a part cut from a cone, proceed in the same manner as with the cylinder. The necessary construction lines are shown in fig. 174. Such objects as an ink bottle, a funnel and a top are similar in form to the cone. See fig. 172.
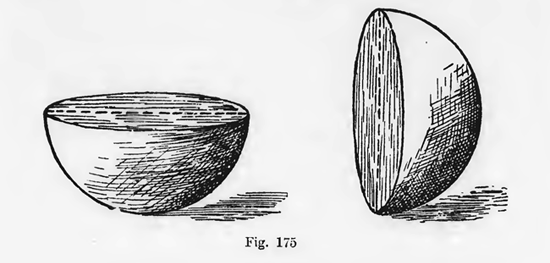
Cut a sphere in two. What is the form of the flat surface? Draw the hempishere in different positions. Two positions are shown in fig. 175.
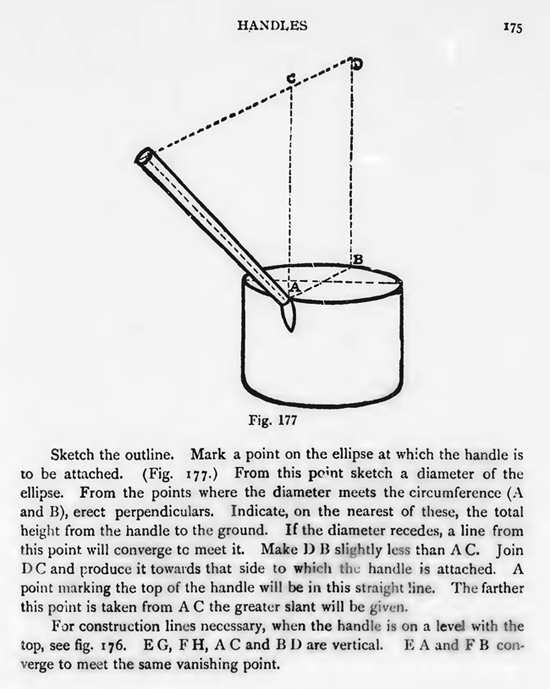
To show the appearance of a handle attached to a cylindrical object is a most difficult thing to do well. An ordinary saucepan is a good example to begin with.
Sketch the outline. Mark a point on the ellipse at which the handle is to be attached. (Fig. 177.) From this pe;nt sketch a diameter of the ellipse. From the points where the diameter meets the circumference (A and B), erect perpendiculars. Indicate, on the nearest of these, the total height from the handle to the ground. If the diameter recedes, a line from this point will converge to meet it.
Make 1) B slightly less than A C. Join DC and produce it towards that side to which the handle is attached. A point marking the top of the handle will be in this straight line. The farther this point is taken from A C the greater slant will be given. Make the construction lines necessary, when the handle is on a level with the top, see fig. 176. E G, F H, A C and B 1) are vertical. E A and F B converge to meet the same vanishing point.
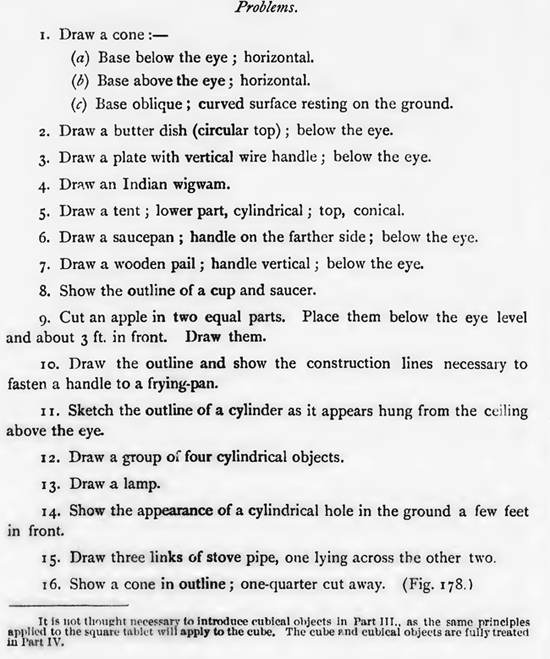
1. Draw a cone:—
(a) Base below the eye ; horizontal.
(b) Base above the eye; horizontal.
(c) Base oblique ; curved surface resting on the ground.
2. Draw a butter dish (circular top) ; below the eye.
3. Draw a plate with vertical wire handle ; below the eye.
4. Draw an Indian wigwam.
5. Draw a tent ; lower part, cylindrical ; top, conical.
6. Draw a saucepan ; handle on the farther side ; below the eye.
7. Draw a wooden pail ; handle vertical ; below the eye.
8. Show the outline of a cup and saucer.
9. Cut an apple in two equal parts. Place them below the eye level and about 3 ft. in front. Draw them.
10. Draw the outline and show the construction lines necessary to fasten a handle to a frying-pan.
11. Sketch the outline of a cylinder as it appears hung from the cc 'ing above the eye.
12. Draw a group of four cylindrical objects.
13. Draw a lamp.
14. Show the appearance of a cylindrical hole in the ground a few feet in front.
15. Draw three links of stove pipe, one lying across the other two.
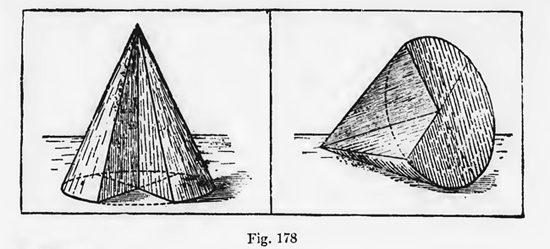
16. Show a cone in outline ; one-quarter cut away. (Fig. 178.)