

METHODS OF APPLYING PENCIL STROKES


Most mediums admit of being handled in several ways, and the pencil is no exception. It may be applied to the paper as one would apply charcoal; that is, scumbled on and rubbed together by means of a stomp or a piece of chamois. Sketches made in this manner have beautiful tonal qualities, but the method is slow and laborious, and is for that reason of little use in connection with nature sketching, where quick work is desired.
Another method, and that which will be considered here, may be termed the "direct" method, the aim being to attain by the intelligent use of pencil strokes, or markings, the desired result at once. The chief charm of this kind of pencil work is its crisp suggestiveness. This quality can only be attained by working with directness, and avoiding, as far as possible, "going over" the same place twice.
To accomplish this directness of result, it is essential, of course, that one should gain complete control over the pencil. One must be able to lay strokes vertically, horizontally or obliquely with equal facility. The hand must learn to adjust instantaneously the pressure on the pencil, so that the result may be any desired gradation from light to dark, or from dark to light, or a tone of the same value throughout. All this is a matter of practice.
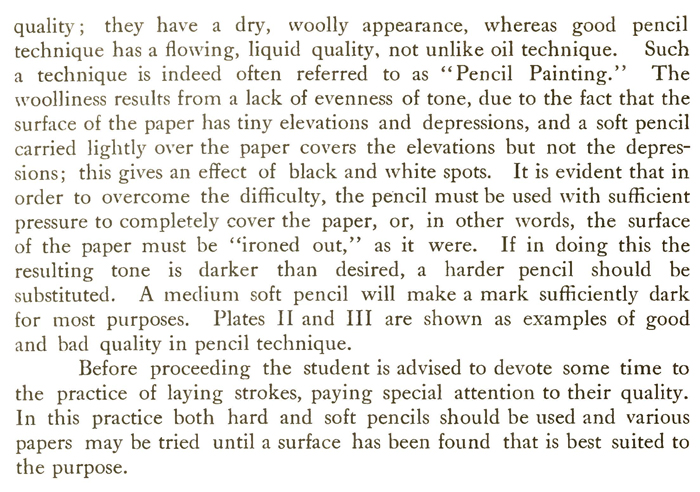
Those with but little experience in the use of the medium are advised to practice laying pencil strokes, following the suggestions given on Plate I. In doing this the aim should be to work with directness ; the strokes should be made in a light and flowing manner, not laid mechanically side by side. The paper should remain in one position, the hand changing its position according to the direction in which the strokes are to he laid. In laying the strokes the pencil may be carried back and forth without being lifted from the paper (marking both ways), or it may be lifted at the end of each stroke and carried back without making a mark. Both ways should be practiced.
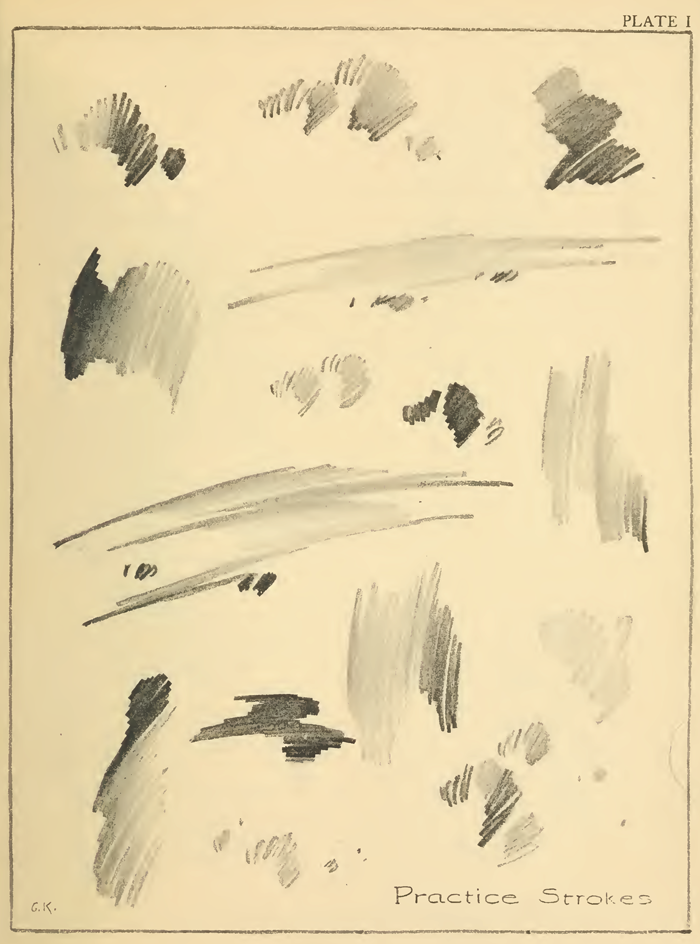
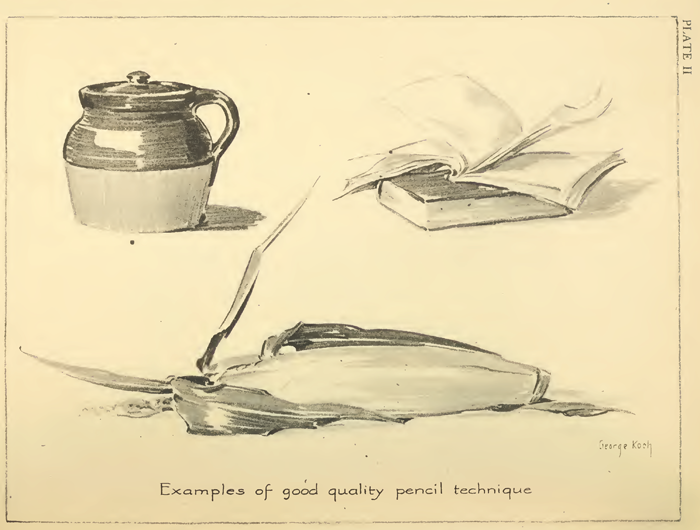
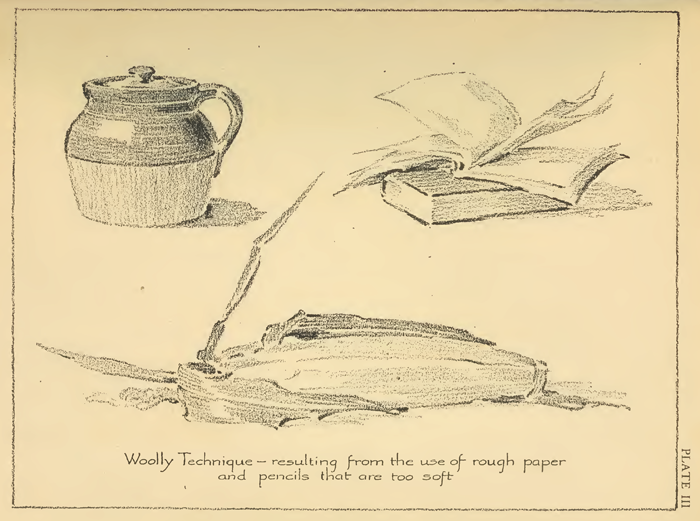
It need hardly be said that light tones are rendered with a hard pencil, and dark tones with a soft pencil. It is possible, of course, to produce light tones with a very soft pencil, but the tones so made lack quality ; they have a dry, woolly appearance, whereas good pencil technique has a flowing, liquid quality, not unlike oil technique. Such a technique is indeed often referred to as "Pencil Painting." The woolliness results from a lack of evenness of tone, due to the fact that the surface of the paper has tiny elevations and depressions, and a soft pencil carried lightly over the paper covers the elevations but not the depressions; this gives an effect of black and white spots. It is evident that in order to overcome the difficulty, the pencil must be used with sufficient pressure to completely cover the paper, or, in other words, the surface of the paper must be "ironed out," as it were. If in doing this the resulting tone is darker than desired, a harder pencil should be substituted. A medium soft pencil will make a mark sufficiently dark for most purposes. Plates II and III are shown as examples of good and had quality in pencil technique.
Before proceeding the student is advised to devote some time to the practice of laying strokes, paying special attention to their quality. In this practice both hard and soft pencils should be used and various papers may be tried until a surface has been found that is best suited to the purpose.
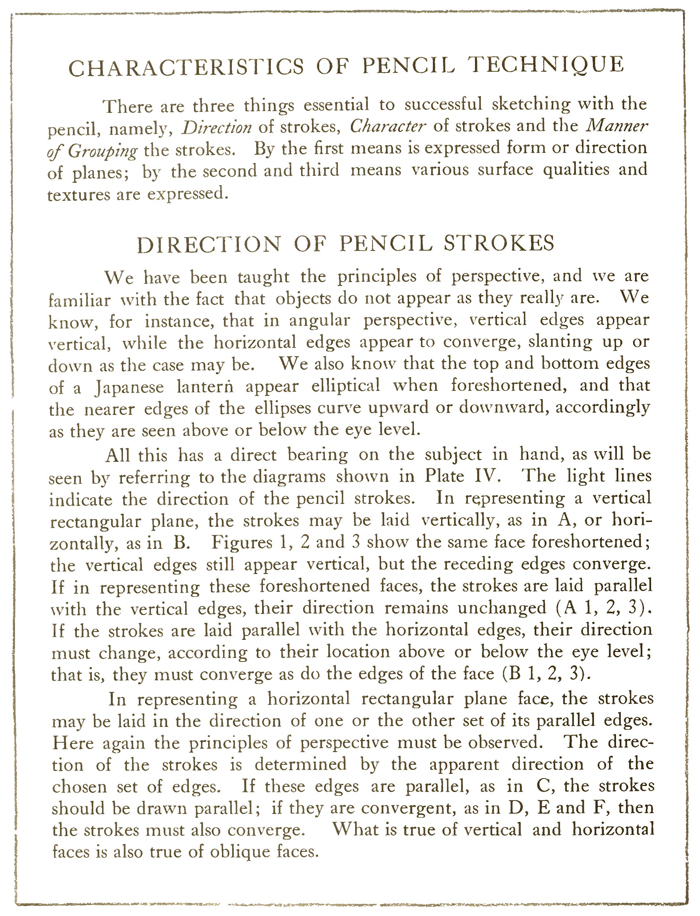
There are three things essential to successful sketching with the pencil, namely, Direction of strokes, Character of strokes and the Manner of Grouping the strokes. By the first means is expressed form or direction of planes; by the second and third means various surface qualities and textures are expressed.
We have been taught the principles of perspective, and we are familiar with the fact that objects do not appear as they really are. We know, for instance, that in angular perspective, vertical edges appear vertical, while the horizontal edges appear to converge, slanting up or down as the case may be. We also know that the top and bottom edges of a Japanese lantern appear elliptical when foreshortened, and that the nearer edges of the ellipses curve upward or downward, accordingly as they are seen above or below the eye level.
All this has a direct bearing on the subject in hand, as will be seen by referring to the diagrams shown in Plate IV. The light lines indicate the direction of the pencil strokes. In representing a vertical rectangular plane, the strokes may be laid vertically, as in A, or horizontally, as in B. Figures 1, 2 and 3 show the same face foreshortened; the vertical edges still appear vertical, but the receding edges converge. If in representing these foreshortened faces, the strokes are laid parallel with the vertical edges, their direction remains unchanged (A 1, 2, 3). If the strokes are laid parallel with the horizontal edges, their direction must change, according to their location above or below the eye level; that is, they must converge as do the edges of the face (B 1, 2, 3).
In representing a horizontal rectangular plane face, the strokes may be laid in the direction of one or the other set of its parallel edges. Here again the principles of perspective must be observed. The direction of the strokes is determined by the apparent direction of the chosen set of edges. If these edges are parallel, as in C, the strokes should he drawn parallel; if they are convergent, as in D, E and F, then the strokes must also converge. What is true of vertical and horizontal faces is also true of oblique faces.
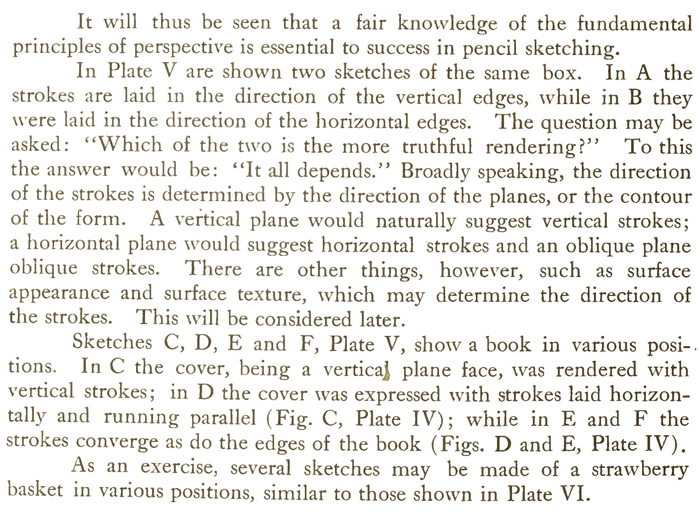
It will thus be seen that a fair knowledge of the fundamental principles of perspective is essential to success in pencil sketching.
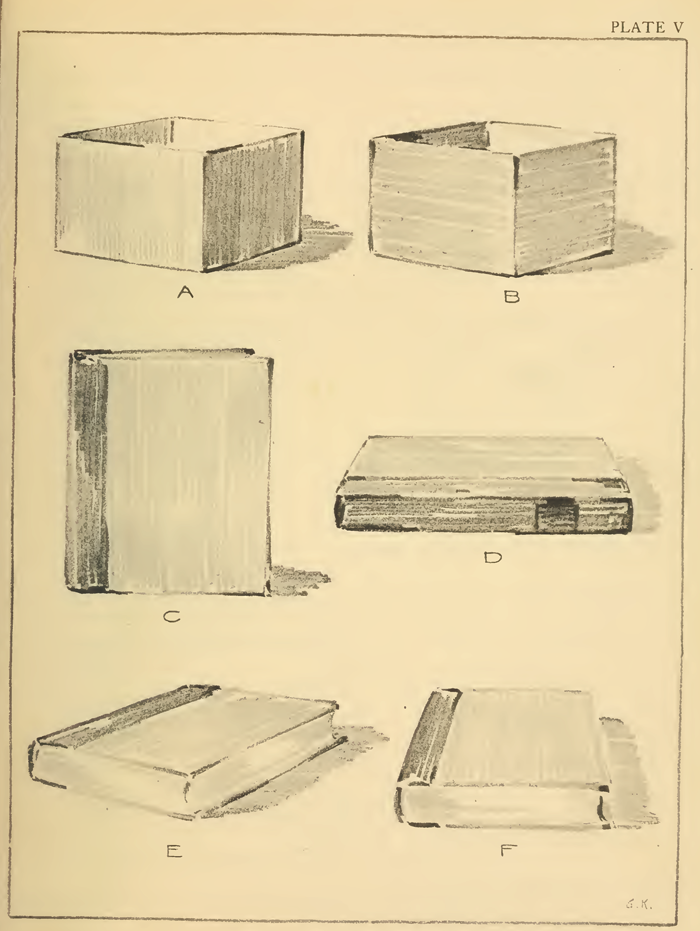
In Plate V are shown two sketches of the same box. In A the strokes are laid in the direction of the vertical edges, while in B they were laid in the direction of the horizontal edges. The question may be asked: "Which of the two is the more truthful rendering?" To this the answer would be: "It all depends." Broadly speaking, the direction of the strokes is determined by the direction of the planes, or the contour of the form. A vertical plane would naturally suggest vertical strokes; a horizontal plane would suggest horizontal strokes and an oblique plane oblique strokes. There are other things, however, such as surface appearance and surface texture, which may determine the direction of the strokes. This will be considered later.
Sketches C, D, E and F, Plate V, show a book in various posi-. tions. In C the cover, being a vertical plane face, was rendered with vertical strokes; in D the cover was expressed with strokes laid horizontally and running parallel (Fig. C, Plate IV); while in E and F the strokes converge as do the edges of the book (Figs. D and E, Plate IV).
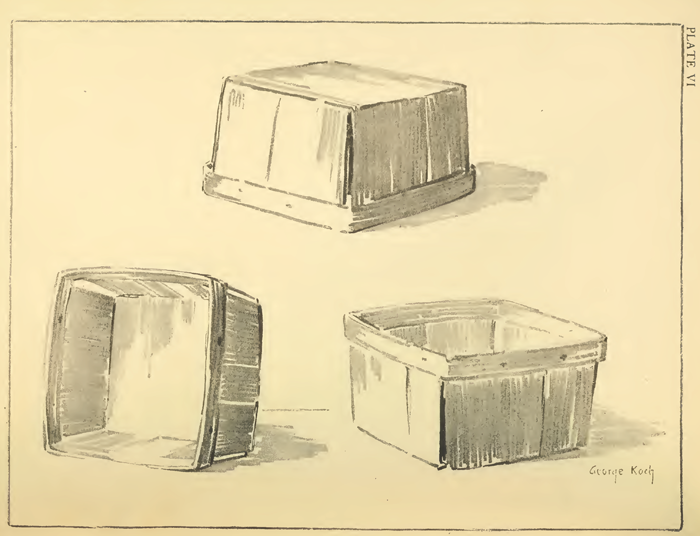
As an exercise, several sketches may be made of a strawberry basket in various positions, similar to those shown in Plate VI.
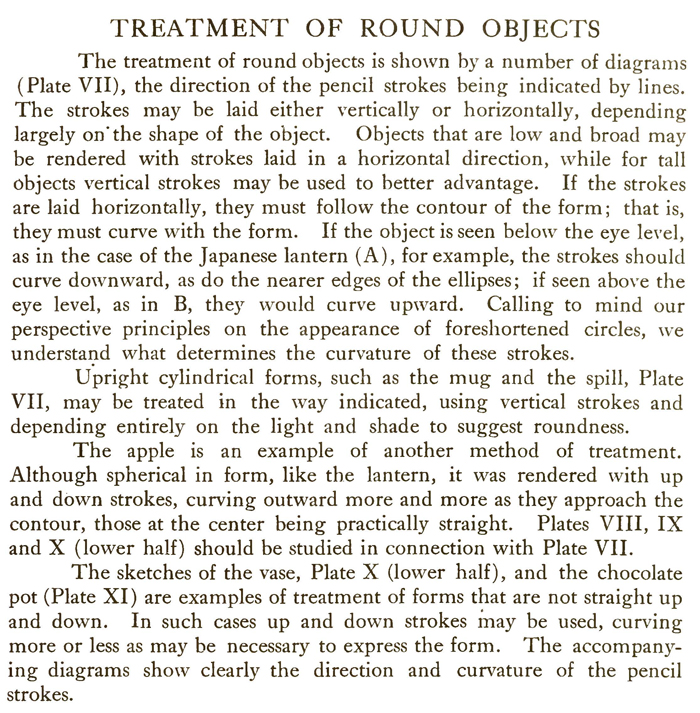
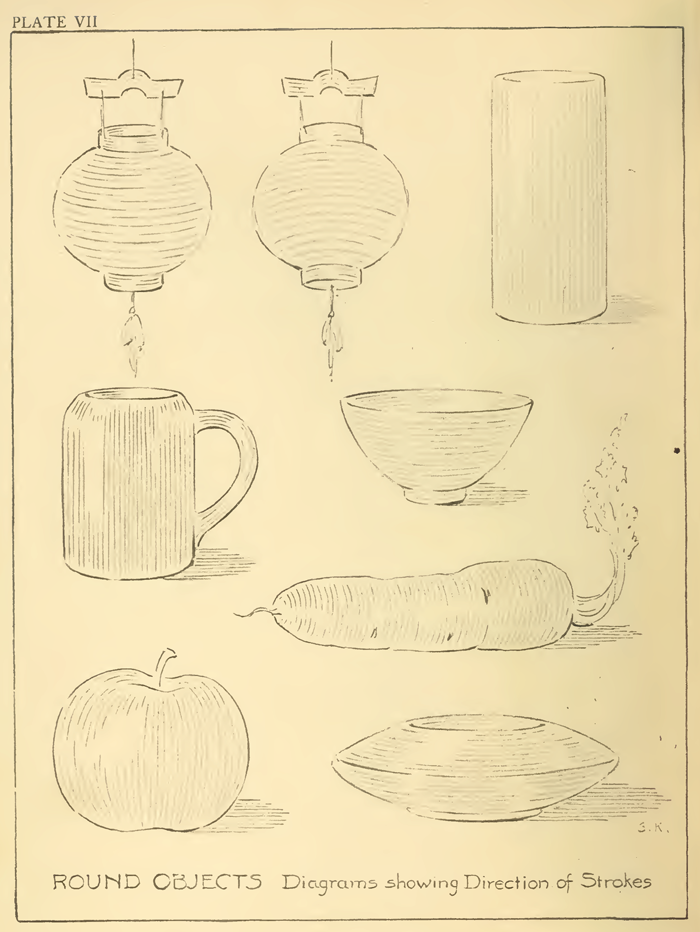
The treatment of round objects is shown by a number of diagrams (Plate VII), the direction of the pencil strokes being indicated by lines. The strokes may be laid either vertically or horizontally, depending largely on' the shape of the object. Objects that are low and broad may be rendered with strokes laid in a horizontal direction, while for tall objects vertical strokes may be used to better advantage. If the strokes are laid horizontally, they must follow the contour of the form; that is, they must curve with the form. If the object is seen below the eye level, as in the case of the Japanese lantern (A), for example, the strokes should curve downward, as do the nearer edges of the ellipses; if seen above the eye level, as in B, they would curve upward. Calling to mind our perspective principles on the appearance of foreshortened circles, we understand what determines the curvature of these strokes.
Upright cylindrical forms, such as the mug and the spill, Plate VII, may be treated in the way indicated, using vertical strokes and depending entirely on the light and shade to suggest roundness.
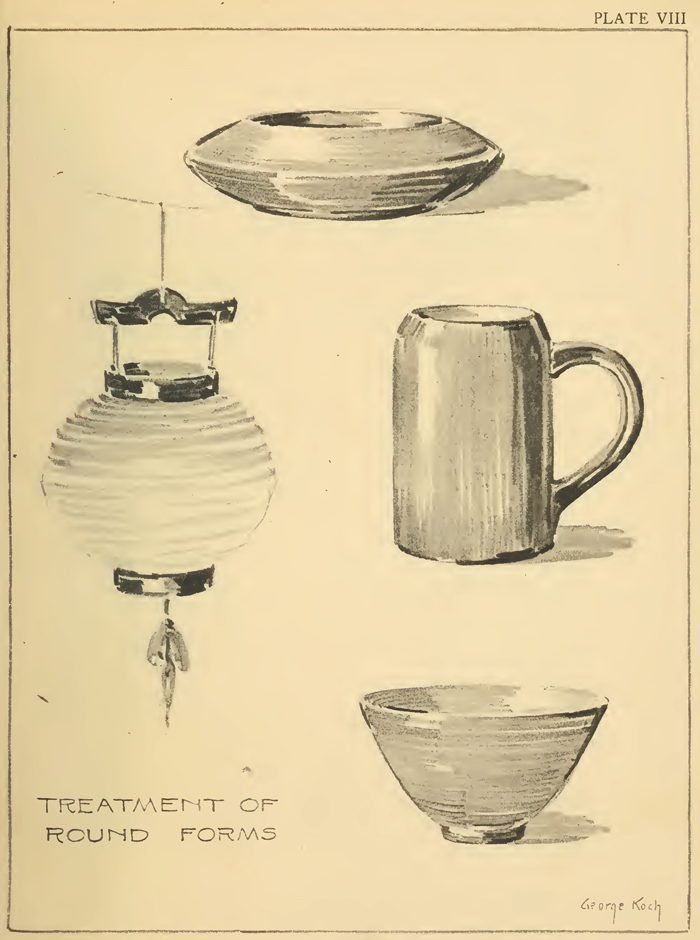
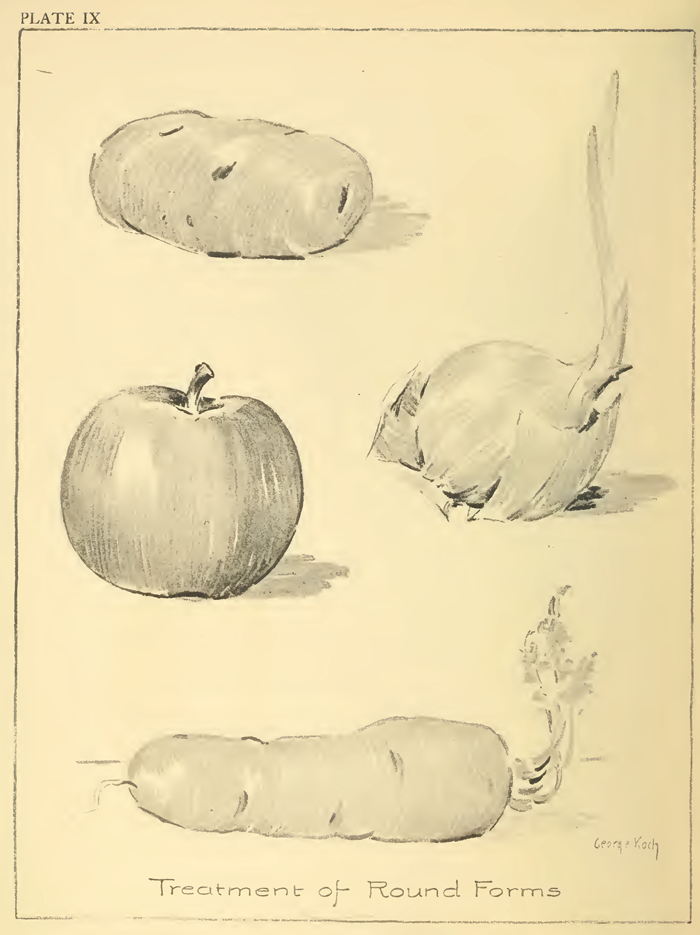
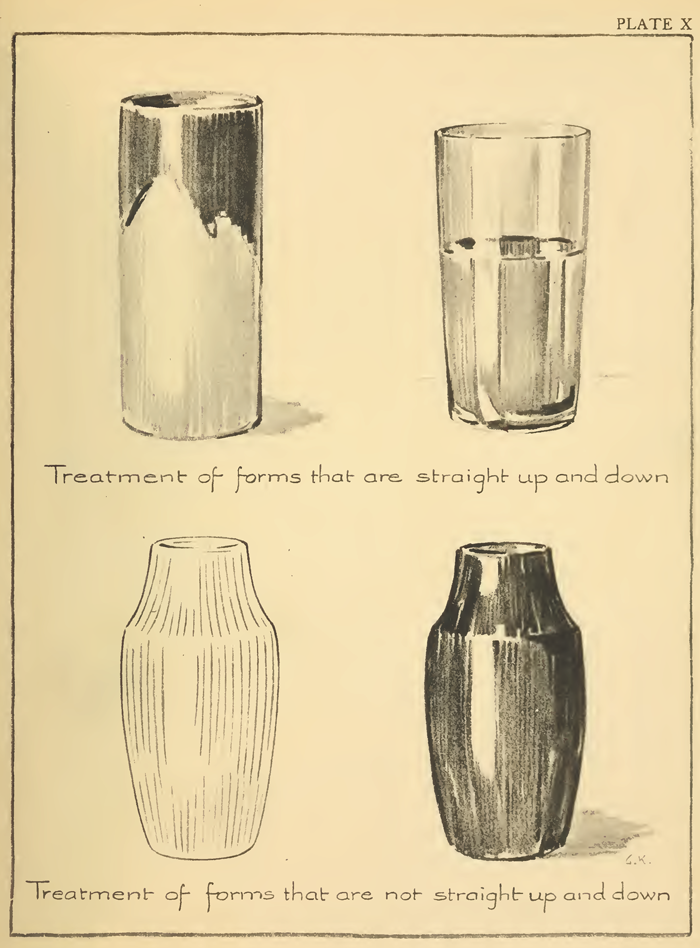
The apple is an example of another method of treatment. Although spherical in form, like the lantern, it was rendered with up and down strokes, curving outward more and more as they approach the contour, those at the center being practically straight. Plates VIII, IX and X (lower half) should be studied in connection with Plate VII.
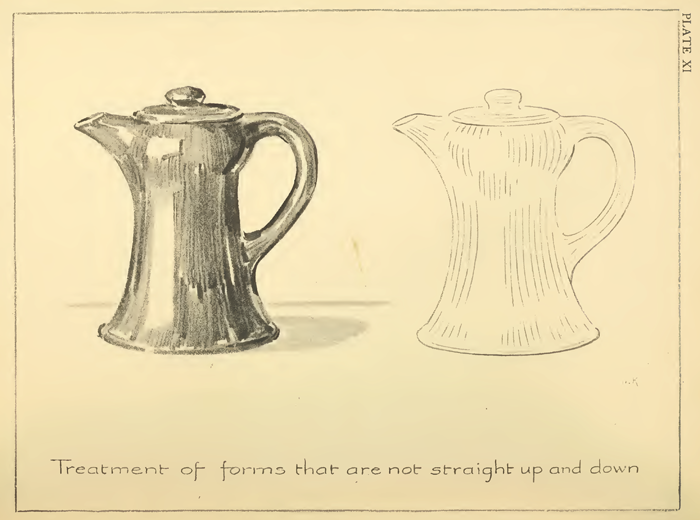
The sketches of the vase, Plate X (lower half), and the chocolate pot (Plate XI) are examples of treatment of forms that are not straight up and down. In such cases up and down strokes may be used, curving more or less as may be necessary to express the form. The accompanying diagrams show clearly the direction and curvature of the pencil strokes.