Home > Directory Home > Drawing Lessons > How to Improve Your Drawings > How to Transfer Sketches with Triangulation Technique
COPYING / TRANSFERRING SKETCHES & IMAGES WITH TRIANGULATION TECHNIQUE
|
|
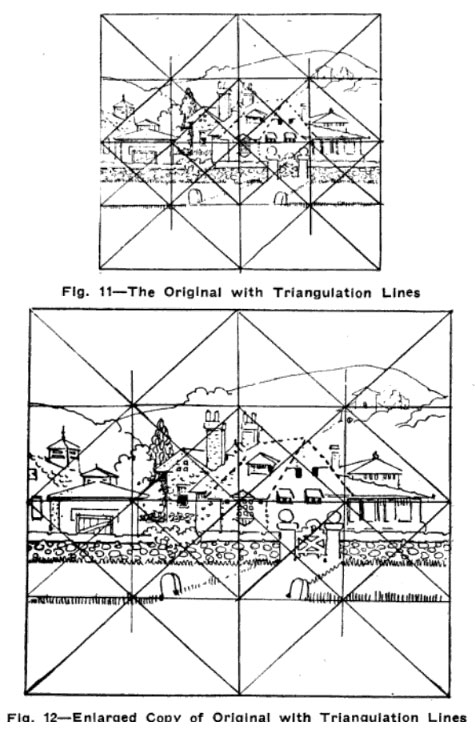
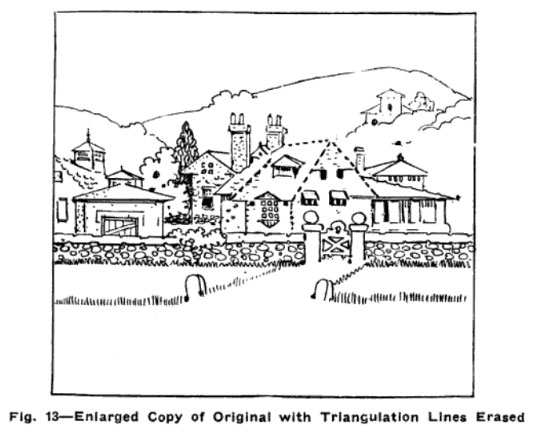
Copying Drawings by Methods of TriangulationTo enlarge or reduce one may resort to any of the following methods : (1) Photography. (2) Scanning - Then Using Photoshop or Other Computer Application. (3) Projector of Some Sort. (4) The mechanical instrument known as the pantograph. (5) The mechanical instrument known as the proportional dividers. (6) Free hand drawing. Good practice, but not conducive to atcuracy. (7) Squaring the original by means of intersecting horizontal and vertical lines. This requires great care in preparation and use. The squares must be square and usually require numbering along at least two sides of the original and of the copy. (8) Triangulation. An old and simply made geometrical form which Charles Lederer adopted for the purpose of enlarging and reducing. In the squaring method even an ordinary reduction or enlargement requires from 16 to 64 squares, the latter with boundary numbers I, 2, 3, 4, 5, 6, 7 and 8 on at least two sides of both original and copy. In this maze the draftsman is apt to become "lost." In the method Mr. Lederer had adopted, the triangulation forms a pattern which aids the eye to keep within the proper corresponding spaces. That is, each triangle, in the original and in the drawing under way, occupies a distinctive and individual position not observable in the squares. A square or other parallelogram is drawn first, the oblique, vertical and horizontal lines being added.
In a drawing in which the detail is complex, the triangles are easily subdivided, both in the original and in the drawing to be made from it. Not alone is this method superior in every way to the "squaring" process, but it provides a sure and easy way to make regularly proportional distortions.
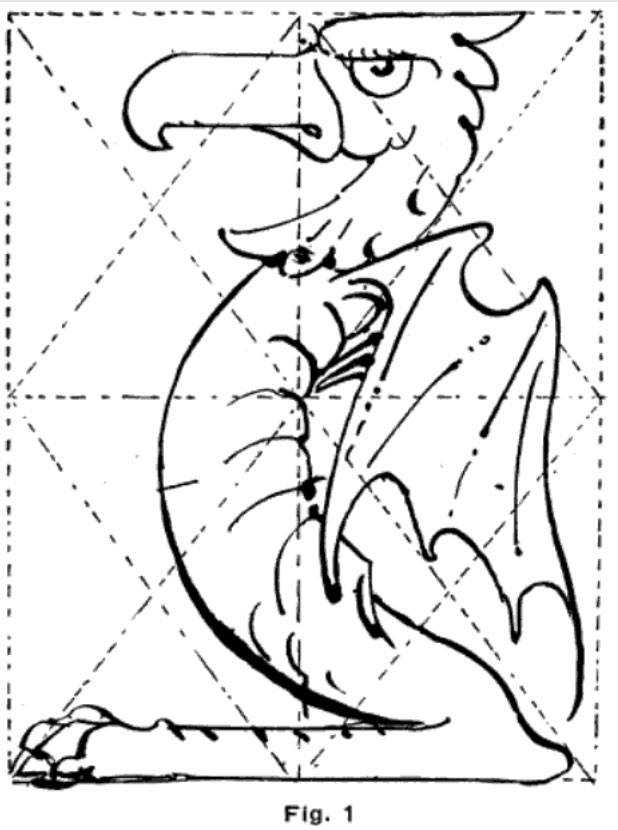
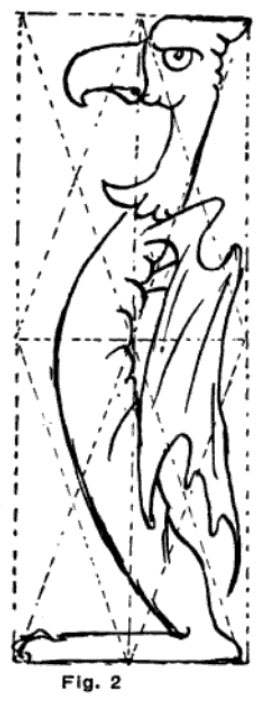
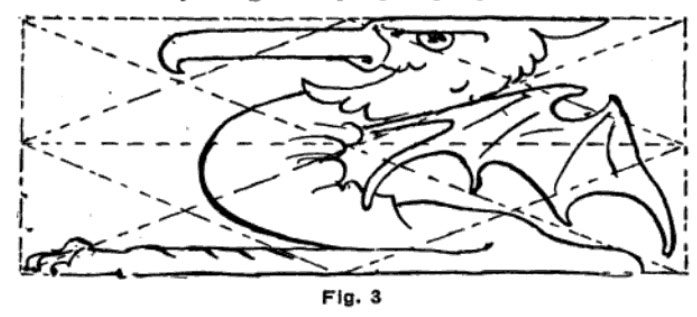
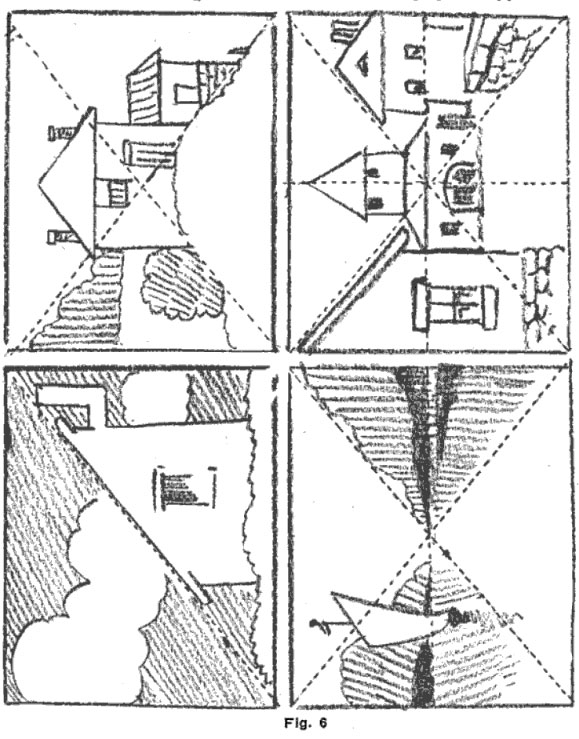
Look at the creature shown in Fig. 1. If he had to be copied and reproduced in narrow vertical and horizontal panels, this would be tough to figure out without a computer or the triangulation methodAs you can see in the Figs. 2 and 3, with the triangulation method it was satisfactotily accomplished.
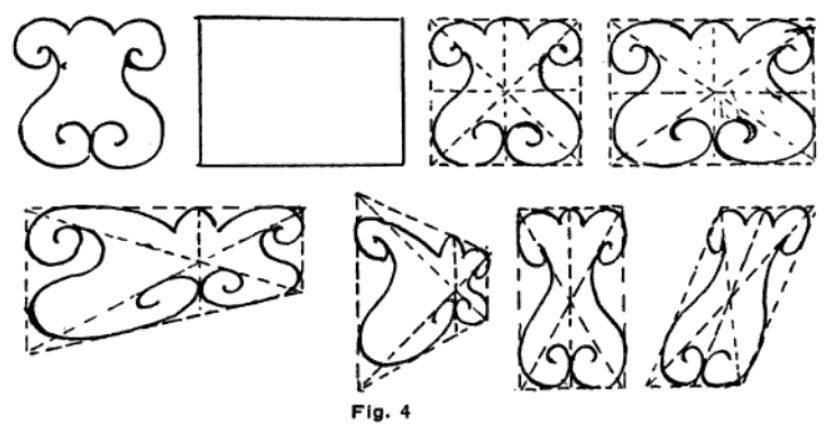
Another Example.—Fig. 4 is another example of what may be done in the way of varying the form of an area in which any design may be placed.
The Start of the Diagonal Method of Enlarging and Reducing Only one drawing, about 4x6 inches in size, not four drawings, as indicated, are to be made. How to Proceed with Triangulation :
Draw a rectangle as in A. Intersect with diagonals as shown in A and B. Intersect the diagonals with a horizontal line as in C and Finally with a vertical intersecting line as in D. All lines inside of the rectangle should be made very light. They are merely guide lines to be erased when the drawing is completed.
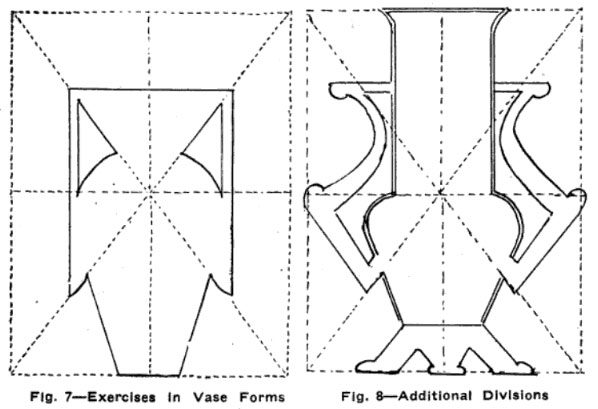
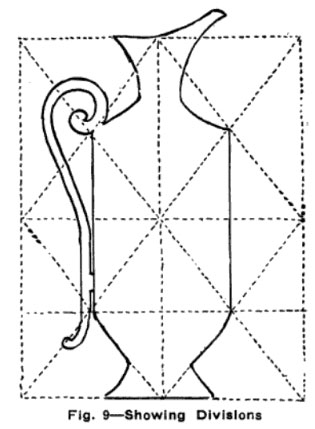
See the picture above, try to copy them by means of the triangular guide lines. The first one by the aid of a single oblique line. The second by the aid of two oblique lines ; the third with two oblique lines and one horiontal line; the fourth aided by the addition of a vertical line. Errors Quickly Noted.—For the beginner, even a common vase or teacup is a difficult subject. Straight, upright and oblique guiding-lines are helpful in drawing curved objects. The following diagrams will make the method clear. By this means, as will be observed, the several parts are balanced with ease, and errors quickly noticed and corrected. The use of these lines accustoms the pupil to judge the relative proportions of the different parts of an object as related to the whole. The divisions made by vertical, horizontal and oblique lines will greatly aid the pupil in his work. He is thus en- abled to become methodical and accurate in his measurements, and will cultivate what is known as the "true eye" for drawing.
Do not, however, encourage the pupil to depend on or permit himself to be crippled by the constant application of mechanical methods or appliances, or allow the use thereof to interfere with free-hand drawing. They are intended for occasional use. To avoid this, have him frequently lay aside the guide line methods and trust more to the eye. Whenever desirable more divisions can easily be made. The additional spaces need not be made over the entire surface, but the surface may be subdivided indefinitely in whole or in part, according to the intricacy of detail in the design to be copied, same size, enlarged or reduced.
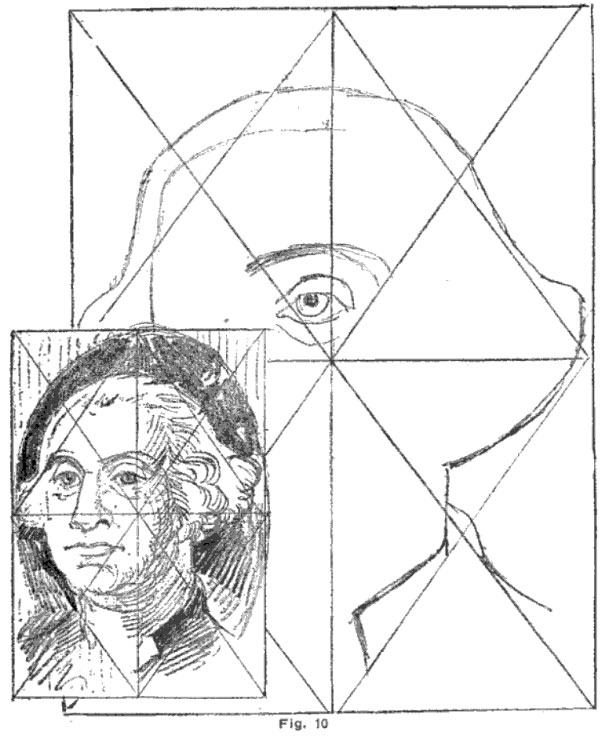
General Directions for Triangular Guide Lines Triangular guide lines are particularly adapted for the purpose of enlarging or reducing portraits. In this exercise A small pencil sketch of George Washington is offered as an example, showing the start of an enlarged drawing of the sketch.
The guide lines should be made as faintly as possible. If the original is one that is to be preserved, and might be marred by the guide lines, one of these methods should be used : (1) Tack a piece of very transparent tracing paper (the vegetable tracing paper is preferable for this purpose) over the original and place the guide lines on the tracing paper. (2) Use tracing gelatine instead of paper and a steel point instead of a pencil, and with the latter scratch the guide lines on the gelatine. A coarse needle fastened into a cork as a handle makes a good tracing point. (3) If the copy is very large pins may be placed at the points where the usual vertical, horizontal and oblique lines intersect the outer lines and thread carried from one point to the other instead of marked lines.
|
Privacy Policy ...... Contact Us


