Home > Directory Home > Drawing Lessons > Figure Drawing for Children > Actions by Means of Single Lines
drawing children (by age) in action & motion by means of easy, single lines
|


GO BACK TO THE HOME PAGE FOR TUTORIALS FOR BEGINNING ARTISTS
[The above words are pictures of text, below is the actual text if you need to copy a paragraph or two]
AGE AND ACTION IN THE SINGLE-LINE FIGURE.
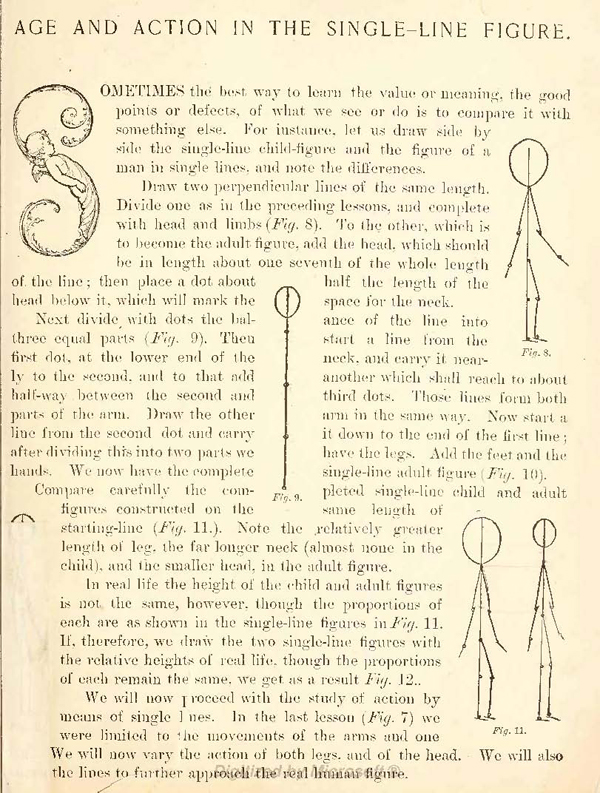
Sometimes the best way to learn the value or meaning, the good points or defects, of what we see or do is to compare it with something else. For instance, let us draw side by side the single-line child-figure and the figure of a man in single lines, and note the differences.
Draw two perpendicular lines of the same length. Divide one as in the preceding lessons, and complete with head and limbs (Fig. 8). To the other, which is to become the adult figure, acid the head, which should be in length about one seventh of the whole length half the length of the space for the neck.
a.nce of the line into start a line from the neck, and carry it near another which shall reach to about third dots. Those lines form both arm in the same way. Now start a it down to the end of the first line have the legs. Add the feet and the single-line adult figure (Fig. 10). completed single-line child and adult.
Note the relatively greater length of leg, the far longer neck (almost none in the child), and the smaller head, in the adult figure.
In real life the height of the child and adult figures is not the same, however, though the proportions of each are as shown in the single-line figures in Fig. 11. If, therefore, we draiv the two single-line figures with the relative heights of real life, though the proportions of each remain the same, we get as a result Fig. 12.
We will now 1 roceed with the study of action by means of single l nes. In the last lesson (Fig. 7) we were limited to the movements of the arms and one We will now vary the action of both legs, and of the he the lines to further approach the real human figure.
The single figures and groups in Fig. 13. indicate the wide range of pose, action and expression now possible.
Copy these carefully on a larger scale. Do not stop there. however ; do not merely copy these, but go on. and draw original figures and groups that shall express ideas and tell stories — this work is by far the more important. Let the examples in Fig. 13. only serve to give suggestions of what to do and how to do it. The intention always is to develop the pupil's own faculty for seeing and doing.
It will be good practice to make two drawings of each As it is usually easier to draw the figure facing either to the right or the left, make a second drawing facing in the opposite direction. This will be good discipline, and will, as it were, by rule prove the example.
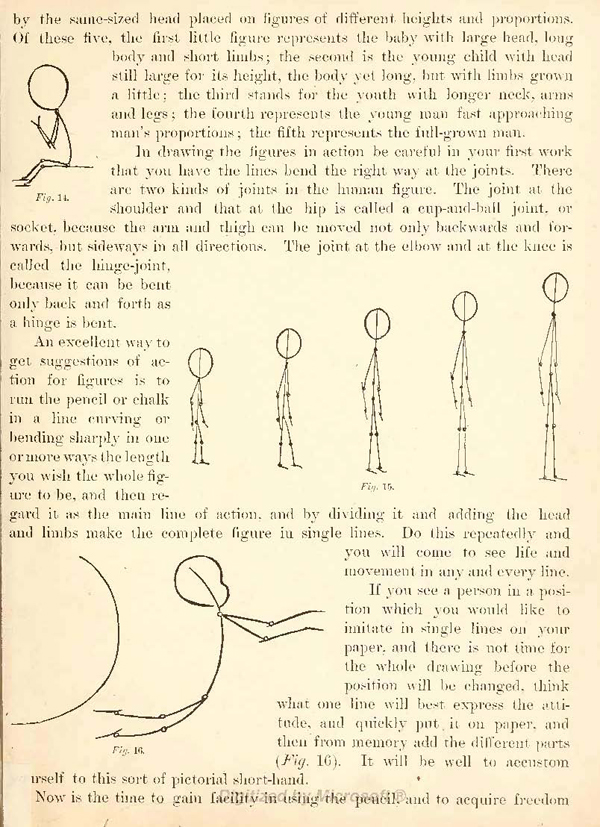
Some simple rules of proportion are often convenient, and may be given here. In the figure of a child there must be about four and a half times the length of the head in the height of the whole figure, that is from the top of the head to the bottom of the feet. A baby is about three and a half times the height of his head, which you see gives a still larger head for the baby than for the child in proportion to his whole height (Fig. 14) In the series of in Fig. 15 this change opigritimibbpAihicittingtaf age is more clearly by the same-sized head placed on figures of different heights and proportions.
Of these five, the first little figure represents the baby with large head, long body and short limbs; the second is the young child with head still large for its height, the body yet long, but with limbs grown a little ; the third stands for the youth with longer neck, arms and legs ; the fourth represents the young man fast approaching man's proportions; the fifth represents the full-grown man.
In drawing the figures in action be careful in your first work that you have the lines bend the right way at the joints. There are two kinds of joints in the human figure. The joint at the Fig. 14.
Shoulder and that at the hip is called a cup-and-ball joint, or socket, because the arm and thigh can be moved not only backwards and forwards, but sideways in all directions. The joint at the elbow and at the knee is called the hinge-joint, because it can be bent only back and forth as a hinge is bent.
An excellent way to get suggestions of action for figures is to run the pencil or chalk in a line curving or bending sharply in one or more ways the length you wish the whole figure to be, and then regard it as the main line of action, and by dividing it and adding the head and limbs make the complete figure in single lines. Do this repeatedly and you will come to see life and movement in any and every line.
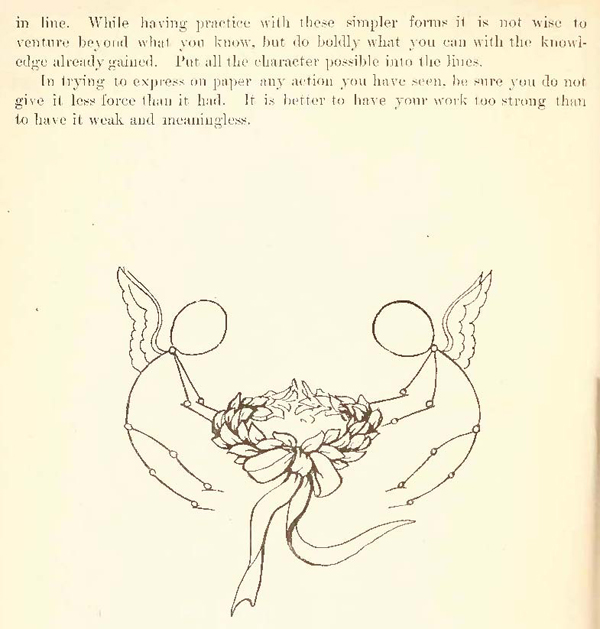
It will be well to accustom irself to this sort of pictorial short-hand. Now is the time to gain freedom in line. While having practice with these simpler forms it is not wise to venture beyond what you know, but do boldly what you can with the knowledge already gained. Put all the character possible into the lines.
In trying to express on paper any action you have seen. be sure you do not give it less force than it had. It is better to have your work too strong than to have it weak and meaningless.
Privacy Policy ...... Contact Us


