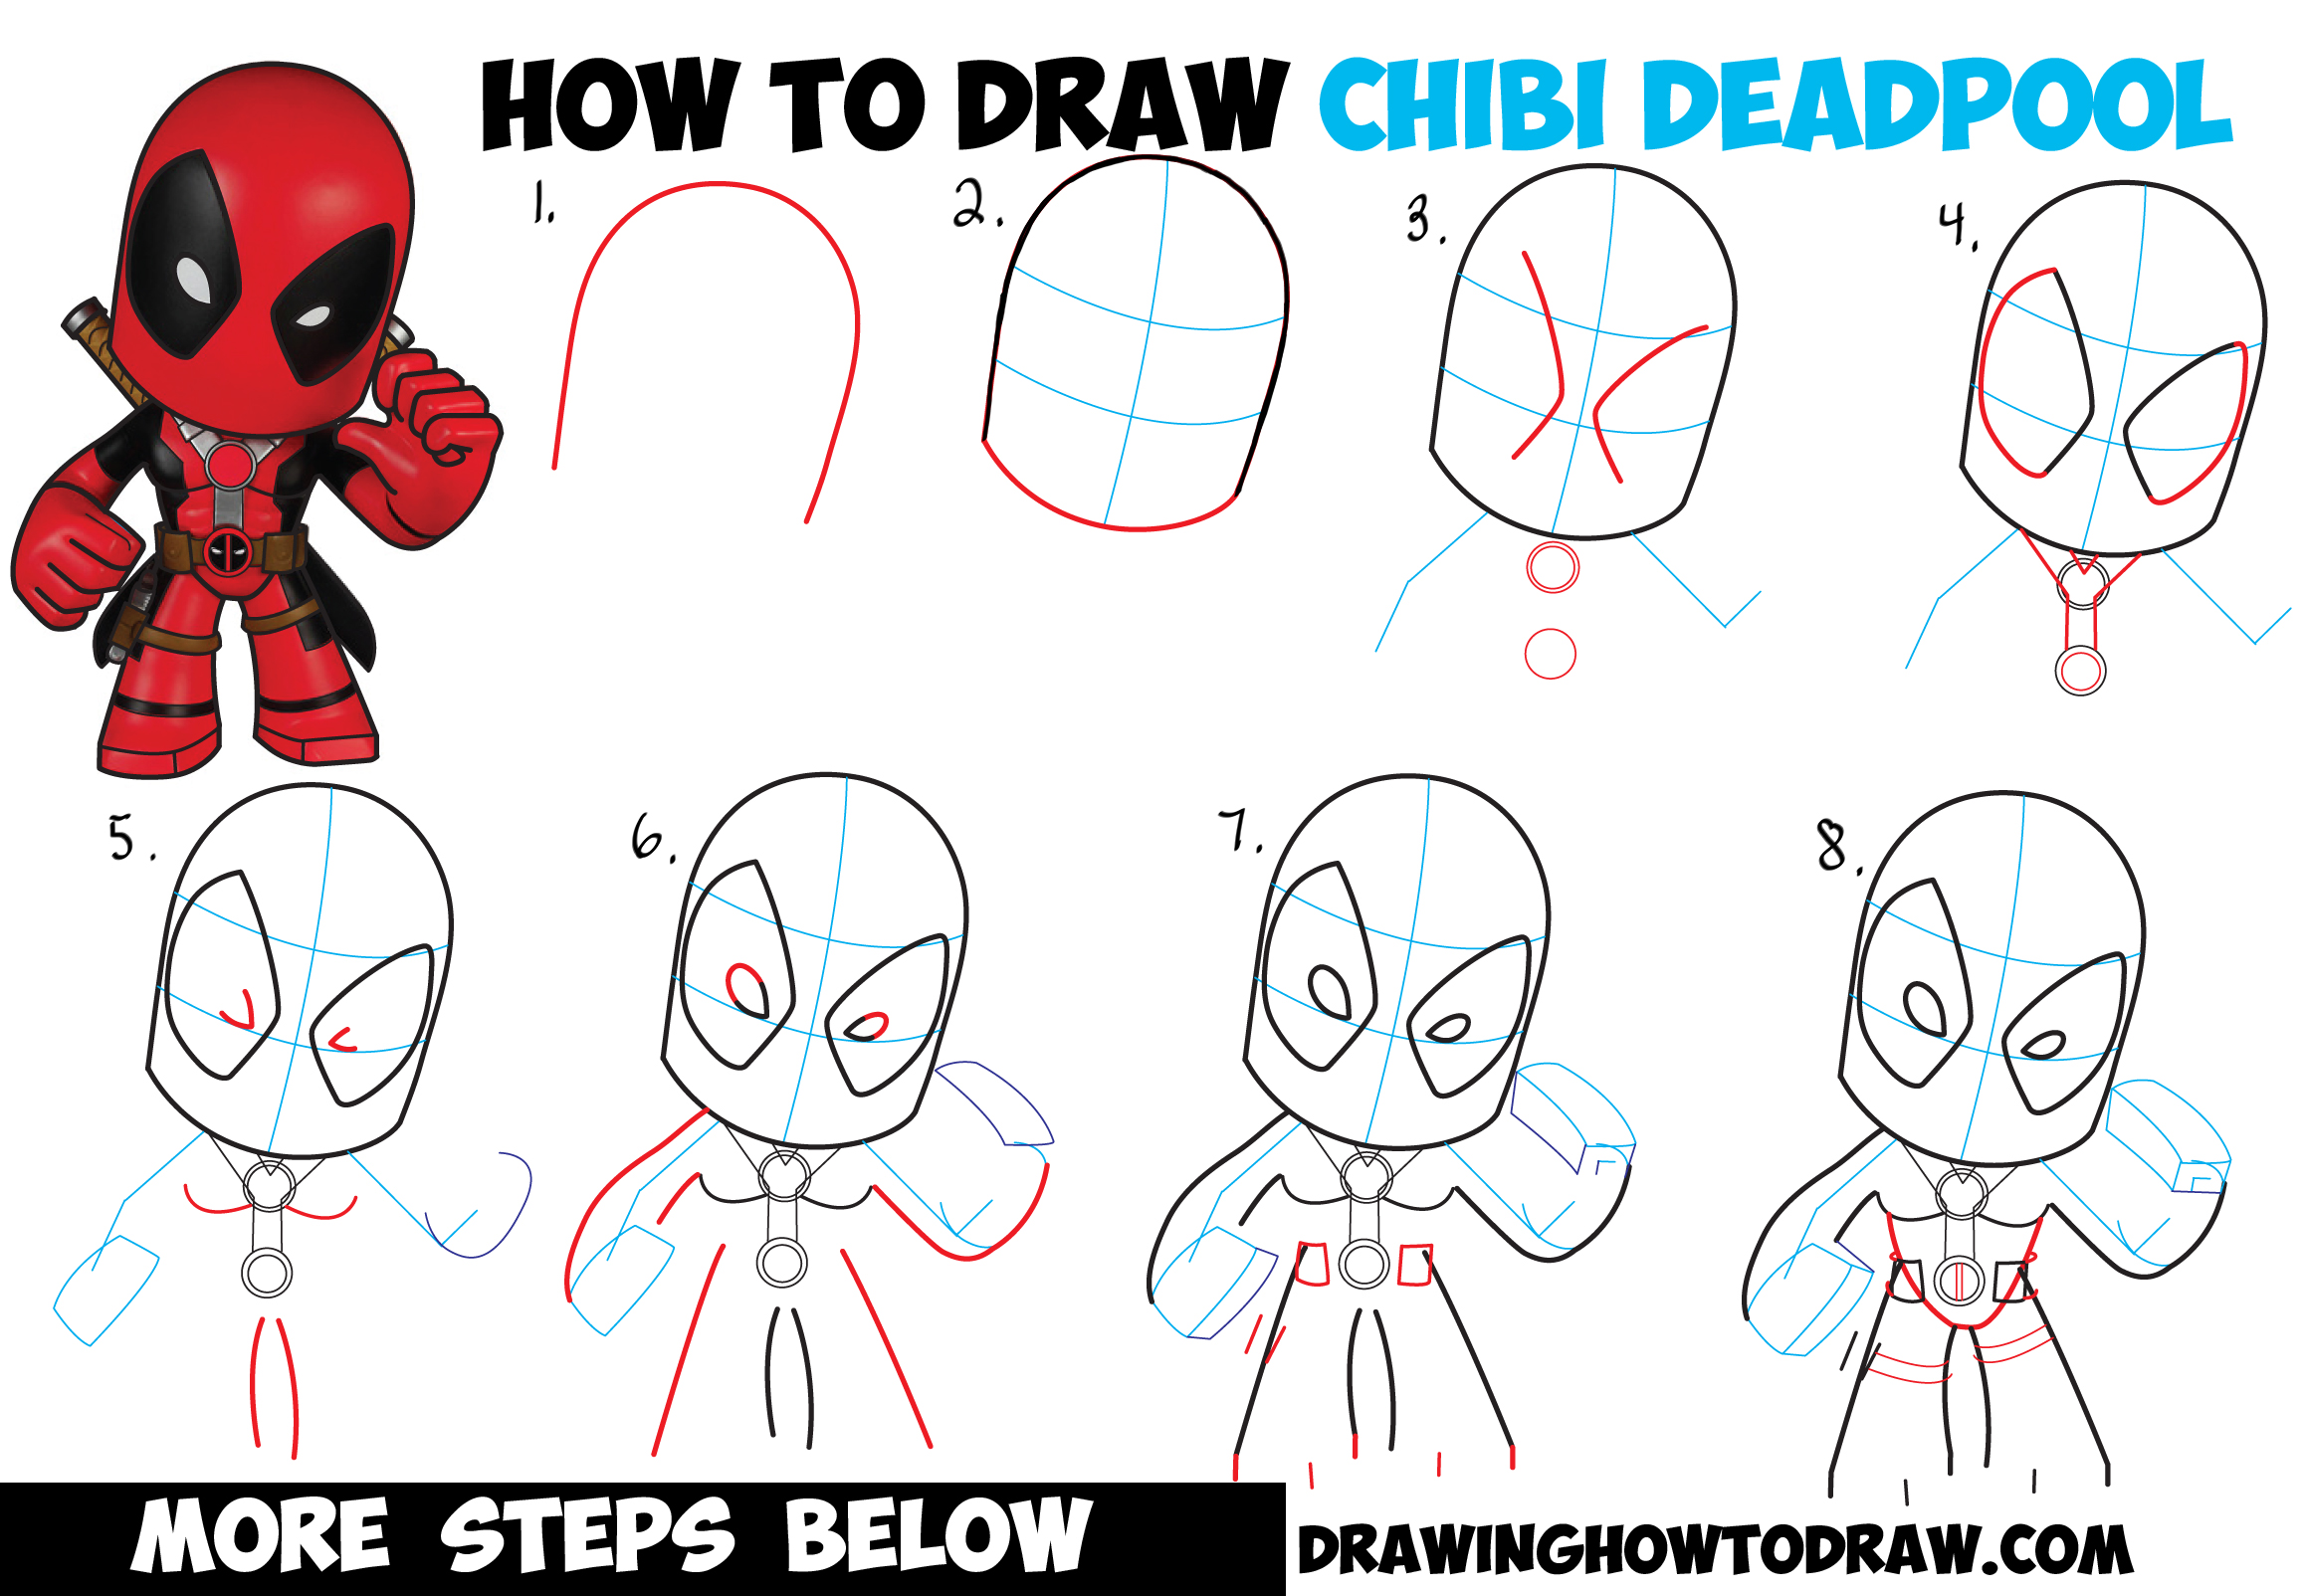
Today I will show you how to draw a chibi Marvel Deadpool character based on the Funko vinyl Deadpool toy from Amazon out on the market. I thought it was cute so I made a tutorial based on it. I will guide you through the steps of drawing Deadpool with easy-to-follow illustrations using geometric shapes, letters, and numbers. Have fun!
Learn How to Draw Chibi Deadpool Simple Steps Drawing Lesson
[ad#draw]
Written-Out Step by Step Drawing Instructions
(Step 1) Draw an upside down letter ‘U’ shape for the head.
(Step 2) Draw a curved line at bottom of the head. Lightly draw guidelines inside the head…these will help you place the eyes in the right spot. ALL BLUE LINES IN THIS TUTORIAL ARE GUIDELINES … guidelines are erased at the end so DRAW THEM LIGHTLY!
(Step 3) Draw sideways letter ‘v’ shapes (using the guidelines to place them) in the face. Lightly draw arm guidelines – they look a bit like letter ‘L’ shapes. Draw circles on Deadpool’s chest.
(Step 4) Draw curved lines to finish the outer eyes. Draw a bubble letter ‘Y’ shape on chest. Draw a circle inside the bottom circle.
(Step 5) Draw letter ‘v’ shapes in eyes. Draw curved lines on either side of top circle. Draw inward-curved lines for legs. Draw hand guidelines.
(Step 6) Outline arm guidelines. Draw a line for each outer leg. Draw a sideways letter ‘u’ shape to finish off inner-eyes. Draw a rectangle guidelines on right hand.
(Step 7) Draw some lines around the body. Draw rectangles on either side of bottom circle. Draw a rectangle guide on each hand…draw letter ‘L’ guidelines on right hand.
(Step 8) Draw a letter ‘u’ shape on torso. Draw curved lines on legs. Draw a guideline on each hand.
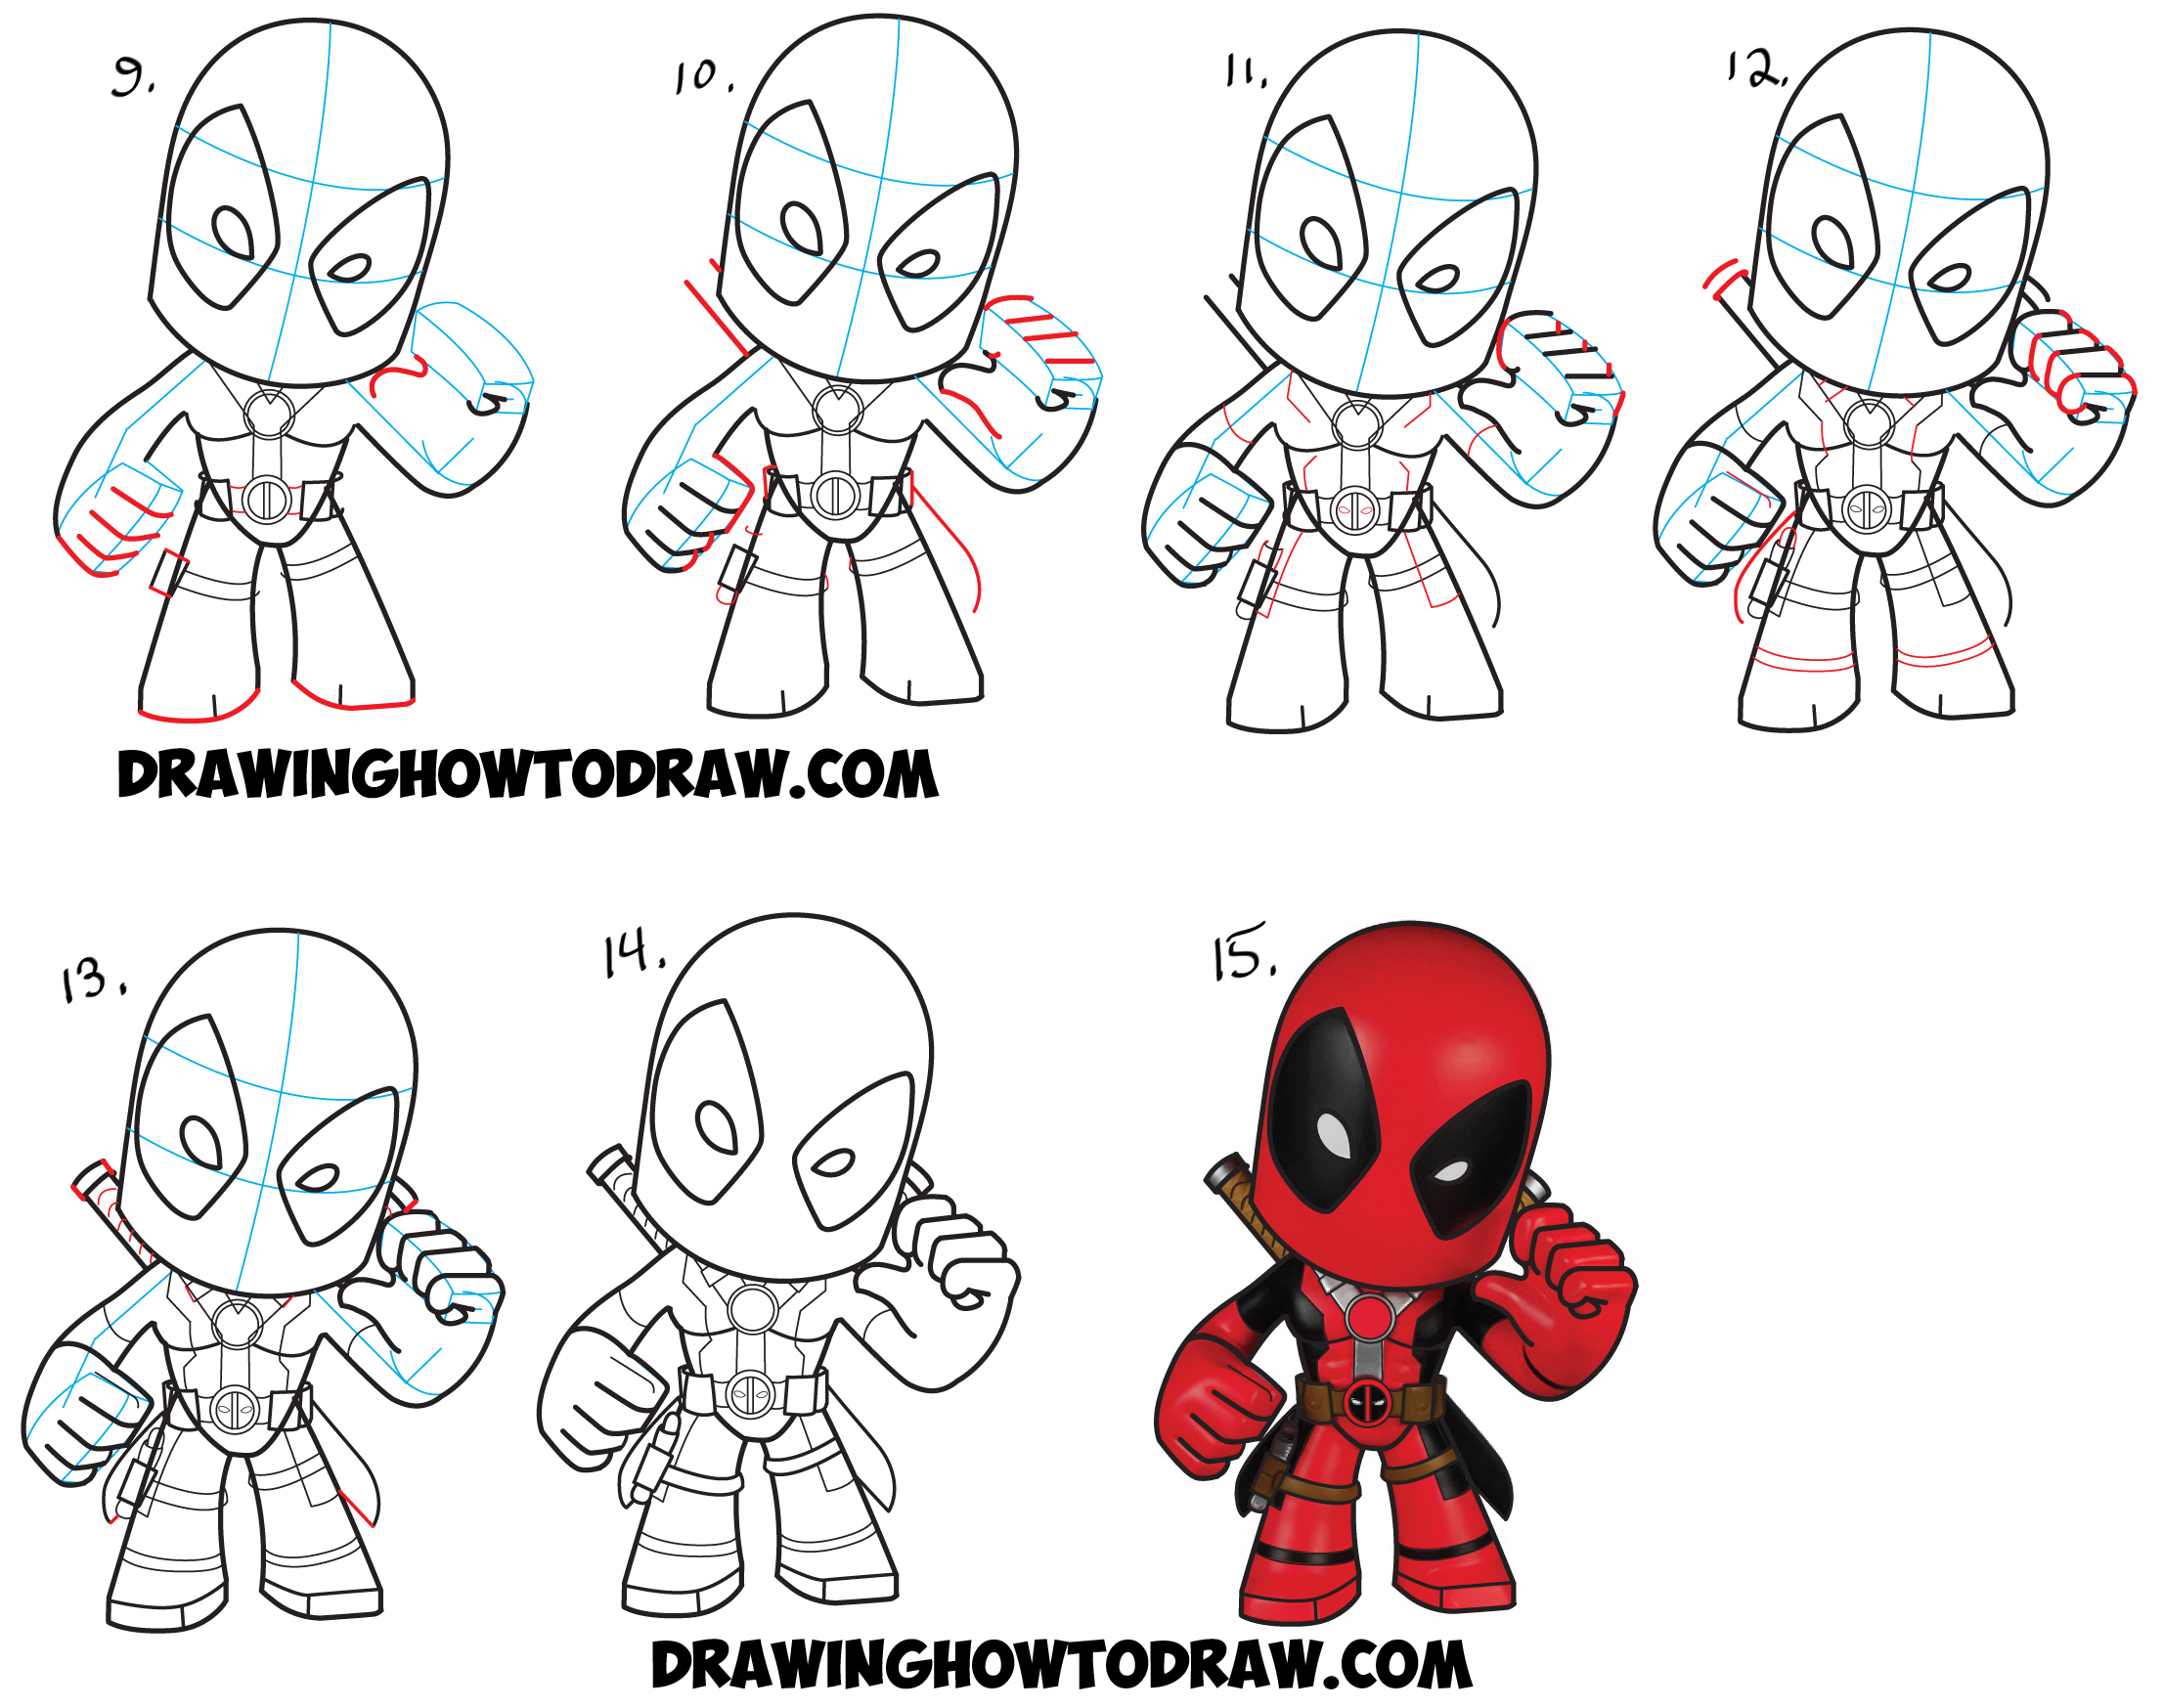
(Step 9) Draw letter ‘L’ shapes for fingers on left hand. Draw letter ‘s’ shapes on right hand (I forgot to highlight one of them…sorry). Draw some lines on body…draw curved lines on bottom of feet.
(Step 10) Draw 2 lines for sword on back. Draw a letter ‘L’ and lines on left hand. Draw lines on right hand, as well as a curved line. Draw a letter’ J’ shape for knife on right side. Add other details you see as well.
(Step 11) Draw curved and straight lines on right hand. Draw letter ‘L’ shapes on chest and legs, as well as curved lines.
(Step 12) Draw curved lines on back sword, on fingers, and bottom legs. Draw a letter ‘j’ shape for knife on left side. Draw other details as well.
(Step 13) Add finishing details.
(Step 14) Here is the line drawing of the chibi / kawaii Marvel Deadpool character.
(Step 15) Color in Deadpool if you have the time.
————————————————————–
Check Out Our New Chibi Drawing Book on Amazon
—————————————————————-
Technorati Tags: deadpool, chibi deadpool, baby deadpool, kawaii deadpool, how to draw deadpool, draw deadpool, drawing deadpool


